- PRO Courses Guides New Tech Help Pro Expert Videos About wikiHow Pro Upgrade Sign In
- EDIT Edit this Article
- EXPLORE Tech Help Pro About Us Random Article Quizzes Request a New Article Community Dashboard This Or That Game Popular Categories Arts and Entertainment Artwork Books Movies Computers and Electronics Computers Phone Skills Technology Hacks Health Men's Health Mental Health Women's Health Relationships Dating Love Relationship Issues Hobbies and Crafts Crafts Drawing Games Education & Communication Communication Skills Personal Development Studying Personal Care and Style Fashion Hair Care Personal Hygiene Youth Personal Care School Stuff Dating All Categories Arts and Entertainment Finance and Business Home and Garden Relationship Quizzes Cars & Other Vehicles Food and Entertaining Personal Care and Style Sports and Fitness Computers and Electronics Health Pets and Animals Travel Education & Communication Hobbies and Crafts Philosophy and Religion Work World Family Life Holidays and Traditions Relationships Youth
- Browse Articles
- Learn Something New
- Quizzes Hot
- This Or That Game
- Train Your Brain
- Explore More
- Support wikiHow
- About wikiHow
- Log in / Sign up

How to Make a Travel Itinerary with Google Maps
Last Updated: March 14, 2022 Fact Checked
This article was reviewed by Stan Kats and by wikiHow staff writer, Nihal Shetty . Stan Kats is a Professional Technologist and the COO and Chief Technologist for The STG IT Consulting Group in West Hollywood, California. Stan provides comprehensive technology solutions to businesses through managed IT services, and for individuals through his consumer service business, Stan's Tech Garage. Stan holds a BA in International Relations from The University of Southern California. He began his career working in the Fortune 500 IT world. Stan founded his companies to offer an enterprise-level of expertise for small businesses and individuals. There are 8 references cited in this article, which can be found at the bottom of the page. This article has been fact-checked, ensuring the accuracy of any cited facts and confirming the authority of its sources. This article has been viewed 92,479 times.
If you’re planning a trip, you might be wondering how to figure out where to go and in what order. Luckily, Google has a free tool that you can use in order to get a better sense of your travel plans. We’ll walk you through how to make a travel itinerary with Google Maps through its My Maps feature. In a few easy steps, you can master an excellent organizational tool that’ll help you plan the best trip possible.
Setting Up Your Map

- Unfortunately, as of October 2021, Google no longer supports the “My Maps” app on phones. If you’re on mobile, you’ll have to use your phone’s web browser to access the site while on the go. [2] X Research source
- If you don’t already have a Google account, setting one up is a quick process. A Google account gives you a number of benefits, including a new gmail address. Check out this link to start the set-up process: https://accounts.google.com/signup/v2/webcreateaccount?flowName=GlifWebSignIn&flowEntry=SignUp

- For instance, your might name your map something like “California Summer Trip 2022,” and you could enter a description like, “Places to see and eat during two-week California road trip.”

- For example, for a California road trip, you might enter “Golden Gate Bridge” into the search box. My Maps will automatically direct you to its location.

- For instance, if you’ve searched for “Golden Gate Bridge,” there will be a white box that offers some information on the location, and even a rating from other users. Click on the “Add to map” button to send it to your saved locations.

- For example, you might fill in the description to the “Golden Gate Bridge” box with something like, “Spend at least 1 hour here—must-see location.”

- You might consider changing the colors of your pins to match how important each location is to your trip. For example, must-see locations could be red pins, your housing spots could be green pins, and optional places to visit could remain as blue pins.
Creating an Itinerary and Planning Routes

- For example, you might have a layer titled “Places to see,” one titled “Places to eat,” and one titled “Places to sleep.” You can then put sightseeing destinations, restaurants, and hotels you want to stay at in their respective layers.

- You can add more than one location to a single route. For example, if you wanted to plot a route from Big Sur to the Golden Gate Bridge, and then to Palo Alto, you can add all three locations to your route layer and create a multi-stop path. [11] X Research source
- By clicking on the three dots next to the layer with your travel route, then selecting “Step-by-step directions,” My Maps will create a set of directions for your travel. Handy!

- For example, by using My Maps, you might notice that seeing the Golden Gate Bridge, walking around San Francisco, and eating at a restaurant in Berkeley are close enough to all be doable in one day, while visiting Big Sur might be better saved for another afternoon. My Maps can help you plan out the most efficient trip possible, so you can enjoy your travels even more.

- When sharing your map, you can also choose the option that allows others to edit the map as well. With this option selected, your friends can pick places that they’re interested in as well, so you can have them all on the same document. [13] X Research source

- Although My Maps can’t be viewed offline, you can download an offline map of any areas you’re interested in on your phone. Using the Google Maps app, type in a location into the search bar, tap the name of the location, then navigate to the option “Download offline map.” [15] X Research source
Expert Q&A
You might also like.

- ↑ https://support.google.com/mymaps/answer/3024925?visit_id=637744367666134651-2428484219&p=lite_addplaces&rd=1
- ↑ https://9to5google.com/2021/07/20/google-my-maps-android-shutdown/
- ↑ https://support.google.com/mymaps/answer/3024454?hl=en&ref_topic=3024924
- ↑ https://support.google.com/mymaps/answer/3024925?visit_id=637744500327517491-717751493&p=lite_addplaces&rd=1
- ↑ https://support.google.com/mymaps/answer/3024925?hl=en&co=GENIE.Platform%3DDesktop
- ↑ https://support.google.com/mymaps/answer/3502610?hl=en&ref_topic=3024924
- ↑ https://support.google.com/mymaps/answer/3109452?hl=en
- ↑ https://support.google.com/maps/answer/6291838?hl=en&co=GENIE.Platform%3DiOS
About This Article

- Send fan mail to authors
Did this article help you?

Featured Articles

Trending Articles

Watch Articles

- Terms of Use
- Privacy Policy
- Do Not Sell or Share My Info
- Not Selling Info
Get all the best how-tos!
Sign up for wikiHow's weekly email newsletter
- Help Center
- Google Maps
- Privacy Policy
- Terms of Service
- Submit feedback
Plan your commute or trip
Find ways to get to relevant places.
- On your computer, open Google Maps . Make sure you’re signed in.
- Get directions to relevant places : Click a place in the list. You’ll get places based on your Gmail, Calendar, and recent travel history.
- Get directions to saved places: If you saved your work or home address in your Google Account, click Home or Work . You can edit your home or work addresses in your Google Account. Learn how to set your work and home addresses .
Learn more about your surroundings
- Find places of interest: Click an option, such as Restaurants, Hotels, or More.
Was this helpful?
Need more help, try these next steps:.
How to use Google Maps as a trip planner and make a full itinerary
- You can use Google Maps as a trip planner through the "Places" and "My Maps" features.
- Both the Google Maps website and app let you save locations to lists, which you can then get immediate directions to.
- When getting directions, you can look up reviews and add multiple stops to your route.
Google Maps has become an essential part of any road trip. After all, it's a GPS, business directory, and reviews platform all-in-one.
But if you spend some time with it, you can integrate Google Maps even more seamlessly into your next vacation. Google Maps has a variety of features you can use to plan your trip and save any interesting spots you find on the way.
Here's how to make Google Maps your trip planner, using the Places feature, My Maps, and more.
How to use Google Maps as a trip planner
Use the 'places' feature to save points of interest.
Let's say you're traveling, and happen to stumble upon the cutest coffee shop you've ever seen. You want to visit, but don't have time right now — what's the best way to remember it?
Google Maps' Places feature can help you out. Both the Google Maps website and app let you save any location on the map to a list, which you can then easily find later.
1. Open Google Maps and click, tap, or search for the location that you want to save.
2. Find the Save icon , which has the icon of a bookmark. You'll find it right under the location's name, but you might need to swipe to find it in the mobile app.
3. Pick where you want to save the location to. You've got three lists to start with — Favorites , Starred places , and Want to go — but you can make a new one by tapping New list .
4. Once you've saved the location, you can find it again by opening the list. In the mobile app, tap Saved at the bottom of the screen; on the website, click the three stacked lines in the top-left and then Your places .
Tap on a location in your list to have the map jump straight to it.
Look at Google Reviews to find the best shops
Nearly every point of interest on Google Maps has a section for user reviews. Similar to sites like Yelp, these reviews can be a great way to see which stops are must-sees and which you can pass.
To check out reviews:
1. Open Google Maps and find the location that you're interested in.
2. At the top of its information page should be a star rating and a number, showing how many people have left reviews.
3. Scroll down until you hit the Reviews section, and you'll find reviews from other users who've visited the location. They'll include a star rating, a date, and occasionally a picture.
If you're interested in leaving a review of your own, check out our article on how to write Google reviews .
Make a custom My Maps page to share your road trip plan
Only available on a computer as of this month , Google's My Maps program lets you make a custom map or plot out a route with as many waypoints as you like, and then save and share it with others.
1. Head to the My Maps homepage and click Create a New Map .
2. You'll be given a world map. In the menu in the top-left, click the Untitled map name to give your map a name.
3. Use the search bar at the top of the page to find any location, then click Add to map to save it. You can add as many points of interest as you like.
4. You can also save multiple separate lists of locations to the same map; just click Add layer in the top-left menu.
5. To save directions between multiple locations, click the Add directions icon that looks like a curved arrow. It'll add a new layer that you can use to plot a path.
6. When you're done, click Share or Preview in the top-left window.
Add multiple stops to one trip
Driving from one city to another is simple. But if you want to make stops along the way — lunch, the beach, a mall — things get complicated.
Luckily, you don't need to start a new Google Maps route for every stop. You can create one navigation route that includes every stop from the start, giving you a clear way to see how long it'll all take.
1. Open the Google Maps app and start navigating to another location.
2. On the screen that lets you pick your starting and ending location, tap the three dot icon .
3. Select Add stop .
4. A third waypoint — labeled "B" — will appear. Tap it to choose your second destination, or drag it to reorder the waypoints.
On a computer
1. On the Google Maps app website, find a location and start getting directions to it.
2. Underneath the menu that lets you pick your starting and ending location, click Add destination .
3. A new field will appear. Enter your third waypoint.
4. Once you pick a new waypoint, you'll be able to click Add destination again and pick another one, as well as reorder them.
You can add up to nine destinations on both the website and mobile app.
- Main content
How to Use Google My Maps to Plan a Trip (Ultimate Guide)

Note: Some of the links in this post may be affiliate links. This means if you click on the link and purchase the item, I will receive a commission at no additional cost to you. More details are here .
I love a good map. I’ve got maps hanging on my walls. I go to the bookstore to read maps. Whenever I navigate my way home using only a map, I feel like I must have some innate bushcraft skills. And if you’ve read my posts about traveling in Maine , you’re probably sick of me talking about the DeLorme Atlas by now.
But while reading paper maps will always inspire a sense of get-up-and-go adventure for me, I’m not totally opposed to using tech for planning my trips and navigating on the ground.
And one of my favorite techy solutions? A secret little trip planner called Google My Maps, buried inside of everyone’s favorite map tool.
Google My Maps lets you create shareable custom maps with multiple layers, plus location pins with icons and notes. It’s a great way to brainstorm travel plans or create a trip itinerary from a desktop. And since the map can be viewed in the Google Maps app, you can use it to navigate on the go.
To give you an example of what this post will show you how to do, here’s one of the custom Google Maps I’ve created for a trip.
Keep reading for an overview of how to use Google My Maps to plan a trip, plus a video tutorial of how to set it up—all updated in 2023. I’ll also share answers to commonly asked questions and some lesser known tips to help you get the most out of this tool.
A quick note: Creating a custom map in Google My Maps is distinct from Google Lists of saved places. Check out our Google My Maps vs Lists comparison to see all the differences and our full guide to using Google Maps Lists .
8 Top Google My Maps Features
(AKA Why It’s Awesome)
Google My Maps allows you to see your trip itinerary.
This is so helpful, especially if you’re a visual person or enjoy using maps. But even if you’re not, it’s still really useful to see where everything is in relation to each other as you plan your trip, vacation, or holiday because it helps you be realistic about your plans.
It connects with other Google apps.
Setting aside my (ahem, very rational) fear that they may take over the world soon, I love all things Google. My Maps stores a copy of the map in whatever Google Drive account you’re using. (Am I the only one who has six of these?) So if you like to create Google Docs or folders to store trip planning information, documents, photos, or itineraries, it’s nice to have your map easily accessible in the same folder.
You get additional location information since it’s part of Google Maps.
If a location is on Google, you can see their website, phone number, address, reviews, and website when you add it to your custom map. (Note that you can’t see this information when clicking on your saved pin from the Google Maps app, but you can from desktop.)
You can add your own extra notes and photos.
Customize your map even more by adding notes, photos, or videos. Use the notes during planning to add website, hours, or tips. If I hear about the location from a particular website, I usually add that link and what was noted in the article about the location (e.g., it’s a great sunset spot, which dish on the menu is recommended) so I can reference it later.
You can view your route by creating a layer with directions.
When I traveled to Burlington, Vermont, I wanted to see the length of the bike trail on the map, so I used the directions feature to show the whole route. (Check out the Burlington travel guide for an example of the travel map I created that includes the bike path route.) And while I haven’t done this yet, you could also use Google My Maps to plan a road trip itinerary for a longer adventure.
Caveat: As I’ll discuss later, you can’t use directions layers to get turn-by-turn directions (but I mention an alternative below). For this reason, I only use these layers to visualize my route.
It’s highly customizable.
Don’t mind me while I swoon over the color coding and organization options over here. Use custom icons, layers, and colors so it’s easy to see what things are at a glance. For example, you can give different locations individual styles: a coffee cup icon for cafes, a bed icon for hotels, and a swimming icon for beaches. You can also use layers in many different ways, such as one layer for each day of your trip or one layer for each category (like dining, lodging, and things to do).
In-depth planning on your computer. Easy, on-the-go access from your phone.
While you can’t edit the maps from the Google Maps app on iPhone or Android, you (and anyone you’ve shared them with) can view them. You can click on icons and see your notes, as well as navigate to those locations.
Note that there used to be a dedicated My Maps app on Android, but this has been deprecated.
It’s easy to share it with a friend or with the world.
If you’re planning a trip with other people, it’s easy to share the map with others . And if it’s something you want to make available to everyone (like I do on my travel guide posts), just change the privacy setting and share the link or embed it on a website.
3 Ways to Use Google My Maps
Brainstorm and store ideas for future “maybe” trips.
I often come across a really interesting hotel, restaurant, or fun thing to do in destinations I want to travel to in the future, and I want to make sure I don’t forget about them. I have so many bookmarks in so many places (Pinterest, Facebook, Instagram), but Google My Maps is the place I’ve started storing ideas for future trips.
Plan your trip itinerary.
Want to use Google Maps for route planning? When you’re ready to plan an upcoming trip, plot it out visually by using Google My Maps to create your itinerary. If you like structured itineraries, you can easily create a detailed day-to-day plan.
Or, you can use a looser itinerary structure like we usually do by adding all the places you might like to go.
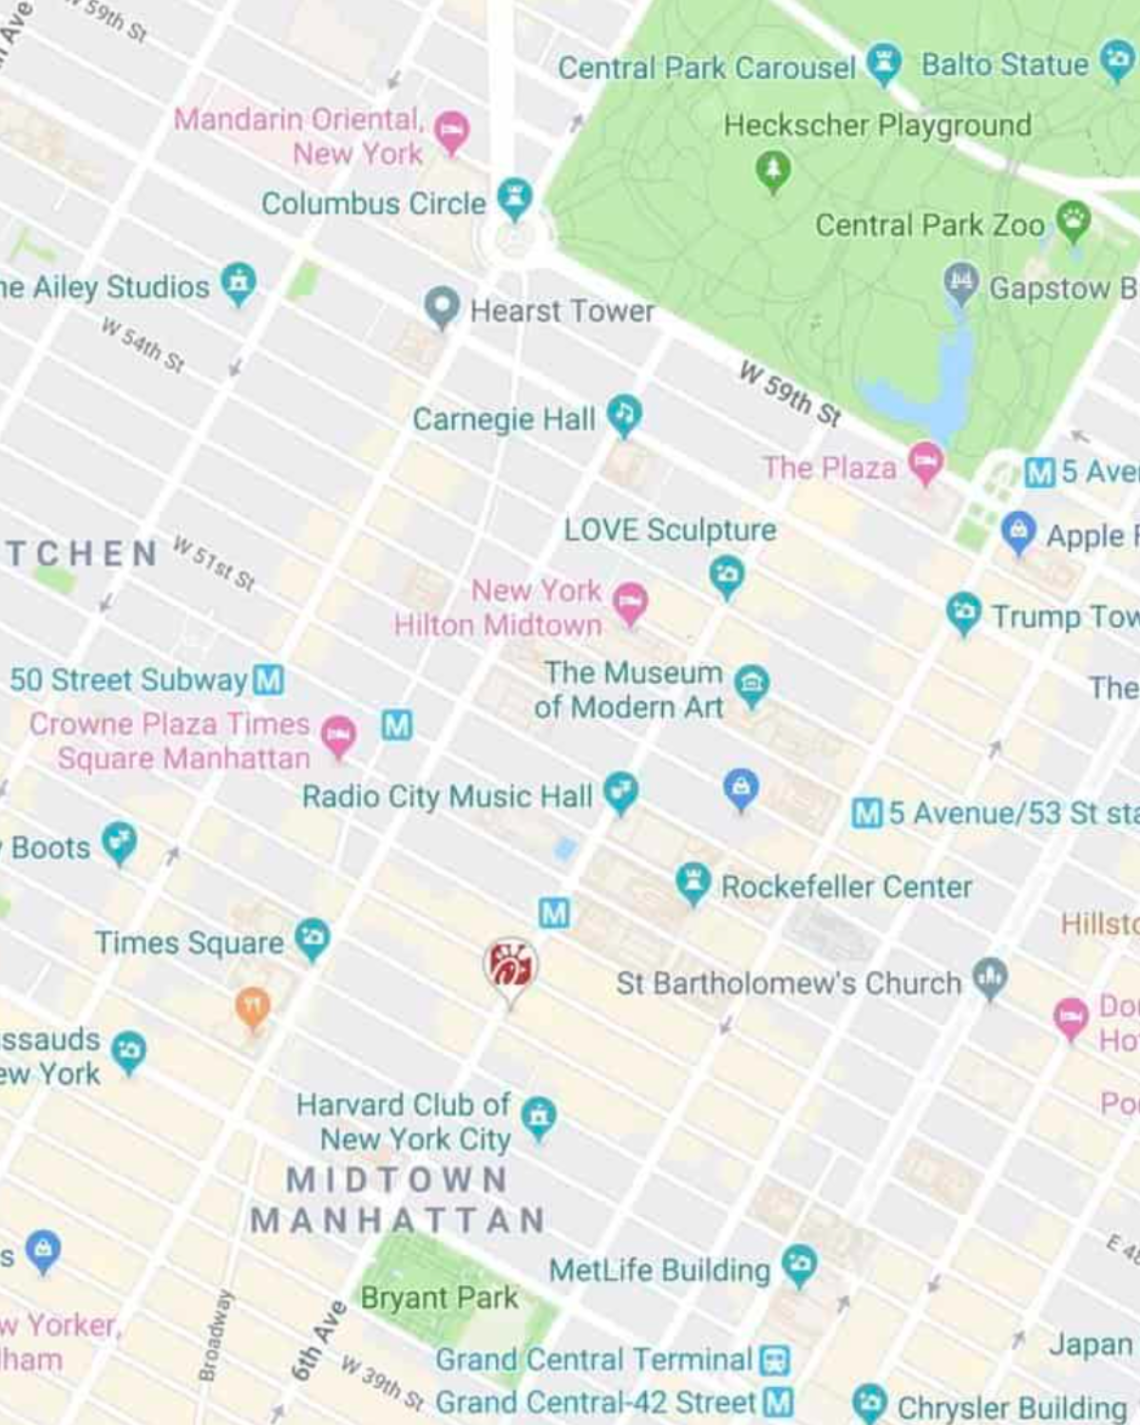
For example, on a day trip to NYC, we added tons of places to eat on the map (thank you, Tiktok). As we were walking around doing other activities and started to get hungry, we were able to easily see which saved restaurants were closest to us.
Navigate on the go.
Whether you’re using your map loosely for ideas or for a structured itinerary, you can pull it up on your phone anytime and get directions to your next location.
Not sure what you want to do today, or want to see what the closest restaurant from your list is for dinner? Pop into your custom map to jog your memory from the notes you made or to get directions to your next location.
Recommended: Need an organized backpack to take on the road? Check out my favorite luggage for camping, road trips, and flying: the Cotopaxi Nazca 24L and Allpa 35L !
How to Use Google My Maps to Plan a Trip
How to create a new custom map.
Go to Google My Maps from your desktop browser . Check the Google icon in the top right corner to make sure you’re using the Google account you want to. Click “Create A New Map” and a window will open with a blank map. To give your map a name and description , click the map name (“Untitled Map”).

You can also change the color and style of the base map if desired. At the bottom of the layer panel on the left, click the arrow next to “Base Map.” You’ll get a window with nine options, including terrain, light political (a very light version of the standard Google Maps), satellite, and some different colored versions. Note that changing the base map style on desktop won’t change anything when viewing on mobile in Google Maps.
How to Add and Edit Layers
When you create a new map, the first layer will already be created, so you’ll probably want to rename it. To give your first layer a title , click directly on the title name like you did with the map name, or click the 3 dots next to “Untitled Layer” and then click “Rename Layer.” Clicking these 3 dots next to a layer title is also how you can delete a layer if you add one accidentally or change your mind. In this example, I’m changing my first layer to “dining” and will add all restaurants to this layer.
You can use layers any way you want to, or simply stick to one layer if you don’t need multiple. To add new layers , simply click “Add Layer” in the gray section below the map title and description.
To move a pin between layers , click the pin on the layer and hold down the mouse, and then drag it to the desired layer.

How to Add Location Pins
There are various ways to add location pins to a layer. First, make sure the correct layer is chosen by clicking anywhere in the white area on the layer. You’ll see which layer is selected by looking for the blue bar on the left of the layer.
- In the map search bar, type either a place name or an address. Click “Add to Map” to add a pin for this location . This is how I add most pins.
- If you don’t need an exact location or don’t have an address , you can click the pin marker button below the map search bar (“Add Marker”). It will turn your mouse into a T and you can click anywhere on the map to add a blank pin. You’ll immediately be prompted to add the pin title and description.
- If you’re dealing with very remote locations (or you just like geeky map stuff), you can also use latitude and longitude coordinates in the search bar.
To delete a pin , simply click on it and click the trash icon.

A few tips and best practices for adding pins:
- If the place you’re searching for does not have a listing on Google, you’ll have to use an address. One thing to note is that sometimes Google Maps listings aren’t correct or don’t take you to the right place, so you may want to double check the location if you’re not using a street address to add the pin (especially if it’s a small business without a website).
- I have also found that hiking trail heads are frequently on Google Maps, but they’re not always correct in terms of navigating there by car. I usually add them to my map to get a basic idea of where they are while planning, but I use a paper map or atlas to find them while traveling.
How to Customize Location Pins
To change the title and add notes to your listing, click on the pin on the map, and then click the pencil icon (“Edit”).
To change the color and icon of the pin , click the paint bucket icon (from the pin itself or directly in the layer). Click “More Icons” to view all the icon options. You can color code by type of activity, by layer, or any way that makes sense to you.
To add photos or videos to a pin , click on the pin on the map, and then click the camera icon (“Add Image or Video”). This is another way to make your map interactive, especially after you’ve visited a location and want to share it with others.

How to Add A Directions Layer
I find that directions layers are helpful for showing the route of a walking tour, bike path, or road trip you want to take, but I don’t find them useful for directions while traveling since I can simply use the maps app to navigate.
I use directions layers whenever I want to show an entire route on a map , rather than a specific location. Think of this as the 2024 version of mapping out a trip with AAA paper maps and a highlighter (if you’re old enough to remember).
Click the arrow icon underneath the search bar, which will create a new directions layer. On the legend, click “Driving” if you want to change this to walking or biking directions. Add a location name or address to Points A and B in the legend. If you find that the pins are not exactly where they should be, you can drag the points on the map.
Continue adding points by clicking “Add Destination” on the map. You can either type the information into the legend or hover your mouse to a spot on the map and double click it. (This is especially useful if you’re tracing a route on something like a bike path or hiking trail that won’t have an address.)
Rearrange the order by dragging the items around in the legend. Just like altering directions on Google Maps navigation, you can click on part of the route and drag it to a different road if you want to change part of the route after it is complete.
If you need to access the directions so you can see the distance of your route or the time it will take, click the three dots on the layer and click “Step-by-Step Directions.” Note that you can’t actually use this to get turn-by-turn directions in Google Maps.

How to Share A Google My Map
There are several options for sharing your Google Maps trip plan.
Open up your map, then click the share button in the gray bar above your layers. To allow others to view your map (which includes embedding on your website), click “change” under the section “Who has access.” For embedding, you will need to make this setting public.
Otherwise, if you want to allow others to edit your map, add their email address in the “invite people” section.

How to View Your Custom Map in Google Maps (iPhone or Android)
Open Google Maps and go to the Saved icon at the bottom. Scroll to the bottom of this screen and click “Maps.” Choose the My Map you want to view. The layers with your custom icons will now be visible on your Google Map. You can click on any pin to view your details (such as description or photos), as well as to navigate there.
To close a map, click on a pin and then click “View Map Legend.” There, you can click the Close icon.
From the Map Legend, you can also toggle layers on and off, and then backing out to the main map (don’t click Close—just the back arrow or back button).
How to Navigate with a Custom My Map (iPhone or Android)
To navigate to one of your pins, open your map, find the pin for where you want to go, click it, and then click “directions.” When you do this, you won’t see your custom map anymore but will be looking at the regular navigation of Google Maps.
You can’t use a My Maps “directions layer” for navigation. If you’re looking for that functionality, I recommend just creating a route in Google Maps and sending it to your phone (or sharing with others). See here for more details.
How to Import Locations from Google Sheets, CSV, or Excel
Importing locations to a My Maps layer can be helpful in a few scenarios:
- You have a significant amount of locations to add to your layer
- Your data is already in the form of a spreadsheet
- You want additional fields included besides the default Name and Description
- You want to create groupings of pins (for example, a list of 50 restaurants could have a column for “Cuisine,” which will give you the option to group and style the pins by cuisine)
The process is simple, and you can import a variety of file types, including CSV, Excel (XLSX), or directly from Google Sheets. There are also special file formats that import map data from other programs, but this section is focused on spreadsheet-type files that you create and format.
Create a spreadsheet with the desired column headers. At a minimum, you need place names and either addresses or latitude-longitude information .
If you want to group your pins by some type of categorization, you should include that as a column. Other columns you could include: website, phone number, description, or notes. While Google Sheets allows you to include photos in a cell, Google My Maps will not import photos in this way (it will include the column as a field, but will be blank).
Once your spreadsheet file is ready, click “Import” on a blank layer (if your map already has layers, you will need to add a new layer to see this option). If uploading a CSV or XLSX, do this from the Upload tab. If using a Google Sheet, click the Google Drive tab and choose your file.
Choose which column has location data (address or latitude-longitude) and click “Continue.” Choose the location name column next and click “Finish.”
To change the icons individually, click “Uniform Style” next to the paintbrush on your layer. Under “Group Places By,” choose “Individual Styles.”
To change styles by a category column (such as Cuisine), click the link next to the paintbrush and choose to group places by the desired column. You can then give each category its own color or icon.
You can manually add new pins to this layer, and they will include all the fields you imported from the spreadsheet columns.
You can also add more items to your spreadsheet, and import this new data. Click the three dots on your layer. Under “Reimport and Merge,” click “Add More Items” and choose your file. It will add the new rows to your layer.
How to Import a Route from Google Maps Timeline History (KML) or GPS Data From a Fitness App (GPX)
Google My Maps can import routes and locations you’ve already traveled to via special file types that are very easy to download from certain apps. This could be useful if you want to share a walking, biking, or driving route that you’ve taken without having to recreate it on a directions layer.
Note that this only works as well as the GPS satellites were able to track your location while you were traveling.
If there are a lot of clouds, dense forest, buildings, or anything else blocking the GPS signal, your tracked route will be much less precise. I’ve noticed that Google Maps sometimes has my route showing somewhere I couldn’t have walked or driven.
If you have your location history turned on in Google Maps, you can download a KML file from a trip, which will include the route traveled and location pins for any stops. Sometimes it misses a location name or adds a pin in the wrong place, but overall it’s pretty good.
Go to your Google Maps Timeline and locate the day you want to export. Click on it, and you should now see your route highlighted along with any stops you made. Now click the gear icon on the bottom of your map, and click “Export this day to KML.” Go to your My Map and on a new layer, click “Import.” Choose the KML file you just downloaded. You can now edit each portion as needed—changing the color and thickness of the route line, changing the location icons, as well as adjusting the route where desired.
If you have other apps that track your location, such as fitness apps, you may be able to download a GPX file that shows the route you took. The instructions for doing this will vary from app to app, but I was able to easily find it in Samsung Health by looking at the detail of a particular workout/walk and clicking the three dots to download a GPX. The import process to Google My Maps is the same as above.
With both methods, you can make adjustments to points/stops along the way or even add more pins. With the Google Maps KML file, you can also adjust your route by moving the small white dots.
Google My Maps Tutorial
Here’s a walk through video to show you how to use Google Maps to plan a trip, along with several of my own Google My Maps itinerary examples. Coming soon: a 2024 update!
Google My Maps Examples
Here are a few more examples of My Maps I’ve created for sharing recommendations, trip ideas, and actual vacation planning.

Google My Maps FAQs and Tips
As great as Google My Maps is for planning a trip, there are some limitations to using it. Lots of questions have also come up about more specific uses and ways to use its features. Thanks to all the readers who have asked or shared tips in the comments as I’m always looking to make this a more robust guide. I’ve organized the questions and tips here since it makes it easier than scrolling through the comments.
How many layers can you add to a map?
Google My Maps limits you to 10 layers. If you are planning a longer road trip and want to create a layer for each day, this limitation may prove frustrating.
Here are a couple of workaround ideas: You can create 2 maps, and have the entire master route as 1 layer on each (showing the very basic route for all 12 days—say from city to city) as a reference. Then build individual layers for each day. As a second option, you could add multiple days to 1 layer and change the titles to start with the day they correspond to (so it would be “1 – Name of Place” instead of just “Name of Place.”) However, this option may not be ideal since you can’t see the titles until you click when you’re on the phone.
How many location pins can you add to each layer?
You can add up to 2,000 pins per layer, and the entire map cannot exceed 10,000 lines, shapes, or places total. I haven’t tested the limits, and it’s possible adding this amount of items could slow things down. My guess is that most travelers wouldn’t need anything so large, but it is possible according to Google .
Are custom Google My Maps available offline?
No, but keep reading for a workaround and alternative.
One of the biggest complaints about Google My Maps is that you can’t download your custom map and pins to use offline, unlike the rest of Google Maps.
However, I have been able to use it in areas with spotty reception. I pulled the map up when I did have reception, and I left it running in the background. It would stay loaded in the app and I was able to pull it up to look at it later when I was out of reception. I’m not sure I would rely on this as a surefire workaround, but it can work in a pinch.
Another alternative, especially if you’ll be traveling in another country where you’ll be completely offline, is to use Google Maps Lists, which can be edited from desktop or your phone but don’t offer the option for separate layers, unique icons, or adding photos.
Is there an app for Google My Maps?
There is no separate Google My Maps app, but you can view your maps within Google Maps. Just make sure you’re signed into the same account, and all your maps will sync.
(There used to be a dedicated My Maps app on Android, but this was deprecated in 2021.)
Can you create or edit maps from your phone?
No, the maps cannot be edited from the Google Maps app. Google My Maps can only be created or edited from the desktop version of the site. This is another huge advantage Google Lists has over Google My Maps because Lists allow you to add new places or entire lists from any device—iPhone, Android, tablet, laptop, or desktop.
Is there a bridge height filter?
No. For RVers and others who need to plan ahead for height limitations, there is no bridge height filter available in Google Maps. Since I haven’t had to use this feature myself, I am not confident in an alternative to recommend. However, from a bit of digging around, there are some apps and GPS units for truckers that may be a good place to start looking if you have an oversize vehicle.
What is the difference between Google Maps Lists and Google My Maps?
They both allow you to create custom maps with pins, but there are some key differences, such as offline access, layer capabilities, customizable pins, and creating/editing within the app. Check out the details on how Google My Maps compares to Lists (including a features comparison table).
How many stops can you add on a directions layer?
You can only add 10 stops per directions layer. This is also the maximum number of stops you can add for navigation in Google Maps. As some readers have pointed out, this can be limiting when you want to use this feature for a long road trip.
Can you use the directions layers on your phone for navigation purposes?
No, you cannot create a directions layer and then access those turn-by-turn directions for navigation in the Google Maps app.
So…are directions layers totally useless? What’s the point of having a Driving Directions layer in My Maps?
Personally, I still like to use these layers, but only to show a route for my very visual brain, rather than to actually create custom directions.
Can you send a custom created route (layer) to someone else so that the other person will take that specific driving route on google maps?
No, you can’t do this from My Maps, but there’s a workaround I can suggest.
Forget My Maps, and use Google Maps from desktop or mobile to plot a route. You can add up to 10 stops, and then you will be able to share your custom directions.
From desktop, there’s an extra step in first sending the directions to your phone. If you’ve created the directions in the mobile app or once you have them pulled up there, you can share them with anyone by clicking the 3 dots next to your list of locations (sharing must be done before clicking “Start”—if you’re already in the navigation, you need to back out of it to share). When you share, it will list all the steps as well as send a link for the other person to open the directions in Google Maps directly.
An important caveat to sharing custom routes: Google Maps will reroute the directions as it normally does according to current traffic at the time of driving, so this method cannot be relied upon if you’ve mapped a specific route for bridge clearances. As a workaround, you can add “stops” on the desired interstate (zoom in and add this literally on the road itself so navigation doesn’t try to take you off an exit), which will force Google Maps to take the driver that way. This is what I do when driving south from Connecticut to PA because Google Maps always wants me to take its beloved George Washington Bridge and I always don’t want to. I add a stop to force my route across the Tappan Zee Bridge. However, I’m not sure I would rely on this workaround as a sole method for RVs or truckers.
Can you see how much time the directions will take?
Yes, on desktop you can view the details if you want to know the distance or how long a route will take. To view distance and time for a directions layer, click the 3 dots on the laye, then click Step-by-Step Directions.
Of course, this doesn’t really help when you want to get this information on your phone or use the directions for navigation. As mentioned elsewhere, the “directions” layer functions best as a way to visualize a route. If you need turn-by-turn directions, see the steps mentioned above to save and send directions in Google Maps.
This post was originally published on July 27, 2017 and has been updated in May 2023.

Travel Photographer | FAA Certified Drone Pilot
Naomi is the coffee-loving, crazy-about-Latin-America writer and photographer behind everything here. She's guided by curiosity and a belief that every place has a story to tell–whether it’s through the intricate details of nature, history that has shaped a culture, or the people who call a place home. Learn More
How To Plan A Trip With Google Maps: 7 Easy Steps
This page may contain affiliate links which earn us a commission at no extra cost to you to support the site. Thank you!
Wondering how to plan a trip with Google Maps? Below, we’ll show you how we plan all our trips on Google Maps – get ready for every Google Maps hack you’ll ever need!
There is a lot that goes into planning the perfect trip. What are you going to do? Where will you stay? How are you going to plan your days? How long do you even need to see everything? It’s overwhelming!
I love travel planning. As you can see on this website, I kind of made my career out of it. Because I want to make the most out of my trips (and write the best possible guides about the destinations I visit), I take travel planning pretty seriously.
There is so much research that goes into it, and I couldn’t do it without my favourite travel planning tool: Google Maps. In this guide, I’m sharing how I use Google Maps as a trip planner, along with some handy hacks to help you on your next adventure. Let’s take a look!
Add Directions
Embed your map on your site, 3. it is easy to plan your driving miles/time.

7 Steps to Plan a Trip With Google Maps
Here is how to use Google Maps trip planner:
1. Create a Map
To create a map on Google, you do need a Google account. Once signed up/logged in, go to this page .
Click on “ Saved” >> “My Maps “, which will take you to your maps. If you have created any maps in the past, you will also find them here. As you can see in the screenshots below, I’ve already created quite a few!
Alternatively, you can go to this page , where you see and access your maps in an instant.

To create a new map, click on “ Create Map ”. This will open a new tab with an empty map.

By clicking on “ Untitled Map ”, you can give your map a name and a description. And ta-da! You’re ready for some travel planning on Google Maps. Time to create the perfect itinerary .

2. Add Locations
Now it’s time to start brainstorming. What do you want to do and see on your trip? There are so many ways to find the best places to visit.
For starters, you can find things to do by reading travel guides, blog posts , and itineraries from other travel bloggers. It’s also a good idea to go through Instagram hashtags and location tags. And, of course, good old printed travel guides (by Lonely Planet and Rough Guides, for example) are always a good shout too.
You don’t have to worry about how to plan out your days in detail. For now, you simply want to get an idea of what you want to do on your trip.
Whenever you find something that seems interesting, you can add these to your map by typing the location into the search bar. This can be the name of the location or the address, or you can use the coordinates. Usually, you’ll see a drop-down menu with suggestions as you type.

By pressing enter or selecting one of the options, Google Maps will take you to the location. Here, you can add these locations to your maps. Simply click on “ Add to map ”. Afterwards, you’ll see it appear on the Untitled Layer .

Alternatively, you can use the “ Add Market ” tool (shown in the screenshot below) to add a marker on the map. You can use this when a location isn’t on the map but you don’t have the coordinates, for example.

Before adding all your locations, make sure to read step 3. We explain how to customize your pins on Google Maps, making it much easier to plan your daily itineraries later on.

Planning a road trip on Google Maps? Start by adding the places you want to see/visit. Later on (see step 5), you can add directions to help you find the fastest routes. You can create on Google Maps for the overall road trip, and make another map for daily itineraries of your road trip.
3. Customise Your Categories (Icons and Colours)
The customisation options are another reason why planning trips on Google Maps is one of the best travel planning tools out there. By using colours, icons, pictures and notes, your map will be even easier to navigate.
These options let you break down your locations into categories, such as things to do, photography spots, restaurants, cafes, hotels, shops, etc.
You can change the colour of your pin and add an icon under the “ Style ” option – it looks like a paint bucket. There are hundreds of different icons to choose from.
At this stage, it’s best to stick to changing the icons for now. I normally change the colours to divide the days on my itineraries. Obviously, you can completely style this the way you want.

You can also change the colour and icon of your pins in the side menu.

When clicking on the “ Edit ” icon, you can change the title and add a description for your location. This can be handy to help yourself remember any specifics about this place, such as good photography spots, opening times and whether you need to book a ticket in advance or not.

You can add an image or video to your pins, too. And lastly, you can delete the pin by clicking on the trash icon.

4. Create Layers
Now you’ve added all the things you want to do and given them some icons, it’s time to take a look at the layers. You can add a layer by clicking the “Add layer” option in the sidebar. This automatically creates a brand new untitled layer on your map.

You can rename and delete the layers by clicking on the three dots next to the name of the layer.

You can make layers invisible by unchecking the box next to the name of your layer.

To move points of interest from one layer to another, you can simply drag them over with your mouse.
Layers are an easy way to categorize and organise the locations on your map. There are multiple ways to do this, and you can choose a way that works best for your trip. For example, you can create one layer for restaurant options in Tokyo, one for sightseeing in Tokyo, one for hotels in Tokyo , etc.
When I’m planning a big trip, I like to use layers to break down my individual days or cities. This way, I can quickly see what I’m doing every day while I’m travelling. To make it even clearer, I change the colours of all my pins to match the different layers.
5. Plan Your Itinerary (with Directions)
After following these steps, we should have a good overview of all the things we want to do and see during our trip. This will make it much easier to break down the trip into days.
For the Tokyo itinerary I’ve been planning as part of this Google Maps tutorial, I’m going to spread it out over two days.
I created two layers to match my time in Tokyo in Google Maps.

Because I can see where all my hotspots are located, I can see which activities and sights I want to pair together. This way, I can efficiently plan what I want to see each day. You can even make squares to group things together with the “ Line Drawing ” tool.
For example, it makes sense to group these pins together per day – this will save me a ton of time travelling from one place to the other.

Always check whether these things actually work together, though. Sometimes, a ton of restaurants are located near each other, but there’s no point in planning to visit four restaurants on the same day.
Sometimes, there are museums that take way too long to visit alongside other sights or you can combine certain parts of the city in one day.
Take a look at your itinerary and plan it accordingly. As mentioned before, I like to use the colour tool to add the same colour per day to make it even easier to spot. My Google Map itinerary turned out like this:

If you’re planning a road trip on Google Maps or want directions for walking from one point to another, you can use the direction tools. Click on one of the locations and select “ Directions to here ”.

This will create a new layer on your map. From here, you can add different locations to create a route. You can select points of interest on your map to easily add them to your route. Click on “ Add Destination ” to add more stops.
You can also change whether you want directions by car, bike, or on foot by clicking on the car icon. This opens up a small window with a car, bike and pedestrian. Changing the mode of transport will automatically change the directions to find the best route for you.
This tool allows you to create road trip itineraries or city walks with just a few clicks. I find this especially handy to plan a road trip with Google Maps, as it allows me to estimate the driving time and the amount of money I’ll have to spend on petrol.

By clicking on the three dots next to the name of this direction layer, you can click on “ Step-by-step directions ”. This will give you detailed directions, distances, and an estimation of how long it’ll take for you to get there. Super handy!

6. Book Your Hotels
Now you know exactly what your daily plans are for our trip, it makes it much easier to pick the perfect location for your accommodation . Since you know what parts of the city you’ll be visiting, you can pick a spot that’s near these locations. This will save you so much time (and money), as you won’t have to travel too far to go to start your daily itinerary.
I usually book hotels on Booking.com . The website’s map feature makes it perfect for choosing the location. Because I have my itinerary ready on Google Maps, I know exactly what area of the city I prefer to stay in.
Once you’ve booked your accommodation, you can add the location to your map too.
7. Share Your Trip & Access it on Your Phone
Once you’ve finished your map, you can share it with your travel buddies and download it onto your phone. Here is how to do it.
Access Your Map on Your Phone
To view the map on your phone (with an internet connection), simply download the Google Maps app. Log into your account and click on the “ Saved ” button at the bottom.
Then scroll down and click on “ Maps ”. This will take you to all the maps you created. Click on the map you want to access, and all your saved spots will appear.

Share Your Map
To share your map with your travel company or friends, click on the “ Share ” button. Make sure to enable link sharing , which will allow you to copy the shareable link. You can share this link with friends, who can then access your map and download it themselves.

If you’ve read any of my itineraries or travel guides , you have probably noticed some Google Maps. As I always use these maps for my own trips, I try to include them in my articles for you to use. If you want to embed your map onto your site, click on the three dots >> “Embed on site” .

This will give you a code that you can include on any site for an interactive map to appear.
Why Use Google Maps for Trip Planning?
Google Maps is one the best travel tools because it’s so easy to use for both planning your trip and using it during your trip. We use it for planning city trip itineraries and road trip routes, plus it allows us to save our favourite locations and hotspots.
Whenever we come across a location on social media that we’d like to check out, we add it to a bigger map so we can organise it into smaller itineraries when we’re ready to visit.
Here are some of the main reasons to use Google Maps:
1. It Allows You to Access Your Maps Anywhere
You can access Google Maps anywhere you want. After creating a map on your desktop, you can open it on your phone or tablet. Plus, you can download it so you can access it without being connected to the internet. This is especially handy when you’re abroad and internet access isn’t a given.
2. It Makes it Easy to Find the Best Hotel Location
Using Google Maps to plan my city breaks gives me insight on the perfect location for my accommodation. Because I have a visual representation of all the things I plan to do during my holiday, I know exactly what the best hotel spot is. I compare the map from Booking.com and my own map, and ta-da!
When planning road trip routes on Google Maps, you can easily estimate the time it takes to drive from one place to the next. You can use this to properly budget your trip in terms of petrol cost, too. And when on the road, you can use the directions from your own map while driving.
Conclusion: Using Google Maps Trip Planner
That concludes my tutorial on how to plan a trip with Google Maps. I hope this has shown you all the amazing features this tool offers and how easy it is to use when planning a road trip or city break.
Ever since I started using it, I’ve never looked back. It has saved me so much time and always takes away a ton of travel planning stress. I hope it can do the same for you!
Nele (Nay-la) graduated from Manchester Metropolitan University with an English and Creative Writing Degree and has lived in the UK for nearly 10 years. She has had an interest in Japan and its culture for as long as she can remember. Since her first trip in 2018 surpassed all expectations, she has continued to return to Japan to explore more of all it has got to offer. You can read her full story here .
10 thoughts on “How To Plan A Trip With Google Maps: 7 Easy Steps”
WOW!! I had no idea this resource existed. Your detailed steps and screenshots make it easy for me to take the plunge and start using this tool. Thank you.
Thank you so much for the lovely comment, Anne! So glad the post was able to teach you a few things – it’s such a great tool to use for planning trips!
Hi, Thank you for sharing this interesting feature. I was looking for a hard copy of a plan for my travel in Malaysia.
Great guide, exactly what I was looking for, Great work, Thank you!
- Pingback: Blogs To Read This September - Bournemouth Girl
This was very helpful. Thank you 🙂
Amazing tutorial! I am so glad you came up in Google search just as I was looking for this kind of resource. And best of all its free and a tool that I am so used to. How did I not know this before about G Maps?!
So glad to hear the tutorial was helpful! It’s been such a useful tool in my travels, hopefully you can use it on your next trip too!
Very detailed explanation and very well explained too. Thanks for making this blog…
Great post! I recently planned a trip to a nearby city using Google Maps, and it was incredibly helpful in navigating unfamiliar roads and finding the best routes. I especially appreciated the feature that allowed me to save my route and share it with friends. Will definitely be using this method for future trips!
Leave a Comment Cancel reply
This site uses Akismet to reduce spam. Learn how your comment data is processed .
Must-Read Articles

50+ Best Things To Do In Japan

Is The Japan Rail Pass Worth it?

The Perfect Three Week Japan Itinerary
Japan Travel Tips Group

The Japan Travel Newsletter
Sign up to get inspired! Receive insider tips, special discounts and more to plan your perfect Japan trip.
You have successfully joined our subscriber list.
japan travel Blog
Tokyo Kyoto Osaka Hiroshima Hakone Kobe Nikko Nara Kyushu All Japan Content
Plan Your Trip
Best Things To Do Japan Rail Pass 2 Week Itinerary 3 Week Itinerary Accommodation Japanese Phrases
About The Navigatio Work With Us
- How to Use Points for Free Flights
- The Best Carry-On Luggage
- The Ultimate Guide to Traveling Like a Pro
- My Favorite Travel Credit Cards
- lake louise
- new orleans
- new york city
- palm springs
- packing lists
- product reviews
- How to Use Vitamin C Serum
- Easy Step-by-Step Skincare Routine
- Drunk Elephant: Best & Worst Products
- Fitness & Wellness
- How I Edit My Photos for Instagram
- Furniture My Interior Designer Loves
- Best Strapless Bras
- blogging & business
- Amazon Finds
- Hotel Lobby Candle
- Shop My Faves
- Promo Codes and Discounts
- Shop My Instagram
How To Use Google Maps Trip Planner
With so many different travel apps and websites available, it’s now easier than ever to keep yourself organized while planning a trip. One of my favorite tools to use, regardless of where I’m going, is Google Maps Trip Planner.
If you’re the type of person that gets easily overwhelmed when putting together an itinerary , you’ll want to follow this step-by-step guide which details exactly how I use it. Google Maps Trip Planner is not only a highly-visual way to get your bearings of an area, but it’s extremely useful for figuring out where you can realistically travel to during the duration of your trip.
It’s a fantastic way to use Google Maps for multiple stops in a single itinerary , and also comes in handy if you’ve received a TON of recommendations from friends, because you can add destination after destination, and then refer back to the map as you’re out and about exploring.
For example: if you’re visiting NYC and find yourself in Soho looking for a cute cocktail spot , rather than endlessly scrolling through Yelp or TripAdvisor, you’ll be able to pull out your trip planner to see if you’re near places that your friends have recommended! It’s also a particularly handy tool to use when creating a road trip itinerary.
Here’s the step-by-step outline that we’ll go over:
- Create a new Google map for your destination.
- Choose categories for your map.
- Start adding your locations and ideas.
- Customize and color-code your map.
- Decide which activities to group together.
- Plan your day-by-day itinerary.
- Download the Google Maps app on your phone.
- Share your map with friends.
This will all make more sense once I walk you through everything with screengrabs.
Whether you’re thinking about a girlfriends getaway or a honeymoon , Google Maps Trip Planner will be a game changer for you. Take my word for it! Here’s a step-by-step guide to using Google Maps to coordinate your next getaway — with a completely flawless travel plan.
How to Use Google Maps Trip Planner
1. make a new google map..
To get started, you’ll need to create a new Google Map by visiting this link .
It will take you to the main maps page, which you’ve likely seen before. (Make sure you’re logged into a Google account, and if you don’t already have one, you can sign up for free here .)
Once you’re signed in, simply click on the three bars icon in the top left corner and select “Your Places” from the menu.

Next, you’ll want to click on “Maps” in the far right corner of the menu.
You won’t see anything listed yet, unless you’ve created a map previously.
Click “Create Map” (which is at the bottom of the menu.)

After that, you’ll be directed to an untitled map that you’ll want to name and add a description to.
Do this by clicking on “Untitled Map” and a text box will appear and allow you to fill out this information. Remember to be as specific as possible so you stay organized throughout the entire planning process.

2. Categorize Your Map.
Create a list of all the things you want to spend your time doing on your trip. Here are the categories I typically use:
- Restaurants & Bars
- Cities & Towns (this is good if you’re road-tripping or visiting multiple destinations during a single trip)
- Hotels (I’d only use this category if you’re staying in more than one)
- Activities (beaches, hikes, Instagram spots, etc)
Now that you have your category ideas solidified, you’ll create a “layer” for each one by clicking on the “Add Layer” button on the left hand-side of your screen.
Be sure to name each individual layer by clicking on “Untitled Layer” text box, just like you did when you first named your map. I named my first layer “Hotels” as an example.

More: How I Use Points & Miles to Travel for Free
3. Add Your Ideas to the Google Map.
If you’re planning a trip to a destination you’ve been thinking about visiting for a while, it’s likely that you already have some things on your bucket list, whether it be from friends, bloggers, travel sites, or Instagram.
This is your chance to put those thoughts in one organized space and see which ones you’ll be able to make time for. (Shameless plug: I have guides for Tokyo , Maui , New York City , Thailand , Mykonos , Santorini , Positano , Miami , St Barths , and more. Feel free to use them for inspiration should you be heading to any of these locations!)
To add an idea you have for your trip, click on the layer (the category) that you want to add a location marker to.
For example, I added this hotel to my map by checking the box on my “Hotels” layer and then typing the hotel name into the search bar. When the place you’re searching for pops up on the menu, click “Add to Map” and you’ll see that a marker is placed on the map. You’ll also notice that the name of the location is added underneath the layer description on the left side of the screen.
- If you accidentally put a location into the wrong layer: not to worry. You can easily drag the location and drop it into the correct category.
- If the place you’re searching for doesn’t auto-populate: it’s probably because Google hasn’t made a location for it yet. But don’t fret! You can just as easily add that spot to your map by typing the address into the search bar and writing the location name manually.

Need some trip inspiration? Check out my travel guides, go-to airport looks, and carry-on essentials here.
4. Customize Your Map.
One of the best ways to keep things visually organized is by color-coding your markers by their category.
To do this, click on the paint bucket that’s located at the bottom of the location marker’s pop-up window.
You can also add additional notes about a location (i.e. “LindsaySilb’s favorite bar; order their signature Bloody Mary) or write down other ideas that you have for that place by clicking on the pencil icon directly next to the paint bucket.
To remove an idea from your trip, just click the trash can icon that’s on the same panel.

There are a number of ways to use color coding:
- For example, you could mark all the restaurants that were on your “Must Visit” list in red, the ones you’d like to go to in yellow, and the ones you would stop by if you have the time in green. This will help you make sure that you get everything checked off of your “must-see” and “must-do” list first.
- For example, pricier sit-down restaurants can be marked in blue, while casual “grab and go” places could be labeled in green.
- You might have just one layer named “Activities” but instead of color coding all those places green, for example, you could mark the museums in purple, mark parks in blue, and stores in gray.
Pro tip: Even if you don’t want to color code everything, I recommend changing the default color from blue to something brighter, like red or yellow. In my experience, the blue location markers can be a bit hard to find on the map.
When you’re done organizing your categories, hit the save button and you’ll notice that they all show up underneath their accompanying layer.
Each location should be saved along with its phone number, address, and website information. This is super helpful because if you decide you want to make a reservation at a restaurant or purchase tickets to a theater show, you have all the tools you need to get there in one space.
5. Decide Which Activities to Group Together.
At this stage, you’ll be able to see a zoomed-out version of the map, with all of your points of interest plotted.
This might help you make decisions about which neighborhood to stay in, which hotel to book (if you’ve been debating between a few), which restaurants you can walk to, or which activities should be grouped together.
It’s nice to see your entire itinerary on a map and use a process of elimination approach to determine which pitstops make the most sense on which days. Seeing things on a map also makes it easier to keep track of the amount of time you’ll need to dedicate to get from place to place.

6. Plan Your Day-by-Day Itinerary.
I like to create a Google Doc that has a little outline of each day of the trip. I also use the doc as the place to store hotel confirmation numbers, car rental info, and flight info.
If you’re planning on driving when you get to your destination, you can easily pull up directions to your first stop by clicking on the arrow icon on the bottom of the pop-up’s panel.
This will automatically create a new layer on the left side of your screen with the location’s name on it. You’ll need to type in your starting location, like the airport, in the text box above it that’s labeled “A” and then click on the icon with the three dots to get step-by-step driving directions.

7. Download Google Maps on Your Phone & Log In.
Finally, to make the map you created accessible on your phone while you’re traveling, you’ll need to have Google Maps downloaded if you don’t already.
Then, be sure to sign in with the same Google account that you used to first create the map. Once you’re signed in, go to “Your Places,” and scroll to the last tab on the right called “Maps.”
8. Share Your Map with Friends and Travel Buddies.
One of the best parts about using Google Maps Trip Planner is being able to share the map. If you’re traveling with a group, sharing the map ahead of time will ensure that everyone is on the same page about where things are located.
And better yet, after you’ve returned from your trip, you now have a full list of everything that you can share with friends who are headed to that location.
To share the map on desktop, simply open the map like you’ve done previously. You’ll notice the “share” button directly underneath the title of your map. Click it, and you’ll have the option to share via Twitter, Facebook, or email.
To share the map on mobile, open the Google Maps app, then click the three bars > your places > maps. Select your preferred map, then select “View Map Legend,” and finally click share. You’ll be able to share your map via text, airdrop, Facebook, Twitter, email etc.
If you’re feeling particularly generous, I recommend going back into the map and adding notes about places that you went, what to order there, places that were worth skipping, etc. Your friends will thank you for it!
The verdict? This tool is a travel game changer .
Rather than sifting through an endless number of routes on Google Maps each time you want to go somewhere, using this process will help you streamline all of your travels. You can put together so many trip itineraries by using Google Maps Trip Planner, and it honestly offers the perfect way to plan a road trip.
Are there other apps or hacks that you use to plan trips? I’d love to hear about them. Drop your suggestions in the comments below.
Pin this post for later:

You Also Might Like

How to Plan The Perfect Girls Weekend in NYC

Things to Do in Charlottesville, VA: The Perfect Charlottesville Weekend Itinerary

Four Seasons Bora Bora vs. St. Regis Bora Bora 2021: Which Resort is Better?
10 comments.

I do that all the time Lindsay! Since 2009, believe it or not! I always add a google maps to my travel posts so that people can follow exactly what I did. It’s so helpful!

This is the best thing ever! I love Google maps for making places I want to go but they were always just on my”normal” map and it really bothered me that I couldn’t colour code. I won’t be doing any work today I’m the office, just rearranging my whole maps! Thank you for this amazing tip & detailed guide!

Lindsay Silberman
yay!! So happy you found it helpful!

I had no idea about this, wow!!!! Incredible. Thank you, Lindsay 🙂

I love this and the Visit a City app, which figures out the grouping for you!

This was a great write up explaining the how to… only thing missing is multiple people cannot edit the map.

Actually, multiple people can edit: Just share your map with editor rights

How can you share the map with editor rights? I’m trying to do this right now, and I can’t quite figure it out! Thank you!!

How do you view all maps at once ?

love this tutorial!! thank you
Leave a Reply Cancel Reply
Save my name, email, and website in this browser for the next time I comment.
How to Apply Fake Nails Like a Nail Artist (in 15 Minutes or Less)
Here's exactly how to pack jewelry for travel.
IMAGES
VIDEO
COMMENTS
Find local businesses, view maps and get driving directions in Google Maps.
We’ll walk you through how to make a travel itinerary with Google Maps through its My Maps feature. In a few easy steps, you can master an excellent organizational tool that’ll help you plan the best trip possible.
Plan your commute or trip. Before y ou start y our drive or transit trip to home, work or other places, plan your trip and find useful info. This way, you can know when to leave, what...
Google Maps has a variety of features you can use to plan your trip and save any interesting spots you find on the way. Here's how to make Google Maps your trip planner, using the...
Check out this step-by-step guide to create custom travel maps for trip planning with Google My Maps—covering all the basics plus little-known tips and tricks.
Google Maps is one the best travel tools because it’s so easy to use for both planning your trip and using it during your trip. We use it for planning city trip itineraries and road trip routes, plus it allows us to save our favourite locations and hotspots.
Google Maps Trip Planner is not only a highly-visual way to get your bearings of an area, but it’s extremely useful for figuring out where you can realistically travel to during the duration of your trip.