Log in or Sign up


Useful Searches
- Recent Posts
Find Trucking Jobs

You are using an out of date browser. It may not display this or other websites correctly. You should upgrade or use an alternative browser .
How many fail their pre-trip on the CDL test?
Discussion in ' Questions From New Drivers ' started by Tak , Jan 13, 2014 .
Tak Bobtail Member
I feel like a complete idiot because I know the pre-trip but when I was under the gun I fell apart and forgot to mention exactly what I would check for on a number of items, and I ended up not getting enough correct to pass. I failed to mention that the slack adjustor is not cracked, bent, or broken and has no missing hardware, and since I began on the front right side, I missed it on all the subsequent wheels because we're allowed to say "I'd check this axle the same as I would my front axle, checking my frame, brakes, suspension, tires, and wheels," or "I'd check this side the same way as I would my other side," etc., therefore I missed it for all the other axles. I failed to mention that my brake lines aren't cracked, bubbled, or blistered and not leaking. I failed to point out damage to the trailer bulkhead and a dent in the catwalk. I failed to point out the bent landing gear crossmembers. I was even docked for failing to mention the non-existent mud flaps on the tractor- they had been removed by the school because they interfered w/ the trailer landing gear. There were a few more things but y'all get the idea. But I've been reviewing everything lately and I know what it is I need to remember. I did fine on the air brake test and in-cab inspection though. Now I have to wait to see if they can get me in for a re-test, on a standby basis, because the scheduled tests are booked weeks in advance. I know when it comes to the yard skills and road test, I'll do fine. But the school did tell me that I'll get a day or two of advance notice of when I can get in on standby and will be able to get a few hrs. of practice in the night before so I'm fresh and ready. So how many others fail their pre-trips? Does it happen very much?
Trucking Jobs in 30 seconds
Every month 400 people find a job with the help of TruckersReport.
Wait, employers can't reach you!
Without your consent employers will not be able to contact with job offers, would you like to opt-in now?
Class A CDL Experience Please Select... I Need CDL Training In CDL School Now CDL Grad, No Experience 1-5 Months 6-11 Months 1 Year 2 Years 3 Years 4 Years 5+ Years
Please select ALL of your current, valid driver’s licenses
Please select the number of verifiable months you’ve been driving professionally using your Class A CDL within the last 3 years.
Each company we work with has specific experience requirements for their drivers. In order for you to receive the best possible offers, please make sure your answers above are accurate prior to submitting.

SHOJim Road Train Member
When i went to do my pre-trip for a class B....I TOTALLY MESSED IT THE HECK UP!!! Went back a week later and nailed it! More people probably miss it first time than you could imagine. You WILL get it next time!

tow614 Road Train Member
What's a pretrip

Lepton1 Road Train Member
Yep, when I regained my CDL last year I failed the pretrip and then went back and passed it but then failed the skills test (in the middle of a dust storm). Keep the faith... but it sucks being on standby.

Wooly Rhino Road Train Member
Before you take the pretrip part of the test tell your examiner "I will be checking all of the items I will point out for cracks, leaks, breaks, signs of excessive wear, damage, correct levels or pressure, or any other possible sign of something being unsafe or missing." Then all you have to do is point and touch. You do not have to name the parts. A pretrip is a visual thing.

Allow Me. Trucker Forum STAFF Staff Member
Depends a lot on the tester. It's OK to ask the tester what exactly he wants, as in clutching or floating the gears. Don't assume you have to double clutch, he may say it's ok to float. You won't know unless you ask. Ask him if he wants you to explain EVERYTHING as you do the pre-trip, or can you say the same for the other side. Some will even tell you to skip the rest of this side. Just don't rush yourself, there is no time limit.
gpsman Road Train Member
PyleIt said: ↑ There were a few more things but y'all get the idea. But I've been reviewing everything lately and I know what it is I need to remember. Click to expand...
Allow Me. said: ↑ Depends a lot on the tester. It's OK to ask the tester what exactly he wants, as in clutching or floating the gears. Don't assume you have to double clutch, he may say it's ok to float. Click to expand...
Richter Road Train Member
I failed the road test by touching a curb but did fine on the rest. For the pre trip simply walk around and point at everything you see. start with driver steps, window, miror door, rim tire, axle, hub seals, brakes (pad, slack adjuster, hose etc.) steering, etc...we haven't event moved from right outside the door yet and i got all that. Just look at the truck and mention everything you see. You cant over pretrip a truck lol. You have the cheat sheet right in front of you lol.
tow614 said: ↑ What's a pretrip Click to expand...
- No, create an account now.
- Yes, my password is:
- Forgot your password?
- Free Practice Tests
Commercial Driving
- Introduction
- Getting a CDL
- Fees and costs
- CDL Types & Permits
- Endorsements & Restrictions
- Written exams
- Skills test
- Pre-trip inspection
- TSA background check
- Retake policy
- CDL Maintenance
- ELDT Training & Certification
- CDL how-to guides
Mastering the CDL Pre-Trip Inspection Exam: A Complete Guide
Learn how to conduct thorough pre-trip inspections with our guide, a critical component for commercial vehicle safety.

Written by Andrei Zakhareuski. With over 16 years of expertise, Andrei leads Driving-Tests.org, a top online resource for driver education. His leadership has established vital partnerships with over 2,600 libraries, educational bodies, and state agencies.
The CDL Pre-Trip Inspection Exam is an integral part of obtaining your commercial driver’s license. This guide covers Class A and Class B pre-trip inspections, provides a checklist, and offers tips for memorizing the inspection process.
Start a free Pre-Trip Inspection practice test:
- Alabama - AL - Alabama Pre-Trip Inspection Practice Test
- Alaska - AK - Alaska Pre-Trip Inspection Practice Test
- Arizona - AZ - Arizona Pre-Trip Inspection Practice Test
- Arkansas - AR - Arkansas Pre-Trip Inspection Practice Test
- California - CA - California Pre-Trip Inspection Practice Test
- Colorado - CO - Colorado Pre-Trip Inspection Practice Test
- Connecticut - CT - Connecticut Pre-Trip Inspection Practice Test
- Delaware - DE - Delaware Pre-Trip Inspection Practice Test
- District of Columbia - DC - District of Columbia Pre-Trip Inspection Practice Test
- Florida - FL - Florida Pre-Trip Inspection Practice Test
- Georgia - GA - Georgia Pre-Trip Inspection Practice Test
- Hawaii - HI - Hawaii Pre-Trip Inspection Practice Test
- Idaho - ID - Idaho Pre-Trip Inspection Practice Test
- Illinois - IL - Illinois Pre-Trip Inspection Practice Test
- Indiana - IN - Indiana Pre-Trip Inspection Practice Test
- Iowa - IA - Iowa Pre-Trip Inspection Practice Test
- Kansas - KS - Kansas Pre-Trip Inspection Practice Test
- Kentucky - KY - Kentucky Pre-Trip Inspection Practice Test
- Louisiana - LA - Louisiana Pre-Trip Inspection Practice Test
- Maine - ME - Maine Pre-Trip Inspection Practice Test
- Maryland - MD - Maryland Pre-Trip Inspection Practice Test
- Massachusetts - MA - Massachusetts Pre-Trip Inspection Practice Test
- Michigan - MI - Michigan Pre-Trip Inspection Practice Test
- Minnesota - MN - Minnesota Pre-Trip Inspection Practice Test
- Mississippi - MS - Mississippi Pre-Trip Inspection Practice Test
- Missouri - MO - Missouri Pre-Trip Inspection Practice Test
- Montana - MT - Montana Pre-Trip Inspection Practice Test
- Nebraska - NE - Nebraska Pre-Trip Inspection Practice Test
- Nevada - NV - Nevada Pre-Trip Inspection Practice Test
- New Hampshire - NH - New Hampshire Pre-Trip Inspection Practice Test
- New Jersey - NJ - New Jersey Pre-Trip Inspection Practice Test
- New Mexico - NM - New Mexico Pre-Trip Inspection Practice Test
- New York - NY - New York Pre-Trip Inspection Practice Test
- North Carolina - NC - North Carolina Pre-Trip Inspection Practice Test
- North Dakota - ND - North Dakota Pre-Trip Inspection Practice Test
- Ohio - OH - Ohio Pre-Trip Inspection Practice Test
- Oklahoma - OK - Oklahoma Pre-Trip Inspection Practice Test
- Oregon - OR - Oregon Pre-Trip Inspection Practice Test
- Pennsylvania - PA - Pennsylvania Pre-Trip Inspection Practice Test
- Rhode Island - RI - Rhode Island Pre-Trip Inspection Practice Test
- South Carolina - SC - South Carolina Pre-Trip Inspection Practice Test
- South Dakota - SD - South Dakota Pre-Trip Inspection Practice Test
- Tennessee - TN - Tennessee Pre-Trip Inspection Practice Test
- Texas - TX - Texas Pre-Trip Inspection Practice Test
- Utah - UT - Utah Pre-Trip Inspection Practice Test
- Vermont - VT - Vermont Pre-Trip Inspection Practice Test
- Virginia - VA - Virginia Pre-Trip Inspection Practice Test
- Washington - WA - Washington Pre-Trip Inspection Practice Test
- West Virginia - WV - West Virginia Pre-Trip Inspection Practice Test
- Wisconsin - WI - Wisconsin Pre-Trip Inspection Practice Test
- Wyoming - WY - Wyoming Pre-Trip Inspection Practice Test
Engine Compartment Inspection
Includes checking for leaks, belt tension, and the condition of hoses, among other components.
Cab Check/Engine Start
Involves inspecting the cab’s interior, gauges, and starting the engine to check for abnormalities.
Brake Check
Focuses on air brake systems, including air brake checks and the parking brake test.
Here’s what to know for the CDL class B.
Vehicle Overview
Begin with a general overview of the vehicle, checking for obvious signs of damage or issues.
External Inspection
Inspect all external components, including tires, lights, and mirrors.
Internal Inspection
Check all internal controls, ensuring everything is functional and within reach.
What to Remember
- Lights and reflector s: Ensure all are clean and functional.
- Engine oil and coolant levels : Check for adequate levels.
- Steering mechanism : Ensure it’s secure and functioning.
- Horn : Test for functionality.
- Windshield wipers : Check for operability and condition.
- Mirror s: Adjust for optimal visibility.
- Emergency equipment : Ensure presence and accessibility.
- Air brake system : Test for leaks and proper pressure.
Memorization Tips to Help You Out
- Create a Routine : Develop a consistent order in which to conduct your inspection.
- Use Mnemonics : Create acronyms or phrases to help remember the steps.
- Practice Regularly : Hands-on practice is the most effective way to memorize the inspection process.
- Visual Aids : Use diagrams or checklists as visual reminders.
Pro Tip : Practice the pre-trip inspection in a real-world setting. The more you perform the inspection in a practical environment, the more natural it will become.
Remember, the pre-trip inspection is not just a test requirement – it’s a fundamental safety practice every commercial driver should master. For more resources and detailed guides, visit Driving-Tests.org .
Secure your CDL with confidence!
Our exclusive CDL Premium program offers comprehensive online training with an ELDT certificate, authentic exam questions, and a solid Pass Guarantee, starting at only $69. Ideal for first-time applicants, seasoned drivers, and those new to the U.S. road rules.
Explore CDL Premium
Was this page helpful?
- Start a free Pre-Trip Inspection practice test:
- What to Remember
- Memorization Tips to Help You Out
- All Companies
- Driver Training
- All Freight Types
- Lease/Purchase
- Message Board
- Truck Driver Salary
- How to Become A Truck Driver
- Will I Be Successful?
- Truck Driving Schools
- CDL Practice Tests
- Get Your CDL
- Get Your First Truck Driving Job
- Your First 100,000 Miles
- Advanced Tips
- Sign Up Here
Select Location x
Please tell us your location.
Location not set
The Complete Pre-Trip Inspection Checklist

Due to heavy memorization, the pre-trip inspection is one of the hardest aspects of the CDL test. Also called the “Vehicle Inspection Test,” the pre-trip is one of the tests that trucking students fail the most.
With this pre-trip inspection checklist, we tell you everything you need to know and what you need to check for.
Engine Compartment – What to Check For:
When checking the engine compartment, you always want to make sure the following components are properly mounted and secured. You should also make sure they are not cracked, bent, or broken. The items you need to check for include:
Belt-Driven Alternator
All of the wires are connected. The belt is not cracked or frayed, and the free play on the belt is between ½ to ¾ of an inch.
Belt-Driven Water Pump
The free play on the belt is between ½ to ¾ of an inch, and all the hoses running to and from the water pump are tightly clamped. Ensure nothing is leaking.
Brake Chamber
The brake chamber is not leaking air.
The brake drum is properly mounted and secure.
The brake hose is rubber; it is not cracked and is not leaking air.
Brake Lining
Check for oil or debris on the lining. There should be at least ¼ of an inch of friction material.
Caste Nuts and Cotter Pins
All three caste nuts and cotter pins are present.
Coolant Reservoir

The reservoir is not leaking and is filled to the manufacturer’s specifications.
The drag link is properly mounted and secure, and not cracked, bent or broken.
Gear Box and Hoses
The gear box and hoses have no abrasions, bulges or cuts, and are not leaking.
Gear-Driven Air Compressor
The air compressor is properly mounted and does not leak.
Gear-Driven Power Steering Pump
The steering pump is properly mounted and not leaking.
General Hoses (Passenger and Driver’s Side)
The hoses are secure at both ends and are not leaking. There are no abrasions, bulges, or cuts.
The hub seal (or axle seal) is leaking and is filled to the manufacturer’s specifications.
Leaf Springs
None of the leaf springs have shifted or are bent or broken.
There are no signs of leaks under the truck.
There are no lug nuts missing. There are no rust trails, powder residue, or cracks around the bolt holes.
The oil level is filled to the manufacturer’s specifications.
The pitman arm is properly mounted and secure. It is not cracked, bent, or broken.
Power Steering Fluid Reservoir
The power steering reservoir is not leaking and is filled to the manufacturer’s specifications.
The rim does not have any unauthorized welds.
Shock Absorber
The shock absorber is not leaking. If it is leaking, the leak will be at the point where the top and bottom portion of the shock meet.
Slack Adjuster and Push Rod
With the brakes released and pulled by hand, the push rod does not move more than one inch.
Spring Hanger
The spring hanger is properly mounted and secure.
Steering Column
The steering column is properly mounted and secure. It is not cracked, bent, or broken.
There are no abrasions, bulges, or cuts on the tread or sidewalls. Tread depth should have a depth no less than 4/32 of an inch. Tires are properly filled to the manufacturer’s specifications. This can be checked with an air gauge.
The tie rod is properly mounted and secure, not cracked, bent, or broken.
Make sure all are accounted for.
Driver Door Fuel Area-What to Check For:
Remember – during the pre-trip inspection, you want to make sure these items are properly mounted and secure. Look for cracks, bends, and breaks.
The actual airbag has no abrasions, bulges, cuts, or leaks. The airbag is not missing mounting bolts.

The axle seal is not leaking and is filled to the manufacturer’s specifications.
The brake drum is secured properly and has no cracks, bends or breaks.
Check the brake hose at both ends to make sure it is not leaking air.
There is no oil or debris on the brake lining. There is at least ¼ of an inch of friction material.
Catwalk and Steps
The cat walk and steps are clear of any loose objects.
Door and Hinges
The doors open, close, and latch properly. Door seals should not be worn, torn, or rotten.
Drive Shaft
The drive shaft is not twisted, and the u-joints are free of any debris.
The tread and sidewalls have no abrasions, bulges, or cuts. The tread depth is no less than 2/32 of an inch. Tires are properly filled to the manufacturer’s specifications. This can be checked with an air gauge.
Exhaust System
The exhaust system shows no signs of leaks.
Frame and Cross Members
There are no unauthorized holes or welds. Bundle up the cross members to ensure none are missing.
Fuel is not leaking from the tank, and the cap is on tight.
There are no rust trails, loose bolts, powder residue, or cracks around the bolts.
Mirrors are clean, with no cracks or chips.
The mud flap is secured properly, with no cracks, bends and breaks.
There are no unauthorized welds.
The shock absorber is secure at both ends and not leaking. If it does leak, it is preferable to leak in the middle.
There is proper spacing between the tires and there is nothing stuck.
The spring arm is secure at both ends.
Spring Mount
The spring mount is secure at both ends.
The torque arm is secured properly, with no cracks, bends or breaks.
No u-bolts are missing.
Coupling Area-What to Check For:
Air lines should be secure at both ends with no abrasions, bulges, or cuts. They should not be leaking, dragging, or tangled.
Make sure the apron is properly mounted and secure. Look for cracks, bends, and breaks.
Make sure there is enough space between the tractor mud flap and the trailer landing gear, so that they don’t hit each other when making a turn.
Electric Line
The electric lines are secure at both ends. There are no abrasions, bulges, cuts, or exposed wires.
There is no space between the apron and the skid plate.
The seals are in good condition with no cracks, signs of rotting, or leaking air.
The king pin is properly mounted and secure, without cracks, bends and breaks.
Locking Jaws
Physically check that the locking jaws are fully locked around the king pin.
Mounting Bolts
No mounting bolts are missing.
The platform is properly mounted and secure, without cracks, bends and breaks.
Release Arm
The release arm is in the fully locked position.
The skid plate is properly lubed.
Sliding Fifth Wheel Locking Pin
The pin is in the fully locked position.
Trailer- What to Check For :
The airbag has no abrasions, bulges, cuts or leaks, not missing any mounting bolts.
The brake chamber is properly mounted and does not leak air.
The brake hose is secure at both ends with no abrasions, bulges, cuts, or leaks.
No oil or debris on the brake lining and at least ¼ of an inch of friction material.
No missing cross members.
Header Board
The header board does not have any holes or missing rivets.
Landing Gear
The landing gear is fully raised and the cradle handle secure.
No rust trails, powder residue, or cracks around the bolt holes.
The rims do not have any unauthorized welds.
Rear Door and Hinges
The rear door opens, closes, and latches properly. Door seals are not worn, torn, or dry rotten.
The shock absorber is secure at both ends with no leaks.
When the brakes are released and pulled by hand, the push rod does not move more than one inch.
Tandem Frame and Release
Release handle and locking pins are in the fully locked position.

Trailer Tire
There are no abrasions, bulges, or cuts to the tread or sidewalls. Tread depth is no less than 2/32 of an inch. The tire is properly filled to manufacturer’s specifications and checked with an air gauge.
Light Check
There are five locations where you must check your lights. These include:
- Front of the truck
- Both sides of the truck
- Rear of the truck
- Both sides of the trailer
- Rear of the trailer
The five functions are:
- Left turn signal
- Right turn signal
- Four way flashers
- High/low beams
- Brake lights
Inspection and Brake Tests-What to Check For: In-Cab
The last section is In-Cab Inspection and Brake Tests. For the In-Cab Inspection you once again want to make sure all of the following components are properly mounted and secure. As well as the following:
Air Brake Test
There are three stages to an air brake test:
- Applied Pressure Test – When doing the Applied Pressure Test, you want to build the air pressure to governor cut out. Put the truck in the lowest gear, turn the engine off and immediately turn it back on. Push in the tractor and trailer valves which then release the parking brakes. Push and hold the brake pedal, allowing the gauges to stabilize. When the gauges have stabilized, announce the Primary and Secondary PSI. Listen for air leaks while doing this.
- Warning Light and Buzzer – Pump down on the brake pedal until the warning light and buzzer comes on. This is typically at or before 60 PSI.
- Tractor/Trailer Protection Valve Pop Out – Pump down on the brake pedal until the tractor and trailer protection valves pop out, this will be between 20 and 40 PSI.
Air Pressure Gauges
The air pressure gauges build to governor cut out.
Emergency Equipment
Truck has a fire extinguisher, three red reflective triangles, and spare electrical fuses.
Heater and Defroster
Demonstrate both the heater and defroster are working properly.
Horns (Air Horn and City Horn)
Blow both horns to make sure they are working.
Lighting Indicators
Check the left turn, right turn, four way flashers and high beams; also point these out on the dashboard.
With the transmission in neutral, fully depress the clutch. Turn the key on, check the ABS light, announce when it comes on and off, and start the engine.
The seat belt is not ripped or frayed and adjusts and latches properly.
Oil Pressure Gauge
The engine oil pressure gauge should rise to normal operating range.
Parking Brake
- Trailer Parking Brakes – Set the trailer brake, release the tractor brake, and tug lightly on the trailer.
- Tractor Parking Brakes – Set the tractor brake, release the trailer brake, and tug lightly on the trailer.
Service Brake Check
Release both the tractor and trailer brakes. Drive at idle speed. Apply the service brake to make sure you come to a complete stop and that it doesn’t pull to the left or right when applying the brakes.
The voltmeter is charging between 13 and 14 volts.
Water Temperature Gauge
The water temperature gauge rises to normal operating range.
Windshield and Mirrors
The windshield and mirrors are clean, with no obstructions and in proper adjustment.
Windshield Wipers and Washers
Demonstrate the wipers and washers are working properly by spraying the windshield.

This is a really nice complete list, very useful.
Comments are closed.
Contact ClassADrivers.com
Please use the form below to contact our customer service or sales team.
You can also reach us at (888) 830-2326. Our normal business hours are Monday-Friday 8 a.m. to 5 p.m. (Pacific Time).
Our business address is: Attn: Class A Drivers MH Sub I, LLC dba Internet Brands 909 N Pacific Coast Highway, 11th Floor El Segundo, CA 90245
By clicking the ["Send"] button, you agree to our Terms of Use and Privacy Policy , and to the use of cookies described therein, and you also consent to the collection, storage, and processing of your data in the United States where the level of data protection may be different from that in your country.
8 Commonly Overlooked Checks During a Pre-Trip Inspection
- by BigRoad Marketing
- March 12, 2020 September 12, 2023
Just like breakfast is the most important meal of the day, your pre-trip inspection is the cornerstone to operating a healthy vehicle. The reasons for having a healthy vehicle should be obvious. It ensures the safety of not just the driver, but also everyone else on the road.
As a driver, you are required by law to inspect your truck and trailer before the start of your shift and once within every 24 hours while on the road. It is the driver’s responsibility to ensure the vehicle is safe for operation and is free from defects.
Currently, there are no guidelines as to how long a pre-trip inspection should take. If you check everything you should be checking, a full inspection should take you approximately 30 to 50 minutes. The key to a good inspection is to take your time while working your way systematically around each section of your vehicle and performing each check fully.
Drivers can eliminate many CSA violations with a thorough pre-trip inspection. It’s in your best interest to find a problem before an inspector does, as the fines can be high, on top of your vehicle being put out of service.
Here is how to do your Driver Vehicle Inspection Report digitally in an app
In a time-critical industry like trucking, a pre-trip inspection can add up to a big chunk of time that could have been spent on the road. No wonder it’s not uncommon to hear of inspections that last only 10 to 15 minutes. If that wasn’t bad enough, some drivers do not get paid for the time they spend on inspection even though it’s part of their required day.
If you attended a CDL training program at a reputable truck driving school, you should be familiar with all the requirements of a pre-trip inspection. In fact, you should be able to perform one that far exceeds the minimum requirements. No matter how diligent you think you are though, we all occasionally miss a few details.
{{cta(‘e2c4c0fe-f526-4964-8e09-43378432606f’,’justifycenter’)}}
Here are some of the most commonly overlooked inspections items:
1. Chock Your Wheels
Everyone knows they are supposed to do it, but it’s one of those common sense things that people forget when rushing. Chocks are a simple safety measure that help prevent accidental movement of the vehicle.
During the inspection, you are going to have the engine running at times and you will also be performing tests on the braking system. You really do not want the vehicle to move while you are inspecting the wheels or if you are under the trailer.
2. Cleanliness
One of the first areas an inspector will check during a roadside inspection is your cab. The cab is your main office of business and the condition of this workspace gives an inspector a quick impression of the kind of person they think you are.
When you have a junk-filled cab, it not only marks you as a messy person, it can also present its own dangers. If your dash is strewn with junk, it can prevent your windshield defrosting and defogging from working properly.
Garbage in your cab can hinder mechanical operations by getting lodged under pedals and other mechanical devices. Loose objects also have the potential to become dangerous projectiles in the event of an accident.
Keep your cab clean. Put all loose objects in the glove box and ensure all other objects are secured or mounted correctly.

Testing your truck’s braking system comprehensively involves a lot of steps. It requires checks to be made from both inside and outside of the cab, hunched over the wheels or under the trailer.
Brakes are also one of the hardest working components on any vehicle and subject to a lot of wear and tear. It’s no wonder that violations involving brakes take 6 of the top 20 spots for most frequent violations in roadside inspections.
As well as performing your in-cab check, also be sure to check the brake adjustment with the slack adjuster to ensure your brakes have been adjusted properly. Brake chamber air lines should be secure and able to flex. Also check that air lines are not leaking, are free of mechanical damage and the seals on the glad hands and trailer side are in good condition.
4. Emergency Kit
You are required to carry an emergency kit containing spare fuses/circuit breakers, warning hazard triangles and a fire extinguisher. Just because you have these items in your truck, doesn’t mean you’ll pass an inspection though.
Do other drivers use the truck? Not everyone is going to be as considerate as you. Test fuses for continuity to ensure they work properly. If the hazard triangles have been used, make sure they are free of dirt and the reflective strips will serve their purpose.
Hopefully, you’ll never have to use the fire extinguisher but it’s not something you can ignore during an inspection. Fire extinguishers can lose pressure over time and need to be serviced on a regular basis. Check the tag to see when it was last serviced, make sure the safety pin has not been tampered with and ensure the fire extinguisher is firmly secured.
5. Reflectors
It should make perfect sense to check the lights on your vehicle but do you ever think to check the reflectors? Reflectors can greatly increase the visibility of your vehicle at night and can pose a hazard if they are not functioning correctly.
You can also receive a violation for having defective reflectors and reflective strips on your vehicle. Make sure that reflectors are free of cracks and clean off any dirt. Don’t forget reflective strips along your cab and trailer. Over time, these can weather to the point they become ineffective. Look out for any strips that are worn or peeling and also make sure they are not obscured by dirt.
6. Seatbelts
We all know that seatbelts save lives, so be sure yours is in good working condition. Check your seatbelt for signs of wear and look out for any frayed edges. Your belt is not going to be effective if it snaps.
You should also check that your seatbelt retracts and returns smoothly from the mechanism. If the action isn’t smooth, this could be an indication that the seatbelt needs replacing.
Also, check that your seatbelt locks and releases properly by giving it a sharp tug. One last thing, don’t forget to wear your seatbelt when driving!
7. Wheel Lug Nuts
There are a whole multitude of problems that can arise from not properly checking your wheels, tires and brakes properly. One persistent problem that is often cited is the wheel fasteners. No one wants one of your wheels to come off and start barreling down the interstate toward them.
Wheel fasteners need to be checked to ensure they are not loose and that they are tightened correctly. Rust around lug nuts can also be indicative of a widening of the bolt hole. Check rims that have been painted; sometimes the paint is an attempt to hide these rusted areas. If you have ever noticed during rain fall that you get a rusty trail of water coming from behind the nut, this could be a sign of a more serious problem with the wheel’s bolt holes.

8. Don’t Forget the Paperwork
And finally, make sure you have the correct paperwork and documents as it is often overlooked. Let’s face it, you already have enough paperwork to worry about with all your shipping documents. We are all for reducing paper in the truck but be sure you check that your vehicle registration, permit documents, and trailer ownership documents are all valid and up-to-date.
If you are using an eLog, make sure you have at least one cycle’s worth of paper logs as a backup. In addition, don’t forget to check your safety inspection approval sticker and commercial driver license are up-to-date. Is your medical card still valid? You better make sure you have that as well. That’s just the tip of the iceberg; we haven’t covered what you need if you’re carrying hazardous materials.
If you want to know some of the things a DOT officer is looking for during an inspection be sure to watch this video:
Have you ever been caught-out during an roadside inspection or think we missed a common problem? Please leave us a comment.
Neve | Powered by WordPress
A Comprehensive Guide to Pre-Trip Inspections for Truck Drivers

If you're a trucker or thinking about becoming a trucker, then you need to understand pre-trip inspections. This is the time when drivers check their truck, trailer, and load for any damage or issues that could cause problems while on the road. A pre-trip inspection should be completed because a pre-trip inspection will help you save time and money, avoid breakdowns, and ensure a safe trip. What’s not to like?
This guide will answer all of your questions about pre-trip inspections, from how often should pre-drive checks be performed to what items should a post trip inspection include.
This guide will cover everything you need to know about pre-trip inspections, including what to check for and how to do a thorough truck inspection. There are many different things truckers need to check during their pre-trip inspection, like the engine, fluids, brakes, lights, and tires just to name a few. But don't worry because our guide on pre-trip inspections will help you to become an expert and you will be able to perform a thorough pre-trip inspection like a pro!
Here is the outline of everything we will go over. Feel free to jump ahead to the information you're looking for.
What is a pre-trip inspection?
Why are pre-trip inspections so important for truck drivers.
- What is a DVIR?
- Pre-trip Inspection Checklist for truck drivers
Now, let's get started!
Pre-trip inspections are an important safety measure that all truck drivers are required to perform before every trip. Required by federal law, pre-trip inspections are also a great way for drivers to familiarize themselves with their equipment. Truckers need to know their equipment inside and out so that they can spot any potential problems before they become serious.
Once you are a pro at pre-trip inspections, they shouldn't take you more than 30 minutes and you will be able to check your entire truck in a 10 minute inspection. Truck inspections must be carried out by the driver while on duty, but before driving starts, and at least once every 24 hours while on duty. Performing a pre-trip inspection may seem like a lot of work (especially in the heat, we get it), but it is worth it to avoid the mechanical, financial, and legal issues that can occur due to a breakdown on the road.
Now that we know what a pre-trip inspection is, let's move on to why they are so important for truck drivers.
Truck drivers have a lot on their plates - long hours, tight deadlines, and heavy traffic. With so much to worry about, it's easy to see how a pre-trip inspection might be overlooked or forgotten. However, these pre-trip inspections are essential for keeping both drivers and their loads safe. It may seem like a lot of work to perform a pre-trip inspection every day, but it's a daydream compared to the consequences of missing a truck inspection.
A pre-trip inspection will help you:
- Avoid major delays in your schedule caused by breakdowns.
- Reduce the risk of an improperly-secured load which can be dangerous.
- Save money on costly repairs by performing preventative maintenance.
- Avoid increases in your insurance which can occur even if you were not at fault. Ex. if you can't show proof that a pre-trip inspection was done, or it was improperly completed, or if you did not address known issues.
- If audited, you can be fined and your CSA score will be affected due to ignoring pre-trip inspections or not resolving found issues.
In short, pre-trip inspections may be one more thing on a truck driver's to-do list, but they are definitely worth the effort if you want to avoid the consequences above!
Now that we've gone over why performing a pre-trip inspection is important, let's move on to what you should inspect before every trip.
What is a DVIR?
Every driver must submit a DVIR, or a Daily Vehicle Inspection Report, for each unit they operate, according to federal law (FMCSR Section 396.11). Multiple trailers can go on the same report and a DVIR can be either electronic or paper. Unfortunately, not all trucking companies enforce this policy, so you will have unsafe drivers going months or even years without submitting a DVIR. Not only are you required by law to log your pre-trip inspection, but you will also want this documentation in the case that someone places a claim against you. You can now see why it is important to do your pre-trip inspection daily and have it documented.
FMCSA Pre-trip inspection checklist for truck drivers
A pre-trip inspection should be completed with your truck and trailer together unless you’re bobtailing to pick up your trailer. The most effective way to memorize everything you need to inspect before rolling out is to do your pre-trip inspection the same way each time. The most effective technique to memorize everything you need to check before going on a trip is to follow the same procedure every time. Eventually, you will create your own order of inspecting the sections of your equipment. It's best to do your truck inspection first thing in the morning, plus each time you swap trailers.
Let's go over the list of items you will need to check for a proper pre-trip inspection. If you are a beginner, we recommend you print out and keep this list with you until you no longer need it. You can also google 'Pre-Trip Inspection Checklists for Truck Drivers' to find plenty of resources made specifically for truckers.
Your Trailer and Paperwork
- Make a habit of checking your paperwork first thing when starting your pre-trip inspection.
- Double-check that the trailer number is the same as your paperwork.
- Make sure the seal matches your paperwork if your trailer is sealed.
- If your trailer is unsealed, check inside if the shipment matches what is on your paperwork.
- Empty trailer? Double-check inside the trailer so you don't roll off with one pallet of freight, causing you to have to go back.
- Finally, double-check that your delivery is the same on your bills as your load assignment or trip sheet. Let your dispatcher know if they don't match up.
1. Start your truck inspection at the front
Let's start your vehicle walk around inspection by checking the following components:
- Lights - Check that your lights, warning lights, and turn signals are properly working. Check lenses are clean.
- Air Compressor - Check for a proper build-up of air pressure. Check for leaks.
- Radiator - Check for leaks. Check that fins are clear of debris.
- Fluid Levels - Check your fluids: oil, coolant, power steering, fuel, and windshield washer. Check that caps are tight for your radiator and power steering. Check your dip-stick is properly seated.
- Water Pump, Alternator, Power Steering Pump - Make sure they are working and the belts don't have too much slack or are worn out.
- Oil Pressure Gauge - Check that it's properly working.
- Belts - Check for proper tension.
- Wiring - Check for wear.
- Hoses - Check for cracks, leaks, and tears.
- Steering Linkage - Check for missing or worn parts.
- Engine Block - Look out for any leaks, wear, fraying, or cracking. Also, any fluid running down the side of the engine. Check your fan belts for signs of wear and proper tension. Look under the truck for signs of fluid on the ground.
2. Continuing your truck inspection to the back of your truck
Moving on with your truck inspection, It makes sense to head here because it's easier to check before you hook a trailer.
- Tires - Properly inflated. Decent thread. Replace if there are flat spots.
- Brakes - Your brake chambers should be grease-free and should not be out of round. The shoes should not be worn down too much. When checking brakes, include the parking brakes, air brakes, and hydraulic braking systems.
- Suspension - Check that your shocks and airbags are in good condition, without grease or oil covering them.
- Hub Seal - Should not be leaking. Wipe with oil if it is transparent.
- Slack Adjusters - If your slack adjusters move more than an inch when you pull them, they should be adjusted.
- Drive Shaft - Should be free of grease and undamaged. Double-check for debris in the u-joints.
- Fifth Wheel - Properly greased and should not be broken.
- Fuel Tanks - No cracks or leaks.
- Battery Area - Check for adequate starting power and that charges are holding.
- Stairs and Catwalk - Free of debris. Not broken.
- Frame - No welds, no cracks, and no major rust.
3. DOT inspection requirements for tires
- Drives and tandems - Inflated to 100-110 PSI. Minimum tread of 2/32 in.
- Steer tires - Inflated to 110-120 PSI. Minimum tread of 4/32 in.
- Check with a tire gauge. Tire thumpers aren't reliably accurate, so make it a habit to check with a tire gauge. Tires under 50 PSI cannot retain enough tire pressure and should be replaced.
- Replace tires with flat spots. When you try to slide the tandems or drag them in the winter, flat spots can occur on the tires.
- Check for damage, nails, and punctures on the tires. Tires should have no cuts, gouges, or bubbles. There should be no space between the rims and tires.
- Check the lug nuts. Make sure to tighten loose wheel fasteners. Look for rust around the lug nuts. This can be a sign that the tire can come loose because the bolt hole is widening.
4. In-cab inspection
Time to get your truck started and do your in-cab inspection.
- Gauges - Check that your oil, water, and air temp gauges function properly and rise to normal levels.
- Heat and A/C - Check for heat and air conditioning.
- Mirrors - Check that they are clean, properly adjusted, and not cracked.
- Windshield Wipers - Check that they are working properly and sitting flat against the windshield.
- Seat Belt - Check that it's in good condition and not frayed. Don't forget to put it on when driving!
- Horn - Honk to make sure it works! You will be glad you did when you need it. City and air horn should be working properly.
- Windows - Make sure they're clean and crack-free.
5. Performing your tug test during your truck inspection
For the next part of your pre-trip inspection, it’s time to hook up to your trailer. It is important to test your connection to the trailer by performing a tug test. This way you can test that your coupling system and the brakes are up to DOT requirements for trailers.
To perform a tug test during your pre-trip inspection, back up under your trailer until you hear the click. If you pull away from your trailer during the tug test, you weren't hooked properly. If you pull the trailer with you, the trailer brakes are out of adjustment. If the brakes are out of adjustment, it's important that you write up the incident so that the maintenance team can have it fixed before you or another driver takes the equipment out on the road.
Next, you should check your:
- Headlights and 4-Way Flashers - Make sure they turn on and work properly.
- Airlines and Pigtails - Hook up your airlines, pigtails, and electrical connections. Check that they aren't leaking or ripped.
- Fifth Wheel - Check that your fifth wheel arm is coupled under the trailer. Check that the arm is locked in place.
- Landing Gear - Raise and check for damage.
6. Pre-trip inspecting your bulkhead
The next step in your pre-trip inspection is to check the front of your trailer, also known as the bulkhead.
- Wall - Check for any damage on the wall.
- Inspection Sticker - Check for a DOT inspection sticker. Make sure it's up to date to meet the DOT requirements for trailers.
- Registration Paperwork - Make sure the registration is valid by checking the front trailer box.
- (Reefer Units) - When pulling a reefer, start the 'Pre-trip' function on the unit to run it. It should finish before your pre-trip inspection is finished.
7. DOT requirements for trailers and tandems
You're almost done with your pre-trip inspection! It's time to check the tandems, as well as the side of your trailer.
- Wall - No damage.
- Lights - Should turn on and flash properly.
- Reflectors - Check that they are free of any dirt or debris. No cracks, peeling, or missing pieces.
- Tires - Inflated properly. Decent thread. Flat spots need to be replaced.
- Hub Seals - Not leaking. If they are transparent, wipe them down with oil.
- Brakes - Should not be out of round. Free of grease. The shoes should not show too much wear.
- Suspension - Check that airbags and springs are in good condition and not covered in grease or oil.
- Tandem Pins - Locked in position. The slider arm should be in its cradle.
- Tandem Cables - Shouldn't be dragging on the ground.
- Underbelly - No damaged beams under the trailer. Be sure by checking the entire length.
- Mud Flaps - No tears. Should not be hanging.
8. DOT inspection requirements - Back of the trailer
The next step in your pre-trip inspection is to check the back of your trailer.
- Doors and Hinges - Should not be damaged.
- Latches - Should be closed and secured.
- Lights - Should be on and flashing.
- Seal - Should be intact. Should match your paperwork!
- DOT Bumper - No damage.
- License Plate - Check that your license plate hasn't fallen off and is not worn out.
9. Finishing your truck inspection with the passenger side
Finally, it's time to check the passenger side during your vehicle walk-around inspection.
- Tires - Properly inflated. Decent tread. Tires with flat spots need to be replaced.
- Brakes - Should not be out of round. Should be free of grease.
- Suspension - Check that your airbags and springs are in good condition. Should not be covered in oil or grease.
10. Don’t forget your emergency kit for a full truck inspection
Not only do DOT inspection requirements say that you have to carry a properly working emergency kit in the case of an emergency, but you will be glad that your equipment is working when the time comes for you to use it. Now is a good time to check.
- Fire Extinguisher - Should be working and readily available for use.
- Spare Fuse - At least one spare for each type of fuse you will need for accessories and parts.
- Warning Device - For stopped vehicles. Reflective triangles.
- Warning Flags - Usually red flags that stand in an upright position.
Minimum DOT Inspection Requirements
Now that you know how to do a thorough pre-trip inspection, you can be confident in your ability to do a full vehicle walk-around inspection to ensure that you will have a safe trip. After completing a thorough truck inspection (usually when first receiving the truck or when slip-seating), drivers will check specific points of their equipment listed below:
- Wheels and rims
- Parking brake
- Service brakes - includes trailer brake connections
- Steering mechanism
- Lighting devices and reflectors
- Coupling devices
- Windshield wipers
- Rear vision mirrors
- Emergency equipment
It is important to realize that these minimum DOT inspection requirements are set by the FMCSA, but they might vary depending on the state, type of trucking company, type of truck, or type of trailer. As a professional truck driver, it's your responsibility to perform a thorough truck inspection. Make your life as a truck driver easier and avoid headaches, fines, and preventable accidents by taking the pre-trip inspection process seriously.
Post-trip inspection
We've also added a section for post-trip inspections for when you arrive at your destination or are finished with your trip. It is also best practice to perform a post-trip inspection when switching trailers.
A post-trip inspection consists of:
- Lowering your landing gear.
- Removing the airlines.
- Uncoupling and walking around the trailer to check the lights, tires, seals, and mudflaps.
You have finished your pre-trip inspection!
Congratulations, you have thoroughly checked every component on your pre-trip inspection list. Now, you can hop in your truck and roll out knowing that your truck is in good condition for the road. Release the air brakes, roll forward, and push the service brake!
Truck drivers, don't forget to do your pre-trip inspections! A pre-trip inspection will help you keep yourself and your cargo safe. Not only that, but if you do your truck inspections properly you can avoid costly maintenance and fines from the DOT. Be sure to use our handy pre-trip inspection checklist to make sure you don't miss anything. And if you need a little more help, our team at MigWay is here for you. We help truck drivers drive their careers further by working with a company that values the safety and the success of their team above all else. Ready to hit the road? Give us a call today!
Want to drive with us?
Unmatched time-sensitive deliveries
24/7 solo point of contact
Access to distribution and warehousing services
Damage-free guarantee
Extensive area coverage of US
**Please be aware of scammers impersonating Migway via email. Any legitimate email from us will have an "@migway.com" domain.**
CDL Pre-Trip Inspection Checklist
A thorough pre-trip inspection is a crucial part of a truck driver’s responsibilities. This inspection ensures the safety, functionality, and compliance of your vehicle before hitting the road. By systematically checking key components, you can identify potential issues, prevent accidents, and avoid costly breakdowns or violations.
This pre-trip inspection checklist is designed to guide you through the necessary steps to evaluate the condition of your vehicle. It covers all critical areas, including the engine compartment, brakes, tires, lights, and more. Regular adherence to this checklist not only keeps you and others safe but also helps maintain your vehicle in optimal condition, ensuring you remain in compliance with federal and state regulations.
Pre Trip Inspection Checklist
Download free and print it! Printable Pre Trip Inspection Checklist (PDF)
There are many sections to learn but the test is not as difficult as it may seem. Studying our simplified Class-A pre-trip inspection checklist and taking classes at your local CDL training school will get you prepared.
Engine Compartment
Driver door fuel area, coupling area, light check, in-cab inspection and brake tests, belt driven alternator, belt driven water pump, brake chamber, brake lining, caste nuts and cotter pins, coolant reservoir, gear box and hoses, gear driven air compressor, gear driven power steering pump.
- General Hoses
Leaf Springs
Power steering fluid reservoir, shock absorber, slack adjuster and push rod, spring hanger, steering column, what to check for:.
When checking the engine compartment, you will always want to make sure the following components are properly mounted and secured. You should also make sure they are not cracked, bent or broken. The items you will need to check for include:
- Make sure all of the wires are connected. The belt should not be cracked or frayed and the free play on the belt should be between ½ to ¾ of an inch.
- The free play on the belt should be between ½ to ¾ of an inch. Also check all the hoses running to and from the water pump to make sure nothing is leaking.
- The brake chamber should not be leaking air.
- The brake drum should be properly mounted and secure.
- The brake hose is rubber, so it is important to make sure it is not leaking air.
- Check for oil or debris on the lining. There should be at least ¼ of an inch of friction material.
- Make sure all three caste nuts and cotter pins are present.
- The reservoir should not leaking and must be filled to the manufacturer’s specifications.
- Make sure the drag link is properly mounted and secure, and not cracked, bent or broken.
- The gear box and hoses should have no abrasions, bulges or cuts, and should not be leaking.
- Although the air compressor is hard to see, you must make sure it is properly mounted and does not leak.
- The steering pump is located in the same place as the air compressor and is also gear driven. Ensure the steering pump is not leaking.
General Hoses (Passenger and Driver’s Side)
- The hoses should be secure at both ends. There should be no abrasions, bulges or cuts. Fluids run through these hoses, so it is important to make sure they are not leaking.
- The hub seal (or axle seal) should not be leaking and should be filled to the manufacturer’s specifications.
- Make sure none of the leaf springs have shifted.
- Check for leaks under the truck.
- There should be no lug nuts missing. Look for rust trails, powder residue and cracks around the bolt holes.
- The oil level should be filled to the manufacturer’s specifications.
- Make sure the pitman arm is properly mounted and secure. It should be not cracked, bent or broken.
- Make sure this reservoir is not leaking and filled to the manufacturer’s specifications.
- The rim cannot have any unauthorized welds.
- Make sure the shock absorber is not leaking. If it is leaking, the leak will be at the point where the top and bottom portion of the shock meet.
- With the brakes released and pulled by hand, the push rod should never move more than one inch.
- The spring hanger should be properly mounted and secure.
- Make sure the steering column is properly mounted and secure. It should not be cracked, bent or broken.
- Look for abrasions, bulges or cuts on the tread or sidewalls. Tread depth should have a depth no less than 4/32 of an inch. Tires must be properly filled to the manufacturer’s specifications. This can be checked with an air gauge.
- Make sure the tie rod is properly mounted and secure, not cracked, bent or broken.
- Make sure all are accounted for.
Back to top of Engine Compartment
Catwalk and Steps
Door and hinges, drive shaft, exhaust system, frame and cross members, spring mount.
Again it is important to make sure these items are properly mounted and secure. Look for cracks, bends, and breaks.
- The actual airbag is rubber, so it is important to check for abrasions, bulges, cuts and leaks, in addition to any missing mounting bolts.
- The axle seal should not be leaking and should be filled to the manufacturer’s specifications.
- Make sure to mention the brake chamber is not leaking air.
- Make sure the brake drum is secured properly. Also look for cracks, bends and breaks.
- Check the brake hose at both ends to make sure it is not leaking air.
- There should be no oil or debris on the brake lining. There should be at least ¼ of an inch of friction material.
- The cat walk and steps should be clear of any loose objects.
- Physically demonstrate that the doors open, close and latch properly. Door seals should not be worn, torn or rotten.
- The drive shaft should not be twisted and the u-joints should be free of any debris.
- The tread and sidewalls should have no abrasions, bulges or cuts. The tread depth should be no less than 2/32 of an inch. Tires should be properly filled to the manufacturer’s specifications. This can be checked with an air gauge.
- The exhaust system should show no signs of leaks.
- There should be no unauthorized holes or welds. Bundle up the cross members to ensure none are missing.
- Fuel should not be leaking from the tank and the cap should always be on tight.
- Rust trails could indicate loose bolts, while powder residue and racks around the bolts could mean the bolts have been over-tightened.
- Mirrors should be clean for best visibility.
- Make sure the mud flap is secured properly. Also look for cracks, bends and breaks.
- Make sure to mention there should be never be any unauthorized welds.
- The shock absorber should be secure at both ends and not leaking. If it does leak, it will leak in the middle.
- With the brakes released and pulled by hand, the push rod should not move more than one inch.
- If you are equipped with duals, check to see there is proper spacing between the tires and there is nothing stuck.
- The spring arm should be secure at both ends.
- The spring mount should be secure at both ends.
- Make sure the torque arm is secured properly. Also look for cracks, bends and breaks.
- Make sure to check and mention that no U-bolts are missing.
Back to top of Driver Door Fuel Area
Electric Line
Locking jaws, mounting bolts, release arm, sliding fifth wheel locking pin.
- Air lines should be secure at both ends with no abrasions, bulges or cuts. They should not be leaking, dragging or tangled.
- Make sure the apron is properly mounted and secure. Look for cracks, bends and breaks.
- Make sure there is enough space between the tractor mudflap and the trailer landing gear so that they don’t hit each other when making a turn.
- The electric line should be secure at both ends. There should be no abrasions, bulges, cuts or exposed wires.
- The gap is not an actual item, however there should be no space between the apron and the skid plate.
- The seals should be in good condition with no cracks, signs of rotting, or leaking air.
- Make sure the king pin is properly mounted and secure. Look for cracks, bends and breaks.
- You must physically check that the locking jaws is fully locked around the king pin.
- No mounting bolts should be missing.
- Make sure the platform is properly mounted and secure. Look for cracks, bends and breaks.
- The release arm should be in the fully locked position.
- The skid plate needs to be properly lubed.
- The pin must be in the fully locked position.
Back to top of Coupling Area
Header Board
Landing gear, rear door and hinges.
- Shock Absorbers
Tandem Frame and Release
Trailer tire.
- Again make sure the airbag has no abrasions, bulges, cuts or leakings. The airbag should not be missing any mounting bolts.
- The brake chamber should be properly mounted so that is does not leak air.
- The brake hose should be secure at both ends with no abrasions, bulges, cuts or leaks.
- Check for oil or debris on the brake lining. There should be at least ¼ of an inch of friction material.
- There cannot be any missing cross members.
- The header board cannot have any holes or missing rivets.
- The landing gear must be fully raised and the cradle handle secure.
- Rust trails indicate loose bolts. Powder residue and cracks around the bolt holes could be an indication of over-tightened bolts.
- The rims cannot have any unauthorized welds.
- The rear door should open, close and latch properly. Door seals should not be worn, torn or dry rotten.
- The shock absorber should be checked at both ends for leaks.
- When the brakes are released and pulled by hand, the push rod should not move more than one inch.
- Release handle and locking pins should be in the fully locked position.
There should be no abrasions, bulges or cuts to the tread or sidewalls. Tread depth should be no less than 2/32 of an inch. The tire should be properly filled to manufacturer’s specifications and checked with an air gauge.
- Front of the truck
- Both sides of the truck
- Rear of the truck
- Both sides of the trailer
- Rear of the trailer
Back to top of Trailer
The five functions are:
- Left turn signal
- Right turn signal
- Four way flashers
- High/low beams
- Brake lights
Back to top of Light Check
- Airbrake Test
Air Pressure Gauges
Emergency equipment, heater and defroster, lighting indicators, oil pressure gauge, parking brake, service brake check, water temperature gauge, windshield and mirrors, windshield wipers and washers.
The last section is In-Cab Inspection and Brake Tests. For the In-Cab Inspection you will once again want to make sure all of the following components are properly mounted and secure. As well as the following:
Air Brake Test
There are three stages to an air brake test:
- Applied Pressure Test – When doing the Applied Pressure Test, you will want to build the air pressure to governor cut out. Put the truck in the lowest gear, turn the engine off and immediately turn it back on. Push in the tractor and trailer valves which will then release the parking brakes. Push and hold the brake pedal, allowing the gauges to stabilize. When the gauges have stabilized, announce the Primary and Secondary PSI. Listen for air leaks while doing this.
- Warning Light and Buzzer – Pump down on the brake pedal until the warning light and buzzer comes on. This is typically at or before 60 PSI.
- Tractor/Trailer Protection Valve Pop Out – Pump down on the brake pedal until the tractor and trailer protection valves pop out, this will be between 20 and 40 PSI.
- The air pressure gauges should build to governor cut out.
- Your truck should have a fire extinguisher, three red reflective triangles and spare electrical fuses.
- Demonstrate both the heater and defroster are working properly.
Horns (Air Horn and City Horn)
- Blow both horns to make sure they are working.
- Check the left turn, right turn, four way flashers and high beams; also point these out on the dashboard.
- Make sure transmission is in neutral and then fully depress the clutch. Turn the key on, check the ABS light, announce when it comes on and off, and start the engine.
- The seat belt should not be ripped or frayed and should adjust and latch properly.
- The engine oil pressure gauge should rise to normal operating range.
- Trailer Parking Brakes – Set the trailer brake, release the tractor brake, then tug lightly on the trailer.
- Tractor Parking Brakes – Set the tractor brake, release the trailer brake and tug lightly on the trailer.
- Release both the tractor and trailer brakes. Drive at idle speed. Apply the service brake to make sure you come to a complete stop and that it doesn’t pull to the left or right when applying the brakes.
- The voltmeter should be charging between 13 and 14 volts.
- The water temperature gauge should also rise to normal operating range.
- The windshield and mirrors must be clean, with no obstructions and in proper adjustment.
- Demonstrate the wipers and washers are working properly by spraying the windshield.
Back to top of In-Cab Inspection and Brake Tests
During a CDL pre-trip inspection, truckers inspect many aspects of their commercial vehicle, including the overall safety of the vehicle; major hoses, fluid levels, and vehicle belts; the clutch or gear shift; and emergency equipment. The driver demonstrates their knowledge by walking around the vehicle, checking various safety components and explaining why each part should be checked for safety.

Reference and practice tests:
- Printable Pre Trip Inspection Checklist (PDF)
- CDL Practice Tests
Edited on 8/31/24
How To Pass The CDL Road Test (16 tips that will help)

I bet you are wondering what you need to know (and do) to pass the test?
Don’t worry, I’ve got you covered.
In this article I’m going to share with you 16 practical tips and advice to guarantee you pass the road test your first time.
All these tips I’ve accumulated from many truck drivers and examiners from all over the country.
Follow them and you are sure to pass.
The one thing you won’t find on this page is how to pass the pre-trip inspection.
Tips for passing the pre-trip can be found in this fantastic article .
Enough talking, you need to know how to pass the cdl road test.
Everyone that has a CDL felt the same way you do right now. My goal is to make sure you too pass the road test and in order to help you I put together a list of 15 things to do and/or avoid doing while taking the road test.
The inspector sitting next to you during the test is going to mark you down (and possibly fail you) if you don’t do these 16 things.
One thing that I want to stress is that you have to unlearn some bad habits you have acquired while driving a passenger car.
It’s those little things like turning off your blinker before completely entering a new lane during a lane change and not checking your mirrors enough.
How do I know these are accurate? When I completed the road test (and passed it) I asked the examiner what it was that he was looking for the most.
I tried to remember as much as I could and wanted to share it with future drivers.
Some of these things they don’t tell you about it school but you will be graded on.
- Know The Inside Of The Truck
- Don’t Stall The Truck
- Keep Both Hands On The Steering Wheel
- Start Seeing Speed Limit Signs
- Don’t Talk To The Examiner Too Much
- Look For Posted Weight Limit Signs
- It’s Okay To Be Nervous
- Use Proper Technique When Exiting Your Truck
- Keep Your Eyes Moving
- Don’t Roll Backwards
- Check Your Mirrors
- Changing Lanes: Don’t Turn Off Your Turn Signal Until You Are Completely In The New Lane
- N O Shifting While In An Intersection
1. Know The Inside Of The Truck
This is important because you never know what is going to happen during your test.
What if it starts to rain? You better know how to turn on the windshield wipers.
What if it gets too hot or cold in the cab during the test? You better know how to turn the air conditioning and heat on and off with no problem.
What if it starts to get dark outside? You better know how to turn on your low beams with ease and confidence.
You should be able to do these things by pressing one or two buttons and not fumbling around trying to figure things out.
Make it look like you know the inside of your truck 100%.
This will make you more comfortable with the actual driving maneuvers and the inspector will notice these little things.
Do whatever you can to minimize how much your eyes are off the road for.
Get comfortable with everything in your truck so that you are prepared for whatever happens.
2. Don’t Stall The Truck
This is a big no no.
If you stall the truck you are looking at an automatic fail.
Make sure you know how to drive and drive well because if you stall your truck you won’t pass the test.
3. Keep BOTH Hands On The Steering Wheel
The only times your hands should come off the steering wheel is when you are shifting, signaling, or pressing a button inside the cab related to driving.
BOTH hands need to be on the steering wheel at all times!
Turn off your cell phone before you start the test.
Also, if your phone does start ringing during the test you should ignore it.
Don’t answer the phone or even pick it up to silence the call!
4. Start Seeing Speed Limit Signs
Condition yourself to see every single speed limit sign and make sure you never go over the speed limit at any time.
A good goal is to stay 5 mph below the posted speed limit.
One of the worst things you can do during the road test is to go over the speed limit.
Actually, in some states, with some examiners, you want to make sure you aren’t going to slow.
Usually you are okay going 5mph under the speed limit, but anything less than that and your examiner will probably let you know to pick up the pace a little.
Something that another driver told me he did was this: Starting about two weeks before the exam make it a habit to notice and read out loud every single speed limit sign you see while driving your personal car so that you are used to doing it for the test.
By doing this you are conditioning yourself to never miss another speed limit sign.
5. Don’t Talk To The Examiner Too Much
If you do get an examiner that starts to talk too much be polite and keep your answers short.
Don’t get into any conversation that is not about the test because it will eventually distract you.
You are there to pass the test, not make friends.
Just be polite and zip it.
6. Look For Posted Weight Limit Signs
If you have to go across a bridge of any kind make sure you take notice of whether or not there is a posted weight limit.
A lot of examiners will ask you what the posted weight limit was after you cross the bridge.
You need to be prepared to tell them the correct weight.
Just like its a good idea to notice every speed limit sign the 2 weeks leading up to the exam you should be doing the same for bridge weight limits.
7. Wear A Cap
It sounds crazy but wearing something like a baseball cap makes the side to side checking of your mirrors much more obvious to the examiner.
Pretend you are teaching the examiner how to properly drive.
Pretend like they have never been in a tractor before and you have to demonstrate to them how to pass the driving test.
It makes sure you cover everything you are supposed to and keeps you sharp.
9. It’s Okay To Be Nervous
Being nervous is completely normal but don’t let your nerves get the best of you.
Acknowledge (to yourself) that you are nervous and move on.
Don’t dwell on it or you will be more prone to making a mistake.
If you do make a small mistake (everyone does) the examiner wants to see how you are going to correct it and not let it impact your overall driving ability.
10. Use Proper Technique When Exiting Your Truck
This is one of the most overlooked parts of the test.
When you are exiting the truck make sure you use the proper technique.
You need to have 3 points of contact at all times. This means 2 legs and 1 hand or 2 hands and 1 leg are contacting the truck at all times. No jumping of any kind.
I’ve heard of people not passing the test because of this. Don’t let it happen to you.
11. Keep Your Eyes Moving
During the driving test make sure your eyes are always moving and seeing what is going on around you.
Make sure you are looking way ahead for traffic lights and signs so you can adjust your speed.
Don’t allow yourself to get too comfortable and overly confident.
12. Don’t Roll Backwards
Rolling backwards from a stop is another big no no.
Regardless of the road you are on you should avoid rolling backwards at all costs.
Some examiners will tell you that this can be an auto fail for some drivers.
13. Check Your Mirrors
Make sure you are checking your mirrors at least every 5 seconds.
Keep an eye on where you are in relation to the lane you are in and where other vehicles are.
Do this way more than you would while driving a passenger car.
14. Changing Lanes: Don’t Turn Off Your Turn Signal Until You Are Completely In The New Lane
This is another thing you might not do when you are in your personal car but you can’t do it during the road test.
Make sure the entire truck and trailer are in the new lane before you turn off the signal.
15. Wide Turns
Don’t take tight turns because that is going to get you in trouble.
Make turns as wide and safe as possible.
16. NO Shifting While In An Intersection
This is a big no no too.
Don’t shift while in the middle of an intersection, a turn, or while crossing a railroad track.
Make sure you are in the correct gear when you take off so you wont have to shift until you have completed the turn.
Privacy Policy
COPYRIGHT © 2019 CDL TRAINING SPOT
CDL Skills Test: PRE-TRIP Inspection
This is the web-friendly version of our pre-trip inspection lesson. Visit our YouTube channel to watch a lesson. Go to YouTube . You may download a printer friendly version here. Printable CDL Pre-Trip Guide
There are 4 sections of the truck/bus to concentrate on:
- Engine Compartment + 1 Axle Side
- Back of Truck/Bus + 1 Axle
- *Trailer + Connections + 1 Axle
External Light Check
- In-Cab with Brake Check
* if applicable.
Engine Compartment
You must say at least 2 things about every item you inspect. Point to, or touch, every item that you inspect. You must point out any damaged items that you find to the tester.
Front of the vehicle
Leaks, Leans, and Lights (3 L’s)
LEAKS: Stand in front of the truck. Ensure there are no leaks underneath the engine compartment.
Next, make sure the truck isn’t LEANing to one side which could indicate a suspension problem or low tire pressure.
Last, verify that the LIGHT s on the front of the truck are the proper color, securely mounted, not cracked or dirty, and have no moisture inside.
Check the front of the truck for any other damage. Tell the tester that you’ll note all damage on your Inspection Report.
Under the Hood
There are 3 Fluids, 3 Components, Belts and Hoses to check in the engine area.
3 Fluids to Check
Coolant: verify proper level through sight glass or dipstick; reservoir is properly mounted not cracked; check the hoses for splits or cuts and ensure they are securely mounted at both ends.
Oil: indicate where the dipstick is located and that the oil is at the proper level.
Power Steering: verify proper level through sight glass or dipstick; reservoir is securely mounted and not cracked; check the hoses for splits or cuts and ensure they are securely mounted at both ends.
3 Components
Alternator: securely mounted to engine; wires are properly fastened and not frayed. Belt or gear driven: belt has no more than 1/2" to 3/4" of play, and no cuts.
Water Pump: (follow large hose from bottom of radiator to find w.p.) properly mounted and not broken; no visible leaks: belt or gear driven, belt has no more than 1/2" to 3/4" inch of play and has no splits or cuts.
Air Compressor: no audible leaks and securely mounted to engine; not broken or cracked and belt or gear driven. If belt-driven, belt has no more than 1/2" to 3/4" inch of play and has no splits or cuts.
Belts and Hoses
After properly inspecting the power steering hose and the coolant hose , tell the tester that you would inspect all remaining hoses the same way.
Not all water pumps look the same. Follow the large hose from the bottom of the radiator to the water pump.
After properly inspecting the alternator belt , tell the tester that you will inspect all remaining belts the same way.
Power Steering Box: properly mounted to frame and not cracked or leaking, all hardware present; hose has no leaks and is properly mounted at both ends.
Pitman Arm: not cracked and securely mounted, all hardware is present. Castle nuts and cotter pins in place.
Drag Link: properly mounted at both ends, all hardware present. Rubber bushings: not split or cut and properly greased.
Upper and Lower Control Arms and Tie Rod: not broken and securely mounted, all hardware present.
Steering Axle
Note– not all axles are the same. You must determine which suspension compo- nents are present and inspect those components. Axles consist of suspension, brakes, wheels, and tires.
Spring mounts: spring mounts and hardware are not cracked or broken and properly mounted to frame.
Leaf Springs: not shifted or scissoring; properly mounted to spring hangers.
U-bolts: not cracked or broken, no loose parts, and all hardware present.
Shock absorber: not bent or broken and mounted securely; no visible leaks, rubber bushings not worn.
Brake Hose: hose to brake chamber not split or cut, and no audible leaks, securely mounted at both ends.
Brake Chamber: not cracked or broken, securely mounted, no audible leaks, all hardware is present.
Slack Adjuster: no missing hardware and properly mounted; push rod has no more than 1" of play and is at a 90° angle to brake chamber.
Brake Drum: not broken, no bluing from heat, and no missing hardware.
Brake Pads: not worn dangerously thin (less than 1/4"), securely mounted.
Rim inspect the inside and outside of the rim it should not be broken, securely mounted; no welding repairs.
Tire: sidewalls have no cuts or bulges; tread depth is 4/32" min., evenly worn, check inflation w/ air gauge (do not kick tires); no re-treads on steer tires.
Valve Stem: properly secured and has a metal cap, not broken
Lug Nuts: all lug nuts are present and tight; no rust trails or spidering.
Hub Seal: not cracked or broken, not loose or leaking, all hardware is present.
Side and Back of Truck + 1 Axle
Make It Easy: inspect from Top to Bottom, Front to Rear; Axle Last
Side and Back of Truck
Mirror bracket: properly attached to truck and not broken, all hardware in place.
Door: securely mounted and opens and closes; hinges not broken and securely mounted; rubber seal not split or cut and is properly mounted.
Steps: hold my weight, not loose, no debris.
Fuel tank: not leaking and no loose hardware; cap is tight, seal intact and chain present.
Exhaust: not loose, all hardware present, no evidence of leaks (exterior soot).
Cat Walk and Steps: properly mounted and not excessively dirty.
Frame: not twisted or broken and no illegal welds.
Drive Shaft: not cracked or broken, U-joints not broken and have no foreign objects.
Rear truck lights: proper color, all lights are present, not cracked or dirty, no moisture inside the lens.
Mud Flap: bracket is securely mounted and not cracked, all hardware in place; mud flap not split or cut. DOT tape is securely mounted, not dirty, covers 100% of rear. There is enough space between rear of truck and landing gear for turns.
Drive Axle (s)
Note– not all axles are the same. You must determine which suspension components are present and inspect those components. Axles consist of suspension, brakes, wheels, and tires.
Air Bags: not split or cut, no audible leaks.
Air Bag Mounts: are not loose or broken, all hardware is present.
Connections and Trailer + 1 Axle
Make It Easy: Connections–Start at Rear of Cab, end with Kingpin
Connections
Air Lines should be securely mounted at BOTH ends. All hardware must be present, nothing is broken. Lines have no cuts or splits. No audible leaks. Glad hands are locked in place, not broken, and seals are intact.
Electrical line is securely mounted at BOTH ends. All hardware is present and tight. Lines have no cuts or splits. Safety latches are in place. Lines are not tangled or dragging on catwalk.
Fifth Wheel Assembly
Apron: securely mounted, not cracked or broken. No gap between apron and skid plate.
Skid Plate: properly greased, securely mounted, not cracked. All hard- ware present, none missing. Pivot pin is present, not cracked or broken.
Platform: is securely mounted to frame and not broken, all hardware is present, nothing is loose.
Release Handle: not broken and in locked position.
Kingpin and Locking Jaws: securely mounted and not worn. Locking jaws are secure around kingpin, both are properly greased.
Sliding Fifth Wheel: all hardware is present; air line is securely mounted, no audible leaks, no cuts or splits).
TRAILER Inspection:
Front of Trailer: clearance lights are proper color; not loose, cracked, or dirty, no moisture inside lens. Front of trailer has no holes, all rivets present.
Side of Trailer: no holes in side, all rivets in place. DOT tape is properly fastened, not dirty, covers at least 50% of the side.
Frame is not twisted or broken, all hardware present and tight.
Cross members are in place, not loose or broken, and none missing.
Floor has no holes, securely mounted.
Landing gear is raised, not broken, properly mounted, no missing hardware; handle not broken, securely mounted, and operational.
Clearance light not loose, proper color, not cracked or dirty, gasket not split or cut.
Hoses underneath are securely mounted, no audible leaks, not dragging on ground.
Tandem Slide not bent, properly mounted, pins locked in place; release arm securely mounted, not broken, and in locked position.
Mud Flaps securely mounted, no cuts, and proper distance from tire and ground; ABS light not cracked or dirty, proper color, no moisture inside.
Back of Trailer: clearance lights are proper color, not cracked or dirty, no moisture inside lens; hinges are securely mounted, all are present, hardware is tight; doors not broken, no holes; door seal intact, no cuts, securely mounted; door handles and rods not bent, securely mounted, and operational; lights are proper color, securely mounted, not cracked or dirty, no moisture inside lens; DOT tape is securely mounted, not dirty, covers 100% of rear; bumper is properly secured, not cracked or broken.
Trailer Axle
Make It Easy: Truck first, then trailer
Group similar lights together (headlights and high beams; turn signals and 4-way flashers; brake lights and tail lights).
Follow the flow and you shouldn’t miss any: 4 sides for the truck, 4 sides for the trailer.
Front of truck:
- clearance lights
- headlights, high beams
- left turn, right turn
- 4-way flashers
Side(s) of truck:
- clearance light, turn signals
- 4-way flasher
Rear of Truck:
- tail lights, brake lights
- left turn right turn
Front of trailer:
Side(s) of trailer:.
- clearance light left turn
Rear of trailer:
- tail lights, brake lights left turn, right turn
In-Cab Inspection
Make It Easy: All 5’s
Seat belt: securely mounted, belt has no cuts or frays, adjusts properly, and latches and unlatches.
Horns: ensure that both horns are operational.
Fire extinguisher: properly charged and rated, securely mounted, pin in place.
Triangles: must have 3, not broken, proper color.
Fuses: must have spare fuses or circuit breakers; if vehicle does not use fuses, mention to tester.
After inspecting your safety items,turn the key on and continue your inspection.
Mirrors & windshield: glass not dirty or cracked, no illegal stickers, mirrors properly adjusted.
Windshield wipers: arms properly mounted, not broken, blades have no splits or cuts, wipers and fluid are operational.
Heater/defroster: demonstrate both are operational.
Dashboard light indicators: (turn lights on) high beams, right and left turn signals, 4-way flashers.
Safe Start: tell the examiner these 3 steps before you perform them: parking brake is set, transmission in neutral, and the clutch is depressed. Start the engine and look for the ABS light on the dash to come on and then go off. With the vehicle started, check the gauges.
Oil gauge: operational, rising to proper operating range, no warning light.
Temperature gauge: operational, rising to proper operating range, no warning light.
Voltmeter: operational, proper operating range, 12-14 volts.
Air gauges (2): building air to proper operating range, no warning lights.
Air Brake Tests!
Parking Brake: release trailer brake (push RED valve IN), tug lightly against it.
Service Brake: (brake pedal) release parking brake (BOTH valves should be IN), pull forward to 5 mph, depress clutch and brake while lightly gripping the steering wheel; check if vehicle pulls to the left or right.
Automatic Failure Warning
THE NEXT 4 STEPS MUST BE PERFORMED to avoid an automatic fail on the Pre-Trip
Pay special attention to the notes below regarding the engine and the key.
- Air Compressor check: The engine is running . Perform a Safe Start. Next, fast idle the truck up to 120-140psi, at which point the governor cut-out should occur. You'll hear air release after the cut-out!
- Brakes Applied Test: Turn the engine off, leave the key on, and push-in the air valves . Depress and hold the brake pedal, air gauges cannot lose more than 4psi in 1 minute in a Class A vehicle. (3psi for Class B).
- Low Air Warning: The engine is off, the key is on, the air valves are pushed in . Fan brake pedal until the air gauge reads ~ 60psi at which point a low-air light and/or buzzer should come on.
- Emergency Spring Brakes (Pop-Out): The engine is off, the key is on, the air valves are pushed in . Continue fanning the brakes down to 40–20psi, at which point the brake valves should pop out.
Look at the valves , not the air gauge. Do not pull the valves out! They should pop-out on their own.
Note: Turn the engine off. Turn the key on for the last 3 steps. This simple step will save an automatic failure.
Join 100,000+ Drivers
- Sponsorship
- Thinking of Becoming a Truck Driver?
- Getting a CDL License
- Trucking Driving Jobs Guide
- Trucking Company Guide
- Trucker Life
- Paid CDL Training
- CDL Schools
- Professional Driving Skills + Knowledge
- Owner Operator
- Latest Articles
- Truck Driver Skills
The Pre-Trip Inspection: A Practical Guide For the Truck Driver
Updated February 24th, 2022

- Facebook 426
- Pinterest 1
The pre-trip inspection is an integral part of every road trip for a trucker.
It’s probably the most disliked and most often overlooked part of the job of the professional truck driver in the trucking industry.
This inspection is meant to be a thorough check of the truck, trailer and load.
The check is to ensure that everything is in correct working order, prior to the truck and driver, departing on a trip.
Any damage or issues found during the pre-trip inspection which needs attention, must be addressed before departure.
CDL Test Pre-Trip Inspection
If you just came through the process of getting your CDL, you can breathe a sigh of relief.
You don’t have to check all 500 or so items that you had to memorize for the test every single day.
Out on the road, a thorough pre trip shouldn’t take more than 10 to 15 minutes.
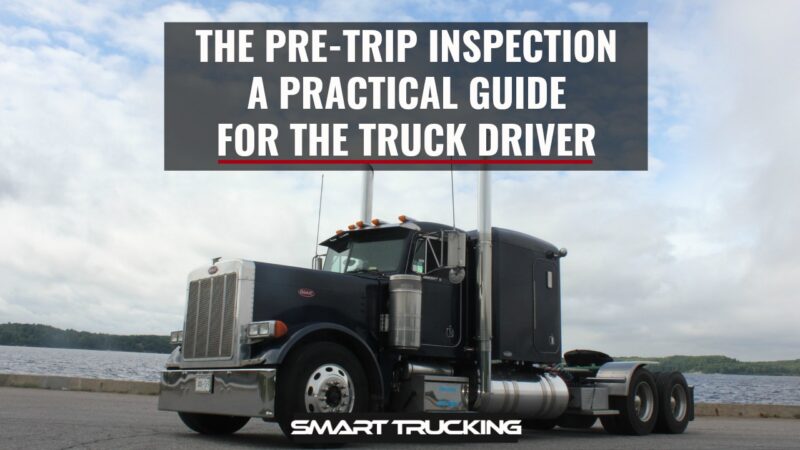
DVIRs – Daily Vehicle Inspection Report
According to federal law ( FMCSR Section 396.11 ), every day, a driver must submit a Daily Vehicle Inspection Report (DVIR) for each power unit he operates. Multiple trailers can go in one report.
DVIRs are either paper or electronic.
Not every trucking company (ahem) enforces this policy, so some truck drivers can go months or years without submitting a DVIR.
Minimum DOT Pre-Trip Inspection Requirements
- Service brakes including trailer brake connections
- Parking brake
- Steering mechanism
- Lighting devices and reflectors
- Windshield wipers
- Rear vision mirrors
- Coupling devices
- Wheels and rims
- Emergency equipment
Your trucking company’s DVIR might be more thorough.
This is a thorough Q&A on DVIRs which you can refer to.

Inspecting a New Truck
When you are assigned a new truck (either daily or just once), there are a few additional things you need to check for on the pre-trip inspection.
Truck Compliance
- Cab card and book – This is a book containing the registration, inspection, permits, cab cards, IFTA paperwork, and any other important papers for the truck. Make sure it is in the truck and all the paperwork is up to date.
- Inspection sticker – This is outside the truck. Find it and make sure the truck is not overdue.
- IFTA stickers – These are the fuel tax compliance stickers. They are on both sides of the truck. Make sure the current year is displayed.
- Elog device – Most trucks are required to have a working elog device.
- Required permits – These are in the cab card book. The most common permits are Heavy Motor Vehicle Trip Permit (Oregon) and the Weight Distance Tax Permit (New Mexico).
- New York HUT sticker – This is usually on the front of your truck. It’s a type of permit.
- License plate – Make sure the license plates on the front and back of the truck match.
- FMCSA Safety Regulations and Hazardous Materials book – These will be given to you by your company. They must stay in your truck within arms reach from the driver’s seat.
- Paper logbook – If your e-log stops working, you must log your hours in a paper logbook, which must be kept in your truck.
- Medical card – You must keep your current medical card in your truck. Always have your CDL on you as well.
- Orange triangles – You must have 3 triangles for when you break down.
- Fire extinguisher – Must be charged and secured to the truck. No rolling around on the floor.
- Extra fuses – If your truck doesn’t use circuit breakers, you must have spare fuses.
- Load bars and/or straps
- Extra oil, coolant, and windshield washer fluid
- Line antifreeze and diesel anti-gel
- Chains and bungees
- Gladhand seals
- Hammer, wrench, wire cutters, cable cutters, knife with glass-breaker
The Class A Pre-Trip Inspection Process
Unless I have to bobtail to pick up my trailer, I inspect my truck and trailer together.
The best way to memorize a thorough pre trip is to do it the same way each time.
Your process will look different from mine, but as long as you are consistent, you will be less likely to miss anything.
I do the inspection first thing each morning as well as every time I swap trailers.
Paperwork and Trailer
- Check the paperwork. It should be the first thing checked when you get to your truck.
- Match the trailer number to your paperwork. If your trailer has a seal, make sure it matches too.
- Unsealed trailer. If your trailer does not have a seal, open it and confirm the product matches the bills. If you are picking up an empty trailer, open it and make sure it’s actually empty.
- Confirm your destination. Ensure the destination is the same as on your trip sheet or load assignment. If there is a discrepancy, call your dispatcher.

I personally like to start with checking under the hood of the rig. Not everyone does, but I do.
Under the Hood of the Truck
I walk around the front of the truck, making sure all the lights work. Then I open the hood.

- Fluid levels – Check all fluids: coolant, oil, power steering fluid, and windshield washer fluid. Make sure caps are tight for the rad, oil filler, power steering fluid and the dip-stick is seated properly.
- Alternator, water pump, power steering pump –Make sure these are in good working order, and the belts are not worn or have too much slack.
- Observe at the engine block. Check for leaks, fluid running down the side of the engine. Check for wear, cracking or fraying. Inspect fan belts for proper tension and signs of wear.
- Hoses – Check all hoses for leaks, cracks, and tears.
- Wiring – Check wiring for wear.
- Steering linkage – Check linkage for worn or missing parts.
- Tires – Tires should be properly inflated and have decent tread. If there are flat spots on the tire, it needs to be replaced.
- Hub seal – Make sure it’s not leaking and wiped with oil if transparent.
- Brakes – Brake chambers should not be out of round and should be free of grease. Shoes should not be worn down too much.
- Slack adjusters – Pull slack adjuster. If it travels more than an inch, it needs to be adjusted.
- Suspension – Shocks should be in good condition, and not covered in grease or oil.
Back of the Truck
Next, I check the back of my truck because it’s easier to check this before hooking to a trailer.
- Tires – Tires should be properly inflated and have decent tread. If the tires have flat spots, the tire needs to be replaced.
- Suspension – Shocks and airbags should be in good condition, and not covered in grease or oil.
- Drive shaft – Driveshaft should be undamaged and free of grease. Make sure there is no debris in the u-joints.
- Frame – The frame should not have any welds and not cracked or significantly rusted.
- Fifth wheel – The fifth wheel should be properly greased and not broken.
- Fuel tanks – Fuel tanks should not be leaking.
- Stairs and catwalk – Stairs and catwalk should be free of debris and not broken.

Tires should be checked with a tire gauge.
Tip . This is especially if you are slip seating. Tire thumpers aren’t very accurate. If you use a tire thumper, still check with a tire gauge from time to time.
Drives and tandems should be inflated to 100-110 psi and have a minimum tread or 2/32in. Steer tires should be inflated to 110-120 psi and have a minimum tread of 4/32in.
Tires under 50 psi should be replaced, as they can’t retain enough air pressure.
Flat spots can occur from dragging tandems in the winter or when trying to slide the tandems. Tires with flat spots should be replaced.
Check tires for damage, nails, and punctures.

Next, I jump in my cab and start my truck.
- Gauges – Make sure air, oil, and water temperature gauges rise to normal levels.
- Mirrors – Adjust mirrors before moving your truck.
- Windshield wipers – Make sure they work and sit flat against the windshield.
- Horn – Make sure the city and air horns both work.
- Heat and A/C – Check to see if heat and/or air conditioning is working.
- Seat belt – Seat belt should not be frayed and should move freely.
Coupling and Air Lines
This is what could happen if you don’t do the tug test.
The pre-trip inspection is a pretty important thing to do.
Learn your pre-trip procedure and do it when required.
This is why you should always do a tug test when picking up a trailer. The passenger side of the front of the trailer is resting on the frame of the truck and NOT hooked up to the 5th wheel.

The front left corner of the trailer is supported by retracted landing gear only. (Not good!)
The truck driver in this photo (hopefully) learned how critical a pre-trip is. Don’t end up in a pickle like this guy.
Next, I hook up to my trailer.
- Tug test – I back under my trailer until I hear a click, and then immediately do a tug test.
A tug test tests both your coupling and your brakes. If you pull away from your trailer, you aren’t hooked properly.
If you pull your trailer with you, your trailer brakes are out of adjustment. Be absolutely sure to write it up and have it corrected before departure.
- 4 Ways + Headlights. I also turn on my four-way flashers and headlights.
- Airlines and pigtails – Next, hook up airlines and pigtails (electrical connection). Inspect to make sure they aren’t leaking or ripped.
- Visual check of Fifth wheel – Look at the fifth wheel arm under the trailer to make sure it is coupled. The arm should be in.
- Landing gear – Raise the landing gear and check for damage.

Next, I check the bulkhead (front of the trailer).
- Wall – Make sure the wall is not damaged.
- Inspection sticker – Check the DOT inspection sticker to make sure it’s not out of date.
- Registration paperwork – Check the front trailer box to make sure the registration is good.
- Reefer unit – If you are pulling a reefer, select the pre trip function on the unit and run it. It should be completed by the time you are finished your pre trip inspection.
Next step for the pre-trip inspection is to check the side of the trailer and the tandems.
- Lights – Lights should be on and flashing.
- Suspension – springs or airbags should be in good condition, and not covered in oil or grease.
- Tandem pins – Tandem pins should be locked in position, and slider arm should be in its cradle.
- Cables – Make sure the tandem cables aren’t dragging on the ground.
- Underbelly – Make sure there are no damaged beams under the trailer. Check the entire length.
- Mudflaps – Mud flaps should not be torn and hanging.
Back of Trailer
Next, I check the back of the trailer.
- Doors – Doors and hinges should not be damaged.
- Door latches – Doors should be closed and secured.
- Seal – Seal should be intact and match paperwork.
- DOT bumper – DOT bumper should not be damaged
- License plate – Check for the license plate. They tend to wear out and fall off.
Passenger Side
Next, I check the passenger side.
- Brakes – Brake chambers should not be out of round and should be free of grease.
- Suspension – Springs or airbags should be in good condition, and not covered in grease or oil.
- Mudflaps – Mud flaps should not be torn.
Ready to Roll

Finally, I jump in my truck and double check my paperwork and destination.
I release my air brakes, roll forward, and push the service brake.
If everything is good, I’m ready to roll.
Post-Trip Inspection
When I’m done for the day, and every time I swap trailers, I do a post-trip inspection. If I am swapping trailers, I do a pre-trip on the new trailer as well.
A post-trip includes:
- lowering the landing gear
- removing the airlines
- uncoupling, and walking around the trailer checking tires, lights, seal, and mudflaps
Then I finish my paperwork and go home.
Slip Seating
If you slip seat (meaning you are in a different truck each shift), your pre- trip check should be more thorough than if you are permanently assigned a truck.
This also applies to the first inspection after being assigned a truck.
Please be courteous and write up any problems or issues found, so the next driver of the vehicle doesn’t have to deal with it.
Side Note: Clean out your truck and throw away any trash. Common courtesy goes a long way in trucking, between drivers.
Pre-Trip Inspection F.A.Q.
Most breakdowns can be avoided with proper preventative measures, such as daily inspections.
Thorough inspections should be done at the start of each shift. Inspections of trailers should be done every time you swap trailers.
Each driver should do a thorough pre-trip every time they swap drivers.
It should take about 10-15 minutes to perform a pre trip inspection.
The DOT. Make sure you stay in compliance so you don’t end up with hefty fines and an out of service.
The best way to memorize your pre trip inspection routine, is to do it the same way every time. That way you’re less likely to miss something. If you have questions, ask your safety team at your company.
Fluids in the engine, engine hoses and wires, brakes and suspension, mudflaps, trailer registration and inspection paperwork, and license plates.
A Few Trip Planning Tips

- Buy and learn to read a trucker’s atlas. It’s useful to plan routes and avoid restricted roads. I find this road atlas a necessity as a professional truck driver.
- Buy a decent trucking GPS , but don’t rely on it 100%. Use common sense.
- Don’t use the GPS in your elog device. It will put you in a lake.
Please note that minimum requirements for the inspection are established by the FMCSA.
But these may vary by state, trucking company, truck type, and trailer type.
It is your duty as a professional truck driver to perform a thorough pre-trip inspection before each trip and before you drive.
You’ll save yourself from headaches, fines and unnecessary accidents.

More Articles You May Like
- Trucking Terms – A Guide to Our Industry’s Lingo
- The 18 Wheeler – A Comprehensive Guide to Big Rigs
CDL Truck Driver Skills – Tips, Tricks + Knowledge to Kick Your CDL Skills Up a Notch!
- The D.O.T. Physical- A Guide For the Truck Driver

Everything You’ll Want To Know About Paid CDL Training
Learn how to talk cb lingo like a trucker, c’mon.

Best Truck Engines + The Worst Truck Engines: A Trucker’s Guide
What you need to know about owner operator vs company driver jobs, twice a month we email you the best tips and new articles to help you better navigate the trucking industry..

10 Truck Driving Safety Tips Every Professional Driver Should Follow
A veteran 40+ years truck driver shares 10 of the all time, tried and true truck driving safety tips ALL professional truckers should know AND follow! If every driver of EVERY vehicle on the road followed these safety tips, our roads would be SO much safer.

Trucker Tips Master Guide: Expert Advice From Experienced Truck Drivers
A collection of trucker tips from million milers and experienced drivers. These are gold nuggets for the new truck drivers!

Instruction, clear advice, videos and photos for truck driver skills, maneuvers and information for all professional truck drivers.
A practical guide to paid CDL training programs. Recommended Company Sponsored Schools, Requirements, pros + cons, what to expect from company-sponsored cdl training programs.

How Witnessing a Fatal Accident Can Affect You: Forever
Truck driving can be a great career. But like any career, there are downsides and sometimes even a dark side. […]

10 Reasons Why Truck Drivers Quit Their Jobs
In the trucking industry, retaining drivers is a constant challenge for trucking companies. Understanding why truck drivers quit is essential […]

The Big Rush For More Truck Drivers To Put Behind the Wheel
It never ceases to amaze me how many regulations govern and control nearly every move we make as truck drivers. […]

Big Rigs, Bigger Dreams: The Best Heavy Haul Trucking Companies, U.S.
Heavy haul trucking is a specialized sector of the trucking industry. It’s a much more challenging driving job than hauling […]
The Fight Against Criminal Record Bias in the Trucking Industry
Truck driving is more than just a job. It’s a lifeline for our communities, delivering goods and keeping the wheels […]
Follow Smart Trucking
- Search search
- ITS Dispatch
- Other Products
Pre-Trip Truck Inspections (11-Step Checklist)

There's a better way to find loads.
Demo the truckstop load board and see how easy it is to find the right loads fast., find your next load, make more money starting now..
The Federal Motor Carrier Safety Administration at the Department of Labor requires a pre-trip inspection by the driver. Any deficiencies must be acknowledged and certified that appropriate repairs have been made before a trip begins.
What is a pre-trip truck inspection?
A pre-trip truck inspection is a thorough check of the truck and its major systems to maintain safety on the road. Inspections need to occur before the start of a driver’s shift and at least once every 24 hours while on the road.
Truck pre-trip inspection needs to be performed by the driver while on duty, but before driving starts.
Why truckers should always perform a pre-trip inspection
Driving a truck is one of the most dangerous occupations, according to the Bureau of Labor Statistics. Drivers of heavy trucks and tractor-trailer trucks suffer fatal accidents more than any other occupation .
A pre-trip inspection checklist helps keep drivers safe. Your inspection is important to ensure safety, maintenance, and procedures are followed to help mitigate liability.
A CLD pre-trip inspection checklist helps uncover potentially dangerous conditions, such as unsecured loads or problems with brakes or steering. While it might be tempting for experienced drivers to skip or shortcut a pre-trip vehicle inspection , it’s never a good idea. “Better safe than sorry” should be the mantra 100% of the time, and drivers shold never skip a thorough pre-trip inspection before a truck hits the road.
Maintenance
A truck driver pre-trip inspection can find minor issues before they become serious. This can save you money on maintenance by solving problems before your trucks get on the road. Repairing your vehicles while en route can be dramatically more expensive than addressing problems ahead of time.
Your DOT pre-trip inspection helps you stay in compliance with Department of Transportation regulations. In the case of an audit, the DOT may review your pre-trip inspection checklist to ensure they have been filled out properly. If the audit shows that issues have been ignored or uncovers a violation, it can lead to fines and hurt your Compliance, Safety, Accountability (CSA) score.

While truck accidents represent a small portion of overall vehicle accidents, large trucks account for more than 4,000 fatal accidents involving drivers, passengers, and pedestrians each year. Even if drivers are not at fault, your liability can increase if you can’t show proof that a pre-trip inspection report was done, was completed improperly, or if known defects were not addressed.
How long should a pre-trip inspection take?
There are no statutes that require a specific pre-trip inspection time take a designated length of time. In practice, an inspection should take as long as necessary to ensure vehicles are safe to drive and have been properly maintained. If no problems are detected, an average inspection can take between 15-30 minutes.
Do not rush inspections. It’s easy to miss things that can put drivers and others at risk.
Pre-trip inspection checklist for truckers
Do you have to log a pre-trip inspection? The answer is yes. Not only are you required to do so by federal law, but you also want the documentation in case of any claims against your company. So, what should a pre-trip inspection checklist include?
Here are some of the most common items:
Inspect the engine compartment.
Inside the engine compartment, check components including:
- Air compressor
- Steering gearbox
- Steering linkage
- Hoses and wiring
Inspect the fuel tank and battery.
Your pre-trip inspection should include a visual check of your fuel tank and battery area to make sure nothing is cracked or leaking. Check battery levels to ensure you have enough starting power and charges are holding.
Inspect the fluids.
Check for fluid leaks by looking under the truck for signs of fluid on the ground, including:
- Power steering fluid
- Brake fluid
- Windshield washer fluid
You will also need to look under the hood to rule out any problems inside the engine compartment. Your pre-trip truck inspection includes checking for adequate fluid levels and the condition of hoses, belts, and wires for safe operation. Pay particular attention to the oil pressure gauge to make sure it’s working properly.

Inspect the brakes.
If your brakes aren’t working optimally, you put drivers and everybody else on the road in danger. A proper pre-trip inspection will include inspecting the brake system both in-cab and externally.
- Truck drivers should check the brake adjustment with the slack adjuster for proper alignment.
- Check brake linings for appropriate thickness.
- Ensure your truck’s air lines aren’t damaged, don’t leak, and are properly sealed.
Brake checks should include air brakes, parking brakes, and hydraulic braking systems.
Inspect the tires.
Inspect tires to make sure you have an acceptable amount of tire tread for safe operation. There should be no cuts, bubbles, or gouges. There should be no foreign objects, such as stones or large debris, between the wheels and no space between tires and rims.
Also, be sure to check and maintain the appropriate air pressure.
Inspect the wheel lug nuts.
Regardless of tire condition, you also need to check the lug nuts. Tighten any loose wheel fasteners. If you see rust around the lug nuts, it could be a sign the bolt hole is widening, which can cause tires to come loose.
Inspect the coupling system.
A failure in the coupling system can cause you to lose your load. Pay particular attention to your kingpin and the sliding fifth wheel locking pin. Then check the other components that connect your trailer to your cab, including:
- Electrical connections
- Locking jaws
- Mounting bolt
- Release arm
Inspect the lights and reflectors.
Exterior lights and reflectors help other drivers see your vehicle approaching and make your rig more visible at night. Check that lights, warning lights, and turn signals are working properly, and lenses are clean for maximum visibility.
Reflectors tend to fade over time from exposure to the elements. Make sure your truck’s reflectors are free of any dirt or debris. They should be intact without cracks, missing pieces, or peeling.
Inspect the trailer.
Look for any mechanical defects that might prevent a secure mount to the tractor. Do a pre-trip truck inspection to look for items such as holes, cracks, breaks, bends, or missing rivets in the:
- Release pins
- Crossmembers
- Release handles
- Locking pins
- Doors and hinges
Inspect the cabin.
Inside the cabin, check seatbelts for any signs of wear or fray and ensure a snug fit. You should also check the operation and functionality of your inside and outside mirrors, seat position, steering wheel, and pedals. Make checking the windshield for cracks or chips standard operating procedure, along with performing a safe start to make sure lights and turn signals are working properly. This includes ABS lights and gauges. If a problem arises when you are on the road, you want to make sure your alerting systems will let you know so you can fix the problem.
You’ll also want to check your windshield wipers and horns.
Inspect the emergency kit.
Trucks are required to carry emergency equipment kits that include:
- Fire extinguishers readily available for use
- At least one spare fuse for each type of fuse needed for parts and accessories
- Warning devices for stopped vehicles, such as bidirectional reflective triangles
- Red warning flags that can be maintained in an upright position
Each item should be in working condition in case of an emergency stop.
Safely haul more high-paying loads.
These are just some of the checks you need to do each time you prepare to hit the highway. Your pre-trip truck inspection checklist should include every aspect of your vehicle and its loads. Ensure you have all the necessary paperwork and documentation to prove the pre-trip inspection was done properly and retain copies for your records.
Once your pre-trip inspection is complete, you’re ready to hit the road and start making money! Find the highest paying loads with the Truckstop Load Board . Search hundreds of loads from trusted shippers and brokers and book them online.
Get a free demo of the load board that delivers more.
- SHARE ON TWITTER
- SHARE ON FACEBOOK
- SHARE ON LINKEDIN
Related Blogs

Truck Fleet Management Tips for Carriers

Personal Conveyance Rules for Owner-Operators

Interstate vs. Intrastate Trucking: Everything You Need to Know
Browse by Topic
- Find Freight
- Get Authority
- Improve Carrier Safety
- Manage Business
- Move Freight
- Protect My Business

Schedule a demo.
Find out how our platform gives you the visibility you need to get more done.
Subscribe to our newsletter.
Get helpful content delivered to your inbox.
You did it!
Please provide email address and choose a newslettter option.
Thank you for subscribing! Watch for an email arriving in your inbox soon.
We are sorry, something went wrong. Please try again later.

Get started for just $39
Basic searching and posting on the internet's most trusted load board.
USD/User/Month**
- done Load Searching
- done Truck/Lane Posting
- done Decision Tools
- done Book It Now
Everything you need to start finding and booking loads now.
Everything in Basic plus tools to weed out slow-paying brokers.
USD/User/Month
Level up your profits with tools that make it easy to make more on every load.
** Price per user. Up to 3 users.
* Amount shown excludes applicable fees & taxes.
Tell us about yourself.
Please check that your entries below are correct.
Please check that your entries above are correct.
Recession-proof your trucking business with this FREE guide!
Get the trucker's guide to 2024: how to succeed in any market today.
- Partner Marketplace
- Terms and Conditions
- Partner Marketplace Terms of Use
- Privacy Policy
- Report non-payment
You did it! Thank you for subscribing! Watch for an email arriving in your inbox soon.
- Subscription Plan
- Newsletters
The Ultimate Guide to Mastering Trucking Pre Trip Inspections

Trucking pre trip inspections are an essential part of a truck driver’s routine. Before hitting the road, truck drivers must conduct a thorough inspection of their vehicles to ensure they are in proper working order. This includes checking various components such as tires, brakes, lights, and fluid levels. The purpose of these inspections is to identify any potential issues that could compromise safety or lead to breakdowns on the road.
Importance of Pre Trip Inspections for Truck Drivers
Ensuring safety on the road is the primary reason why pre trip inspections are crucial for truck drivers. By thoroughly inspecting their vehicles before each trip, drivers can identify any potential safety hazards and address them promptly. This not only protects the driver but also other road users who may be affected by a malfunctioning truck.
Compliance with federal regulations is another significant reason why pre trip inspections are important for truck drivers. The Federal Motor Carrier Safety Regulations (FMCSRs) require truck drivers to conduct pre trip inspections and keep records of these inspections. Failure to comply with these regulations can result in penalties and fines, which can have serious consequences for both the driver and the trucking company.
Preventing breakdowns and delays is yet another reason why pre trip inspections are vital for truck drivers. By identifying any potential issues before hitting the road, drivers can address them proactively, reducing the risk of breakdowns and subsequent delays in delivery. This not only helps maintain a good reputation for the driver and the company but also ensures that cargo arrives on time.
Protecting cargo and equipment is also a critical aspect of pre trip inspections. By thoroughly inspecting their vehicles, drivers can identify any issues that could potentially damage or compromise the cargo they are transporting. This includes checking for secure load restraints, ensuring proper temperature control for perishable goods, and verifying that all equipment necessary for safe transportation is in good working order.
Do not allow a company to tell you the following: oh you can fix it later, or you can fix it after you make delivery.
A lot of trucking company’s will ask there employee drivers to do such.
doing your daily inspection may save your life or others
Understanding the Federal Motor Carrier Safety Regulations (FMCSRs)
The Federal Motor Carrier Safety Regulations (FMCSRs) are a set of rules and regulations established by the Federal Motor Carrier Safety Administration (FMCSA) to ensure the safe operation of commercial motor vehicles. These regulations cover various aspects of trucking, including pre trip inspections.
The FMCSRs require truck drivers to conduct pre trip inspections before each trip and document the results of these inspections. The inspections must be thorough and cover specific components of the vehicle, such as brakes, tires, lights, steering, and suspension. Drivers must also ensure that all required safety equipment, such as fire extinguishers and reflective triangles, are present and in good working order.
Non-compliance with the FMCSRs can result in penalties and fines. The severity of these penalties depends on the nature of the violation and can range from monetary fines to suspension of driving privileges. It is essential for truck drivers to familiarize themselves with the FMCSRs and ensure they are in compliance to avoid these penalties.
A comprehensive pre trip inspection checklist is a valuable tool for truck drivers to ensure they cover all necessary components during their inspections. While specific checklists may vary depending on the company or individual preferences, there are some key components that should be included in any pre trip inspection checklist.
Firstly, drivers should inspect the tires thoroughly. This includes checking for proper inflation, tread depth, and any signs of damage or wear. Properly inflated and well-maintained tires are crucial for safe and efficient operation on the road.
Secondly, brakes should be carefully inspected. This includes checking brake pads, drums or rotors, brake lines, and ensuring proper brake fluid levels. Faulty brakes can lead to accidents or breakdowns, so it is essential to identify any issues before hitting the road.
Lights and signals are another critical component of a pre trip inspection. Drivers should check all exterior lights, including headlights, taillights, brake lights, and turn signals, to ensure they are functioning correctly. This is crucial for visibility and signaling intentions to other road users.
Other components that should be included in a comprehensive pre trip inspection checklist are steering and suspension systems, fluid levels (such as oil, coolant, and windshield washer fluid), mirrors and windshield wipers, and safety equipment such as fire extinguishers and reflective triangles.
Common Pre Trip Inspection Failures and How to Avoid Them
Despite the importance of pre trip inspections, there are common failures that truck drivers may encounter. By being aware of these failures and taking proactive measures to prevent them, drivers can ensure the safety and efficiency of their journeys.
One common failure is neglecting to check tire pressure and tread depth. Improperly inflated tires can lead to increased fuel consumption, reduced traction, and increased risk of blowouts. Drivers should regularly check tire pressure and ensure it is within the recommended range. Additionally, monitoring tread depth is crucial to maintain proper traction on the road.
Another common failure is overlooking brake issues. Faulty brakes can lead to accidents or breakdowns, posing a significant risk to the driver and other road users. Regularly inspecting brake pads, drums or rotors, and brake lines can help identify any issues before they become more severe.
Failure to inspect lights and signals is another common issue. Properly functioning lights are crucial for visibility and signaling intentions to other road users. Drivers should regularly check all exterior lights, including headlights, taillights, brake lights, and turn signals, to ensure they are working correctly.
To avoid these common failures, drivers should follow a comprehensive pre trip inspection checklist, allocate sufficient time for inspections, be meticulous in their approach, and address any identified issues promptly.
Even though An inspection may have been performed, failure can occur at any moment because of mechanical failure, part age or failure.
So after each inspection snap a couple of pictures of the vehicle left side, right side, front, and back. This way if something does fail beyond and outside your control, you have a picture with a time stamp on it. By doing this you may save yourself from a potential lawsuit or getting canned.
Just like humans we all have our failures and so do parts on trucks
Travel Safe Truckersword.com

CB Lingo 101: How to Speak Like a Pro on the Road, warnings ahead
Fuel up with flavor: what are your favorite places to eat.

Leave a reply Cancel reply
You must be logged in to post a comment.
Trending posts

The Top 2 Worst Truck Stops in America: Where Not to Stop for Service

Time For Change Military Government Loads

FRAUD BAINES TRUCKING LLC
Recent posts.


How much will you save with Motive?
Improve your bottom line with Motive’s cutting-edge technology that enhances safety, boosts productivity, and drives profitability.
By industry

Cascade improves safety by 50%, reclaims ~10K hours per year.
With the Motive platform, Cascade has a consolidated view of fleet and spend management across its fleet of more than 3,000 vehicles.
Technical resources

G2 Fleet Management Leader.
Motive ranks #1 in G2 Fleet Management for enterprises; 20% higher than nearest competitor.
Get to know Motive

Missed the Motive Innovation Summit?
Explore the future of logistics and transportation, alongside groundbreaking AI models revealed at our inaugural Summit – Vision 24’.
Talk to Sales or Support 24/7
+1 855-511-3529 Visit Help Center
- Blog »
- Tips for drivers
CDL pre-trip inspection checklist.

A commercial driver’s license (CDL) can put you behind the wheel of a tractor-trailer, a flatbed, or a tanker, among other non-passenger vehicles. Before you hit the road though, you’ll need to complete a CDL pre-trip inspection checklist. By inspecting the commercial vehicle beforehand, you can head out on your route knowing you’ve confirmed major systems and parts are road ready. Recognizing road safety is always a fleet priority . This article provides a comprehensive guide to the CDL pre-trip inspection checklist.
What is a CDL pre-trip inspection checklist?
A CDL pre-trip inspection checklist systemizes the driver’s vehicle inspection to ensure care and consistency. While a pre-trip inspection would be a best practice no matter what, the Federal Motor Carrier Safety Administration (FMCSA) requires these checks for commercial vehicles. Part 396.3 (a) calls on every motor carrier to “systematically inspect, repair, and maintain, or cause to be systematically inspected, repaired, and maintained, all motor vehicles subject to its control.”
The fleet also has to keep formal records of their vehicle checks. So, drivers typically follow a CDL pre-trip checklist and record their findings in the driver vehicle inspection report, or DVIR , confirming the commercial motor vehicle (CMV) inspection is complete.
A CDL A pre-trip inspection checklist requires drivers to inspect many different parts and system including:
- Vehicle lights
- Tires, wheels, and rims
- Windshield wipers
- Emergency equipment
Different motor carriers may add their own expectations to the CDL pre-trip checklist. But they would be adding particular items to check, not doing away with the pre-trip inspection. After all, non-compliance with the federal pre-trip inspection requirements can earn hefty fines and lead to the loss of certifications and licenses.
The Class A CDL pre-trip inspection checklist is important enough that drivers testing for their license are expected to do the pre-trip inspection as part of their examination. Inspection requirements can vary by state. There’s also a Class B CDL pre-trip inspection list.
Why is the CDL pre-trip inspection checklist important?
Compliance isn’t the only reason following the CDL pre-trip inspection checklist is important. The federal requirement is in place, after all, to ensure commercial vehicles on the road are safe to drive.
With continued investment into critical infrastructure over the last 20 years, the percentage of roads in good condition has climbed since 2000. Yet the United States still has hazardous roads. In fact, “from 2000 to 2020, the share of major roadways in poor condition has remained fairly steady, rising from 11.8% to 13.8% over the course of 20 years.”
This makes keeping commercial vehicles in top shape all the more important to safety and efficiency. A CDL pre-trip checklist helps improve fleet safety by avoiding drivers going out on the road in vehicles that are not fit for duty. Taking a truck out on the road with an unsecured load, damaged brakes, disconnected wiring, or another issue could lead to drivers hurting themselves or somebody else.
Fleet vehicle inspections can also help keep drivers on the road. Identifying issues in advance can help avoid major problems that mean downtime and costly repairs. Plus, if the Department of Transportation (DOT) inspects the vehicle and finds something that the driver missed, they can put that vehicle out of service for longer. DOT violations can also lead to fines and hurt your CSA scores . A decrease in your CSA scores can lose your fleet business and cause your insurance premiums to go up too.
How to perform a CDL pre-trip inspection
Although there is no specific time limit, a thorough CDL pre-trip inspection usually takes 15 to 30 minutes. This pre-trip starts at the front of the truck, but you can take the steps in this CDL pre-trip checklist and make them your own.
Front of the truck
Verify lights are clean, securely mounted, the right color, and working. Make sure the truck isn’t leaning. Confirm there are no leaks under the engine compartment.
Engine compartment
Check critical fluid levels. This includes power steering, coolant, windshield washer fluid, and engine oil. Inspect reservoirs, tanks, and hoses for any leaks, splits, or cuts. Ensure the hoses for the water pump, coolant, oil, and power steering are all properly connected and securely mounted. Check the air compressor is well secured. Inspect to make sure the belts on the alternator, pumps, and compressor are secure as well. They should have no more than 1/2″ to 3/4″ of play with no cuts or splits.
Front of the truck/tractor
Inspect the steering shaft and gear box to see they’re properly mounted to the frame and that there are no cracks or breaks. Check gear box hoses for leaks. Look for excessive play in the steering belt, secure connections. Check connections and look for leaks on pitman arm, drag link, and upper/lower control arms and tie rod. Move on to the spring mounts, leaf springs, and U-bolts to confirm they are not cracked or broken and are securely mounted. Do the same with shock absorber but also look for visible leaks and ensure the rubber bushings don’t have dry rot. Check the rubber of the airbag.
Check the hose, chamber, drum, pads and slack adjuster to confirm secure mountings and no leaks. Look out also for any breaks, splits, or cuts. Verify slack adjuster push rod has no more than 1″ of play and is at a 90° angle to the brake chamber. Check the brake drum has no bluing from excessive heat. Ensure brake pads have a minimum thickness of 1/4”.
Wheels/tires
Check tires for cuts, bulges, and abrasions on your tires. Confirm tire tread depth and inflation levels. Check All lug nuts are accounted for and in good condition. Ensure valve stem is properly secured and capped. Look out for unauthorized or illegal welds on wheel rims. Check tires are properly spaced if your tractor/trailer has duals. Confirm the hub seal/axle seal is not loose and has no visible leaks.
Rear of truck
Look at the frame to ensure nothing is broken. Check for unauthorized welds. Confirm the catwalk and steps are properly mounted and kept clear. Ensure the drive shaft is free of debris with unbroken and untwisted U-joints. Verify the exhaust system is secure and look for exterior soot, which could indicate a leak. Make sure mudflaps are also secured at the right height.
Coupling area
Check that the fifth wheel platform, apron, and kingpin are secure, not cracked, bent, or broken. Look for any unauthorized or illegal welds. Confirm skid plate is properly greased. Verify release arm, locking jaw, and slide locking pin are fully locked. See that mounting bolts are tight and none are missing. Ensure glad hands have seals in good condition with no signs of rot or leaks. Secure electric lines with safety latches in place. Check air connector is secure on both ends without cuts or abrasions.
Verify that there are no holes in the trailer’s front, sides, or floor and that all rivets are present. See that DOT tape is properly secured and not dirty. Check that all hardware is present on an untwisted, unbroken frame and that cross members are securely mounted with none missing. Ensure lights are clean, working, and not loose. Confirm landing gear is raised, securely mounted, with an operational handle. Check air lines are securely mounted, above ground, with no audible leaks. Verify tandem slide and release arm are properly mounted and locked.
Truck exterior
Make sure that the truck steps are mounted and secure. Ensure the fuel cap is tight and the tank is not leaking. Demonstrate that the doors latch properly with hinges intact. Ensure mirrors are unbroken and securely attached. Check all the lights and reflectors are working too. This means inspecting the running lights, high beams/low beams, turn signals, hazards, brake lights, license plate lights, and reflector tapes. If driving a hazardous load , ensure you have the proper hazmat placards securely affixed.
Check to ensure your seat belt adjusts and latches properly and that there are no rips or frays. Confirm the shifting distance, room for the clutch, and that parking brake is on. Verify the steering wheel is secure and that the foot pedals are clear of obstruction. When the vehicle is on, look for the ABS light to come on and off. Make sure the windshield wipers, heat and defrost, gauges, and horns are working. Pump the brake pedal several times then apply pressure to the pedal and hold for five seconds to ensure the pedal does not move. For air brakes, confirm applied pressure, warning lights and buzzers, and valve pop-out are all working. Look for three reflective triangles , spare fuses or circuit breakers, and a properly charged and rated fire extinguisher with its pin in place.
Common issues found during pre-trip inspections
While completing a CDL pre-trip list, drivers may encounter any of these common problems. This section identifies common issues, how to address them, and how to prevent future problems too.
Truck is leaning
Using the 3L’s you might see the truck leaning to one side. This could be a suspension problem or indicate low tire pressure.
Fix it by first checking the tire pressure and inflating tires. If that doesn’t address the problem, check the suspension. Driving a vehicle when there is a problem with the suspension, springs, shocks, or struts can cause severe damage to the vehicle.
Broken lights/warning lights
If you detect an exterior light is cracked or broken, fix it before going out on the road. If a light from the on-board diagnostic system comes on during inspection, e.g., “check engine” or “service engine soon,” address that warning as you’ll fail a roadside inspection if that light comes on.
Gas cap missing
Damaged or missing gas caps are a common reason for failed inspections on the road. Don’t set out on your route without replacing the gas cap.
Worn tire tread
Unacceptable or worn tire treads or knots or bulges in tires can also lead to failed roadside inspections. Don’t risk going on your route with substandard tires.
How to prevent future CDL pre-trip list problems
An eDVIR or electronic driver vehicle inspection report allows you to record, compile, and store pre-trip and post-trip information on electronic devices such as computers, smartphones, and tablets. This helps motor carriers and fleets to have a centralized record of inspection history, allowing authorized users to monitor progress, pull reports quickly, and promptly address driver, vehicle, or equipment issues.
Using an eDVIR , you can get out on the road faster with the convenience and accuracy of using a smartphone or tablet to record your data while ensuring your vehicle is safe for operations. Drivers can even take and upload photos to record details and communicate with fleet supervisors for quick troubleshooting.
Making pre-trip inspection checklists easier
CDL pre-trip inspection checklists help systemize the driver’s check of their vehicle before going out on the road. This enhances driver safety and can help reduce accidents. Consistently inspecting fleet vehicles also helps simplify fleet maintenance and avoids failed DOT inspections and reduced CSA scores.
Pre-trip checks are part of the day to day for drivers. Motive’s customizable eDVIR technology simplifies the reporting. Drivers can assess vehicle parts against a built-in checklist in the Motive Driver app, indicate the severity of the issue, and upload photos. Fleet managers get pre-trip inspection reports in real time. Plus, the technology provides advanced reports to help managers analyze health and maintenance trends for all fleet vehicles.
Ensure smooth fleet operations with Motive’s fleet safety software. Learn more today. Contact us to request a free demo.
Want to know more about commercial vehicle driving safety? Check out these tips .

What is paid CDL training? What truckers need to know.

How to save gas while driving commercial vehicles.

How to get your commercial driver’s license in California.
How to spec your fleet vehicles to maximize fuel mileage., fitness tips for truck drivers: how to stay in shape., stay updated.
Subscribe to get the latest news, industry trends, blog posts, and updates.
Please enter a valid email address
Thank you for subscribing!
You will be the first one to receive the latest updates and announcements..
Prime’s Guide to Pre-Trip Inspections
Tractor-trailers can weigh up to 80,000 lb . if you count the semi, trailer and cargo. Operating a heavy tractor-trailer can be dangerous, so drivers undergo extensive training to earn their CDLs and start their careers.
Whether studying for your CDL test or heading to your next customer, pre-trip inspections help you catch problems with your vehicle or trailer. Unchecked issues can lead to accidents or extensive repairs.
Do you know how to perform a pre-trip inspection? Need a quick refresher? Follow our guide to pre-trip inspections to learn the basics. Reach out to our Safety Department for more in-depth information.
Use these quick links to jump to sections of the article:
- The Engine Inspection
- Driver Door Area & Tires
- Trailer Pre-Trip Inspection
Lights & Reflectors
In-cab pre-trip inspection , large truck crash statistics .
Knowing how to operate a semi-truck safely in various conditions is imperative for drivers. In 2019, there were 510,000 large truck crashes, according to FMCSA’s 2021 Pocket Guide to Large Truck and Bus Statistics .
Of these crashes, 4,479 were fatal, and 114,000 were injury crashes involving large trucks. Most fatal large truck crashes involved those weighing more than 33,000 lb.
Accidents happen. Drivers can mitigate their risk of an accident by being responsible behind the wheel , following federal regulations and performing pre- and post-trip inspections.
Your Pre-Trip Inspection Checklist
Drivers must provide a vehicle inspection report at the end of each day. Vehicle inspection reports list any issues that could affect the vehicle’s operation and safety. Inspecting vehicles before and after each trip helps catch problems and keep drivers safe.
At a minimum, each report covers the following parts of a vehicle :
- Coupling devices
- Emergency equipment
- Lights and reflectors
- Parking brakes
- Service brakes
- Steering mechanism
- Tires and rims
- Windshield wipers
Pre-trip inspections take around 15 to 20 minutes. You’ll examine your truck and trailer to ensure it’s ready for the trip.
Before every haul, you should check that you have your license, registration, medical card, updated inspection sticker and FMCSA Safety Regulation manual. If you’re picking up a trailer, always make sure the trailer number matches the number listed on your assignment.
Follow these steps to inspect your tractor-trailer, and watch our video on Prime’s pre-trip inspections . Chock your tires before you begin, so the vehicle doesn’t roll or slip.
Under the Hood: Examining the Engine
Start your pre-trip inspection by looking at the engine. Lower the gear guard so you can open the hood. Remove pins and unlatch the hood to do so. Once the hood is open, step back and look underneath the truck to see if there are any leaks.
Passenger Side
On the passenger side, make sure that your general hoses and alternator are free of cuts, abrasions or cracks. Hoses should be sufficiently secured, exhibiting no signs of leaks.
Driver’s Side
Walk around to the driver’s side and conduct a similar examination. Look at the parts listed below for signs of wear, abrasions and leaks. Your coolant and oil levels should be filled to the manufacturer’s specifications. Keep an eye out for fraying belts, improperly secured parts, and missing castle nuts and bolts.
- Air compressor
- Belt-driven water pump
- Coolant reservoir
- Gearbox and hoses
- General hoses
- Power steering fluid
- Power steering pump
- Shock absorber
- Spring hangers and arm
- Steering linkage
Check Your Brake System
Drivers must check the brake hose, brake chamber and slack adjuster. When pulled by hand, the push rod should not move more than 1” with the brakes released.
Your brake line should be free of debris and oil, and the hose material shouldn’t be worn too thin.
Outside Driver Door Area & Tires
If the engine looks good, inspect the outside of the truck.
- Check your mirror on the driver’s side to ensure it is clean and firmly mounted to the vehicle.
- Open the driver’s door, and examine the door’s seals and hinges for cracks or dry rot.
- The fuel cap should be on tight, and the fuel seal should not leak.
- Ensure that the catwalk and steps at the back are clear of any objects or debris.
In addition to the steps above, drivers should look at the following parts for damage, wear or debris buildup:
- Brake hose, chamber, lining and drum
- Drive shaft
- Frame and cross members
- U-joints and bolts
Check Your Tires (All of Them!)
The tires on your tractor-trailer should have a tread depth of no less than 0.125” and be aired according to the manufacturer’s standards. You can check the air pressure with a gauge and adjust it based on your load and the temperature .
The rims shouldn’t be bent or broken, and there shouldn’t be cracks around the bolt holes. Behind the tire, the mud flap should not be tattered or loosely attached to the vehicle. There should be space between the mud flap and the tire.
Trailer Pre-Trip Inspection
Is the truck good to go? Check! Now it’s time to inspect the trailer. Walk around the trailer and examine it for cracks, abrasions or broken parts.
- Brake hose, lining and chamber
- Frame and cross members
- Shock absorbers
You’ll also want to check that:
- The landing gear is fully-raised with the crank handle secure in its cradle. The landing gear and mud flap should be a proper distance apart.
- The tandem relief’s handle and locking pins are in the fully-locked position.
- The slack adjuster and push rod don’t move more than 1” when pulled by hand.
The back doors of the trailer should latch properly. The trailer’s lock rods and hinges must be intact and not bent. Your trailer should also have door chains for safety when loading and unloading.
Coupling: Back of Tractor, Front of Trailer
A driver’s next step is to examine where the tractor and trailer connect.
- Electric line — Ensure there are no exposed wires. The line should be secure.
- Air line — Your air line should be secured at both ends and not leaking.
- Gladhands — Check for worn or rotted seals on gladhand couplings. Make sure there are no leaks in the gladhands connected to the trailer’s air brakes.
- Trailer apron — No gap should exist between the apron and the skid plate. The skid plate should be lubed.
You should also check the kingpins, mounting bolts, and the sliding fifth wheel and locking pin.
Refrigerated Trailer Inspections
When you inspect one of Prime’s refrigerated trailers , you start by selecting the “pre-trip” option on the trailer’s display. It will take the reefer 10 to 15 minutes to complete a self-inspection and notify you of anything in need of adjustment or repair.
While the reefer’s self-test runs, you should look for any signs of damage on the bottom rail, top rail and sides of the trailer. Reefers are insulated. Drivers need to examine the trailer for cracks and exposed insulation.
You don’t want to drive off without working lights. The lights on your truck and trailer should be securely in place, not cracked and amber in color.
- Clearance lights
- Marker lights
- Headlights
- Tail lights
- Reflective tape on trailer and mud flaps
Once you’ve checked that the lights and reflectors are intact, you should test your lights and turn signals. Climb into your cab and turn the following lights and signals on:
- Left turn signal
- Right turn signal
- Four-way flashers
- Brake lights
Inside your cab, you’ll check that your seat belt latches and is not too worn. Next, check that you have a fire extinguisher that’s charged. Ensure your cab has three reflective triangles under the bunk area and electrical fuses in the glove box.
Once you’ve reviewed your safety gear, adjust your mirrors, start the engine and check the dashboard’s instrument panel:
- Oil pressure — It should be rising as the engine runs.
- Voltmeter — It should show the alternator charging between 13 and 14 volts.
- Air pressure — It should be around 120 to 125 psi.
While you’re here, test the heat and air conditioning, city horn and air horn.
Air Brake Test
With your tires chocked, you can perform an air brakes test. To do so, release both brakes and turn the truck off. When you turn the truck back on, you will apply pressure.
- Apply hard pressure to the brake.
- Watch for the gauges to stabilize.
- Hold a hard brake for one minute. You don’t want to lose more than four psi during this minute.
- Pump down on the brakes until the gauges read at or before 60 psi. Your warning light and buzzer should come on.
- Pump down on the brakes until the tractor and trailer valves pop up between 40 to 20 psi.
Parking Brake Test
After testing your air brakes, you can test your parking brake. Allow the truck to rebuild its air pressure before testing the parking brakes.
- Remove wheel chock.
- Release the tractor brakes and apply the trailer brakes.
- Put the truck in “drive.”
- Give your trailer brakes a light tug, ensuring they hold.
- Switch. Release the trailer brakes and apply the tractor brakes.
- Give your tractor brakes a light tug, ensuring they hold.
- Release both brakes.
- Pull forward to 5 mph, then use the brake pedal. The truck shouldn’t pull left or right. It should come to a smooth stop.
What to Do if There’s an Issue During Pre-Trip Inspection
Contact your fleet manager or road assistance immediately if you find an issue with your tractor or trailer. Prime will take corrective action and advise you on what to do next. Repairs must be made before the tractor-trailer can be dispatched again.
Inspection violations affect both the driver’s and carrier’s records. Violations can decrease a carrier’s CSA score . FMCSA keeps records of driver and vehicle violations. These records are updated monthly.
CDL Pre-Trip Inspection Test
Truck drivers must begin each work day with a pre-trip inspection. The Class A CDL test requires new drivers to know how to do a pre-trip inspection. Student drivers must be able to identify truck and trailer parts and understand how they operate.
You’ll walk an examiner through a pre-trip inspection for that portion of the CDL test. The best way to remember what’s on a pre-trip inspection checklist is to perform inspections the same way each time. The more you practice, the more it will become second nature.
Are you ready to become a driver?
Do you need CDL training? Our Driver Training Program prepares you for your CDL exam and offers experience hauling real loads.
Apply online to start our CDL training program, or contact our Recruiting Department at 866-290-1568 for details.
Recent Posts

7 Easy Stretches for Lower Back Pain Relief

10 Semi-truck Organization Ideas: Easy Cab Storage

10 Construction Zone Safety Tips for Truck Drivers
Transportation solutions, carrier solutions, drive for prime, work in house, success leasing.
Created by: Campaignium
Privacy Overview
- Company Culture
- Company Programs
- Leadership Team
- Fleet Maintenance
- Refrigerated Division
- Flatbed Division
- Tanker Division
- Intermodal Division
- Load Tracing
- Documentation
- Qualifications & Expectations
- Pay & Benefits
- Driver Training Program
- CDL Holders
- Driver Awards
- Salt Lake City
- Pittston, PA
- Springfield, MO
- Jobs At Prime
- View Available Loads
- Prime Power Fleet
- Lease & Lease Purchase
- Benefits of Leasing
- How to Get Started
- Pedigree Benefits
- Financing Information
- Equipment Inventory
- Omnitracs Logs
- Company Store
- Submit Pics from the Road
- Driver Verification
- New Drivers - 1st License
- Defensive Driving
- CDL Practice Tests
- Air Brakes Courses—CDL & RV
- Log Books - US & Canada
- CDL Pre-Trip
- Learner's Permit
- Motorcycles
- Newly Licensed Driver
- Driving Test SHORTS
- Smarter Car Care
- SHORT Driving Tips
- Winter Driving
- Crash Analysis
- Air Brake Valves
- United States
- CDL Beginner
- CDL Turning
- CDL Pre Trip Inspection
- CDL Coupling
- Driving Instructors
- Pass CDL Air Brakes - Free
- Can't Log In
- Live Q & A
- Expert Witness
- The Founder
- 100K Campaign
- Smart Driver Success Stories
- Funny Driving Memes
Cannot find your purchased courses? Click here to Login!
- Commercial Drivers
- Pre Trip Inspection
Pre-trip inspections must be completed more often than every 24 hours.
How to Fill Out the CDL Pre-trip Inspection Form
https://youtu.be/SZ5K0G_dPnY
Introduction
All your training...all the manuals will tell you that you have to do a pre-trip inspection every day.
On a daily basis, you have to do a pre trip inspection.
That information is not entirely correct, and if you go on that information and you just do a pre-trip once a day , you're probably going to get a fine if you get pulled into the scale house.
So, we're going to tell you when you need to do a pre-trip and give you the specific information, so you don't get a fine you don't end up working the day for free.

When To To A Pre-Trip Inspection
Doing a pre-trip daily—doing a pre-trip inspection daily—is not accurate.
In terms of when you have to do a pre-trip inspection:
1) Minimum every 24 hours.
2) As well, anytime that you pick up new equipment you have to do a pre-trip inspection on that vehicle or that trailer.
3) The other time that you'll have to do a pre trip inspection as well, is if you're working with another driver keeping a unit going twenty four hours a day and you're working 12 and 12, or three drivers working 8-8 and 8.
You have to do a pre trip inspection on the piece of equipment that you're driving.
It is more relevant to semi trailer drivers because often you're picking up one, two, three, or four trailers in a day.
Every time you change trailers, you have to do a pre-trip inspection on that trailer.
Every time you pick up a new trailer , you have to do a pre-trip inspection.
Bus drivers the same, you get in a different unit you have to do a pre-trip inspection.
The other driver comes in, you're gonna do a pre-trip inspection because that driver was ten miles down the road and picked a nail up in one of the tires - the tire's flat.
Well...that driver is more interested in getting home than they are in doing a post trip inspection on that vehicle.
So you're going to have to do a quick walk around before you take off.
So the three times that you do a pre-trip inspection:
1) minimum 24 hours;
2) every time you get new equipment;
3) and when you're working the same piece of equipment with another driver.
Don't put your driver's license on a pre-trip inspection form or log book. If the thieves get hold of your license number it's very easy to steal your identity.
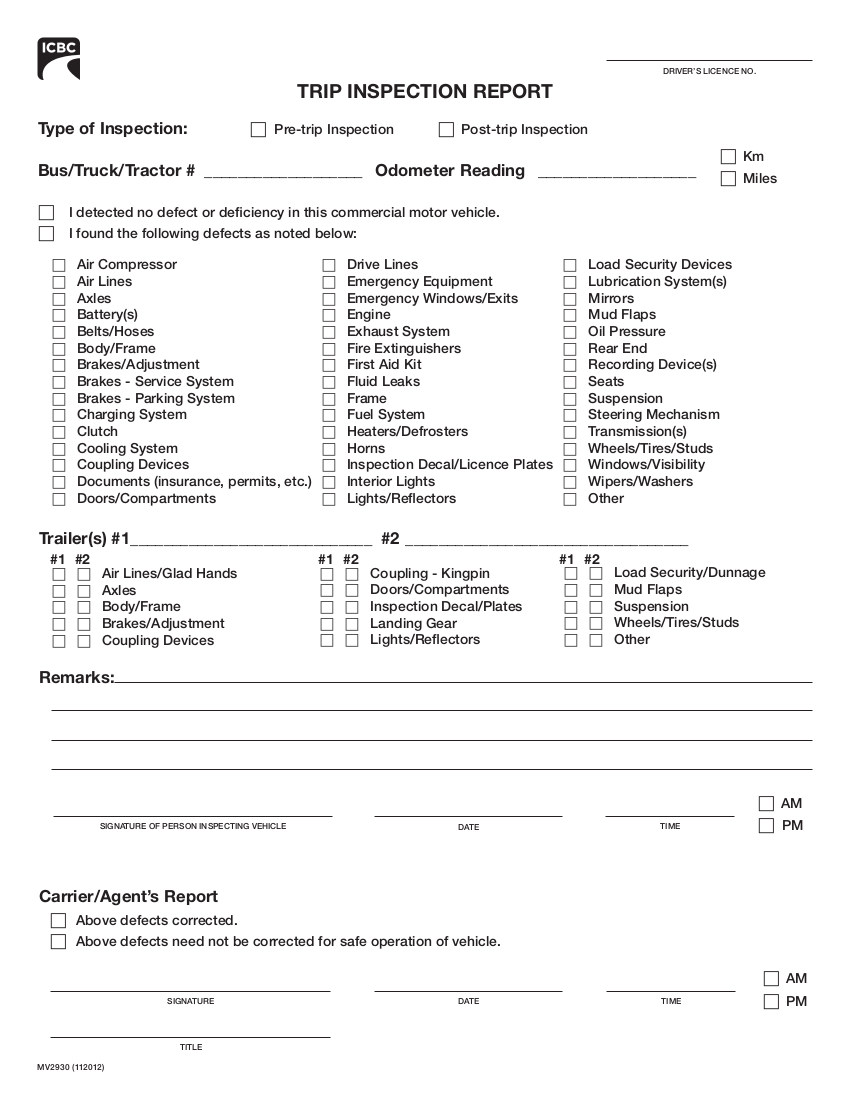
Pre-trip Inspection Forms
You have to fill out a pre-trip inspection form every time that you do a pre-trip inspection.
I'm gonna show you two pre-trip inspections today because one of the pre trip inspection forms is older and has a place on it for the driver's license.
And you can see that here.
Up here on the ICBC pre-trip inspection form that we use in British Columbia— ICBC as the Insurance Corporation of British Columbia.
Somehow an insurance company in British Columbia became responsible for driver licensing.
I don't know whether there is a conflict of interests there or not - maybe...maybe not?
The point is is that we no longer put driver license numbers on any of our legal documents - the log books or the pre-trip inspection forms because of freedom of information legislation and identity theft.

So don't put your driver's license number on; however, the unit number for the truck, the date, the time you started the pre-trip.
The reason that you put the time for the time that you start the pre trip is theoretically if you drive out of the yard and the DOT officer pulls you over right away and you put the end time on, well, they say:
"When did you do your pre-trip, if you're driving?"
So put the time that you started the pre-trip inspection on the form.
As well, am-pm.
There's two boxes - one box is:
1) "I detected no defects for the safe operation of this vehicle."
Check that box if you didn't find anything wrong.
If you did find something wrong:
2) "I found the following defects with this vehicle," check that box.
And then check the appropriate box in the list that you can see here behind me.
So, for example, if the fire extinguisher wasn't charged, you would check safety equipment and then write in the notes that the fire extinguisher isn't charged.

Now, you have to have a fire extinguisher in the vehicle as per the regulations; therefore, it's a major defect and you have to get it fixed before you go.
If you have a clearance light out, that's a minor defect and you can go without having it repaired.
So trailers, we have multiple places for more than one trailer, first-trailer, second-trailer, third-trailer, put that in.
If there's any defects with the trailer, check the appropriate box.
On the top of the ICBC form you can also see there's a starting odometer - starting odometer number goes in there as well.
Down on the bottom here of the ICBC form is where you sign, date, and put the time that you started your pre trip inspection.
The bottom of the ICBC form—down here, right at the bottom of the form—is for the carrier.
If you noted something was wrong with the vehicle that you're driving, the carrier signs off that they repaired it if in fact they did repair it.
So they - the bottom piece here is for the carrier, for the mechanic, or whomever is going to fix your vehicle, if you noted that there's something wrong.

Log Book Pre-Trip Form
Now, the other form that you see here is a more common form.
It's on the bottom of the log book sheet, and it has a space right about me here for post trip, pre trip, the date, the time, the location where you did your pre trip inspection.
So if you're running long haul, you're gonna have to put the location where you did it.
So, for example, if you're in Calgary, Alberta, you're gonna put Calgary, comma, AB.
AB is short form for Alberta.
If you're in Washington—Spokane, Washington—for example, you're gonna put:
Spokane, WA.

Now the other thing that's important to note on your pre trip inspection is that the location and the time match up with what's on your logbook - if you're keeping a log book.
Those two forms have to match up exactly.
If you get pulled into the weigh scale, pulled over by authorities, they're gonna look and they're gonna make sure that the time in your pre-trip inspection form and the time on your logbook match.
As well, on this form, you have the location for your home terminal up here in the corner.
Sign and date for the driver down in the bottom and I've talked about this in previous videos on log books .
Legal Document
The pre-trip inspection is a legal form.
If you have a crash and there's a legal investigation they're going to look at your pre-trip inspection forms and make sure that you did not detect any defects with that vehicle.
They're going to go back through the pre-trip inspection forms and make sure that the driver didn't note a defect on that vehicle for weeks at length of time and the carrier that you're working for didn't fix that.

Starting and ending odometer must match what's on your logbook.
So the two things that need to match in your logbook:
1) the location and the time;
2) and the starting and ending odometer.
Sign and date the document.
And then finally, on this log book here, you can see: "above defects need not be corrected for the safe operation of the vehicle."
Also, if something was fixed, you check the appropriate box, or something doesn't need to be fixed, but there was a defect noted.
As well, in this form here, you can see the unit number for the tractor.
So those are two different pre-trip inspection forms .
They're essentially the same information - little bit different.
The one on the bottom of the pre-trip inspection form [logbook] has a location.
It also has signature and date as they both do, but in different locations.

In conclusion, when do you do a pre trip inspection form:
2) every time you pick up new equipment;
3) if you're working the same piece of equipment with another driver.
Pre-trip inspection forms are essentially the same.
They all have the same information, the time that you start, check boxes for "defects need not be corrected for the safe operation of the vehicle."
Note whatever defects there are, check the box that defects noted - check the appropriate box if its lights.
Check the "light" box.

Make a note in the comment.
Sign, date - it is a legal document; starting & ending odometer, and the time on your pre- trip inspection form, and the location must match what's on your logbook.
On the note of post-inspections in British Columbia, the legislation states that you do not have to do a post trip inspection unless you noted some sort of defect or found a defect during the course of your day.
If you note a defect during the course of the day, you can put that information on the same pre-trip inspection form.
You don't have to fill out a new one.
If you did that, you need to do a post-trip inspection.

CLICK to Learn the Fundamentals of a CDL Pre-Trip Inspection
You can note the post-trip inspection on your pre-trip inspection form, but for the most part, it's not required by law in most jurisdictions; however, a lot of times a post-trip inspection can be company policy.
If it's company policy then you'll need to do a post-trip inspection.
And on most of these pre trip inspection forms, there is a spot for a post-trip inspection check box - you just check that.
Finally, if you get some of these old log book forms , there will be a place for your driver's license number.
You no longer have to put your driver's license number in because of freedom of information legislation and identity theft.

5 Things To Know Before Taking Your CDL Pre Trip Test

CDL Pre Trip Inspection Test Class A

5 Tips to Memorize the CDL Pre Trip Inspection

How To Remember Pre Trip Inspection CDL

CDL Pre Trip Inspection | The Work Pre-Trip

How to Read the CDL Motor Vehicle Inspection Decal

Tips for Avoiding Tire Violations | Roadcheck 2016

CDL Pre-Trip Inspection of Tires to Pass Test

CDL Pre-Trip Inspection Absolutes
© Smart Drive Test Inc. 2024.
Contact Us: [email protected]
Get Your DOT Inspection Checklist

- Register / Login
- Trucker's Forum
- Paid CDL Training
- Truck Driving Jobs
- CDL Practice Tests
- High Road Training
- Pre-trip Fail= Fired
Topic 32770 | Page 1
- General Category

Every driver knows the importance of a proper pre-trip inspection; it’s ingrained in us beginning with our first days in CDL school. Every day we log a pre-trip and post-trip inspection on our ELDs. But addressing the findings in the inspections is just as important as the inspections; just ‘going through the motions’ or putting off repairs until later or leaving them for the next driver can have very dire consequences. The following is a real example that happened to a friend of mine. Identifying names have been changed.
“Trent” picked up a tanker trailer needed for that morning’s live load. He identified several defects during the pre-trip that he determined would make him late for the live load if he either had the defects fixed or requested a different trailer. Trent was an experienced driver, with 10+ years under his belt working with tankers. He was confident that with the defects, he could still get loaded without further complications, deliver the load 1500 mi away, and offload the product safely, making a few adjustments (having pulled tankers for 5 1/2 years, I’m very familiar with problem-solving and getting product offloaded when faced with unexpected opportunities... so that's not really a thing).
Trent proceeded to the live load with the trailer, not wanting to cause the company time or money by arriving late to or having the load appointment rescheduled, got loaded on time as the defects weren’t obvious or visible to the untrained eye, and departed for his destination 1500 mi and three states away. Driving through Arizona, he was pulled for a random DOT inspection (his first Level 1 inspection in nearly five years), but not by any ordinary DOT officer, a HAZMAT-certified DOT inspector (he had a special patch on his uniform identifying him as such), who very quickly identified some issues with the trailer. They moved the inspection to the next exit where the officer could spend more time crawling over the trailer, where he found and cited Trent for all the trailer defects.
Apparently none of the defects were ‘out-of-service’ defects, as Trent was able to continue with the trailer, but they did all fall under the same category of load securement. The inspection report was uploaded and made available several days later, after Trent made his delivery and was underway on his next load. He did inform his company of the inspection, who then took a ‘wait-and-see’ approach, as no one knew exactly how bad the report was going to be. The total score on the report wasn’t the worst score the company had ever seen, but apparently no one in the safety & regulatory department had seen a score that high in one category.
After some discussion within the safety and regulatory department, it was determined that Trent had to be let go. His prior years of service and experience couldn’t save his job from the extraordinarily high score he received from the inspection in a single category. Making a decision he thought was going to keep the wheels of his company running smoothly, efforting to keep from disrupting load and delivery appointments, the end result is he incurred a ridiculously high CSA score that impacted his company and his company’s drivers as well, and effectively ended his driving career for at least three years. He did tell me he knew of someone who would have brought him on board, someone who owned a small trucking company comprised of refeer and heavy-haul trucks (I know, odd combination!), but my guess is that the opportunity leaned toward the sketchy end of the scale, because he never gave it serious consideration. He is currently not driving and starting anew in an entirely different profession.
The lessons here are obvious: responsibility of the driver lies not only in thorough pre- and post-trip inspections, but in follow-up actions whenever defects are found. DO NOT risk your career, safety, or the public’s safety over one load that you may be late on or lose altogether as a result of spending extra time fixing truck or trailer defects. It’s just not worth the gamble.
Pre-trip Inspection:
A pre-trip inspection is a thorough inspection of the truck completed before driving for the first time each day.
Federal and state laws require that drivers inspect their vehicles. Federal and state inspectors also may inspect your vehicles. If they judge a vehicle to be unsafe, they will put it “out of service” until it is repaired.
Commercial Driver's License (CDL)
A CDL is required to drive any of the following vehicles:
- Any combination of vehicles with a gross combined weight rating (GCWR) of 26,001 or more pounds, providing the gross vehicle weight rating (GVWR) of the vehicle being towed is in excess of 10,000 pounds.
- Any single vehicle with a GVWR of 26,001 or more pounds, or any such vehicle towing another not in excess of 10,000 pounds.
- Any vehicle, regardless of size, designed to transport 16 or more persons, including the driver.
- Any vehicle required by federal regulations to be placarded while transporting hazardous materials.
Hazardous Materials
Explosive, flammable, poisonous or otherwise potentially dangerous cargo. Large amounts of especially hazardous cargo are required to be placarded under HAZMAT regulations
Compliance, Safety, Accountability (CSA)
The CSA is a Federal Motor Carrier Safety Administration (FMCSA) initiative to improve large truck and bus safety and ultimately reduce crashes, injuries, and fatalities that are related to commercial motor vehicle
Department Of Transportation
A department of the federal executive branch responsible for the national highways and for railroad and airline safety. It also manages Amtrak, the national railroad system, and the Coast Guard.
State and Federal DOT Officers are responsible for commercial vehicle enforcement. "The truck police" you could call them.
Operating While Intoxicated
Out-of-Service:
When a violation by either a driver or company is confirmed, an out-of-service order removes either the driver or the vehicle from the roadway until the violation is corrected.

Good post, Pete!
"Captain of the Ship"

For the sake of learning, are you able to provide information on the defects and how it was written up?
Thanks for the case-in-point lesson on the importance of doing even the little things right.
For the sake of learning, are you able to provide information on the defects and how it was written up? Thanks for the case-in-point lesson on the importance of doing even the little things right.
The defects were tanker-specific... an air valve on top of the trailer was missing its handle, making it difficult to tell if it was open or closed; it was open, and a little product leaked out through the air valve. There was also something about a vacuum that developed inside the trailer that I'm not sure if was related to the air valve or not... but driving at altitude seems to have affected it, the dog ears securing the dome lid on top loosened a bit, so additional product leaked out through the dome lid. I've personally never experienced that, and I've certainly driven at altitude, but then I've never pulled a trailer loaded with product with valves open. To that issue I'd recommend to all tanker drivers to be sure after getting loaded, even if not allowed on top of the trailer while on the shipper's property, to immediately pull over when off the shipper's property and climb on top with a mallet and make sure the dome lid is secured tightly. That's always been a habit of mine, and have found on at least two occasions where the person who loaded my trailer did not close the lid very tightly.... ... I cannot say how it was written up, as I never asked my friend for a copy of the report he received, and he did not go into detail other than to say the defects were all found under one category. If you find trailer defects, get them fixed.
The customer who is shipping the freight. This is where the driver will pick up a load and then deliver it to the receiver or consignee.

You have to stay on top of your company shop, too.
For the sake of professionalism, I'm not going to sandbag anyone on a public forum, but from some recent experiences I've had, if your internal shop won't fix issues you know need fixing, escalate to a fleet manager or higher. Don't let someone else's laziness or lackadaisical attitude sway you from addressing problems that you know need to be solved.
Fleet Manager:
Dispatcher, fleet manager, driver manager.

I had a nightmare trailer. It took three shops (one at the terminal , and two on the road) to convince them it was an auto inflator issue, and the sensor was going off, because the damn thing was dropping the tire pressure to 85psi. First thing I had done, when the warning popped? Got out the manual guage. Used my gladhand air chuck to fix the psi, then bam. Inflators would bring it back down.
You have to stay on top of your company shop, too. For the sake of professionalism, I'm not going to sandbag anyone on a public forum, but from some recent experiences I've had, if your internal shop won't fix issues you know need fixing, escalate to a fleet manager or higher. Don't let someone else's laziness or lackadaisical attitude sway you from addressing problems that you know need to be solved.
A facility where trucking companies operate out of, or their "home base" if you will. A lot of major companies have multiple terminals around the country which usually consist of the main office building, a drop lot for trailers, and sometimes a repair shop and wash facilities.
What are the various categories for an inspection report? I am not asking for myself so much as for the benefit of the community.

an air valve on top of the trailer was missing its handle, making it difficult to tell if it was open or closed; it was open
The Chicago valve?
Funny you mention that. I had to take a trailer with a pesky ABS sensor that took 3 shops to iron out in Amarillo last month. Both TA and Speedco failed to fix it. Finally, it had to goto Utility.
I had a nightmare trailer. It took three shops (one at the terminal , and two on the road) to convince them it was an auto inflator issue, and the sensor was going off, because the damn thing was dropping the tire pressure to 85psi. First thing I had done, when the warning popped? Got out the manual guage. Used my gladhand air chuck to fix the psi, then bam. Inflators would bring it back down. You have to stay on top of your company shop, too. For the sake of professionalism, I'm not going to sandbag anyone on a public forum, but from some recent experiences I've had, if your internal shop won't fix issues you know need fixing, escalate to a fleet manager or higher. Don't let someone else's laziness or lackadaisical attitude sway you from addressing problems that you know need to be solved.
New! Check out our help videos for a better understanding of our forum features
" data-commandafter="
Click on any of the buttons below to insert a link to that section of TruckingTruth:

Why Join Trucking Truth?

- The High Road Training Program
- The High Road Article Series
- The Friendliest Trucker's Forum Ever!
- Email Updates When New Articles Are Posted
Apply For Paid CDL Training Through TruckingTruth
Did you know you can fill out one quick form here on TruckingTruth and apply to several companies at once for paid CDL training? Seriously! The application only takes one minute. You will speak with recruiters today. There is no obligation whatsoever. Learn more and apply here:
- Privacy Policy

An official website of the United States government Here's how you know
Official websites use .gov A .gov website belongs to an official government organization in the United States.
Secure .gov websites use HTTPS A lock ( Lock A locked padlock ) or https:// means you’ve safely connected to the .gov website. Share sensitive information only on official, secure websites.
FMCSA Frequently Asked Questions Relating to the Waiver of Certain Pre-trip Vehicle Inspection Skills Test Requirements for Certain School Bus Drivers
The Federal Motor Carrier Safety Administration’s (FMCSA) waiver, effective January 3, 2022, permits States to waive the engine compartment component of the pre-trip vehicle inspection skills testing requirement in 49 CFR 383.113(a)(1)(i), known informally as the “under-the-hood” component, for commercial driver’s license (CDL) applicants seeking the school bus (S) and passenger (P) endorsements and the intrastate only (K) restriction. Drivers issued a CDL pursuant to this waiver are restricted to intrastate operation of school buses only.
Additionally, FMCSA waives the requirement in 49 CFR 383.133(c)(1) that States administer this portion of the pre-trip vehicle inspection test in accordance with an FMCSA pre-approved examiner information manual. The FMCSA issued this waiver in response to multiple requests that the Agency provide regulatory relief to address the growing shortage of school bus drivers, which has been exacerbated by the Coronavirus 2019 public health emergency. This waiver is intended for individuals who will operate school buses in intrastate commerce exclusively.
This FAQ document will be updated as additional questions are received.
Question 1: What is the purpose of the waiver?
Answer 1: The purpose of the waiver is to increase the number of school bus drivers by allowing persons to obtain a CDL to operate school buses only in intrastate commerce. An individual licensed under this waiver is not allowed to operate in interstate commerce or operate any commercial motor vehicle other than a school bus.
Question 2: Should drivers who currently hold a CDL be tested in accordance with this waiver?
Answer 2: No. This waiver is intended for individuals who do not currently hold a CDL and are seeking to operate school buses only in intrastate commerce. Individuals who currently hold a CDL and are looking to add a school bus endorsement to an existing CDL are not covered by this waiver and should be tested with the “under the hood” components.
Question 3: Does the waiver require the CDL license to have the K restriction?
Answer 3: Yes. Drivers issued a CDL pursuant to this waiver must be restricted to the intrastate operation of school buses only. The K restriction is the way to identify this limitation on the CDL.
Question 4: If a State decides to adopt the waiver, how does it affect the process for issuing the P endorsement and the S endorsement?
Answer 4: If the individual is seeking to operate a school bus in intrastate commerce only, the State can offer the applicant the skills test without the “under the hood” component, as described in the waiver. In these cases, the issued credential must have a K restriction and a school bus only restriction. If the individual is seeking a CDL with the S and P endorsements with no restrictions, the State is required to test the applicant in accordance with current testing procedures. The State should explain these two options to applicants, so they understand the implication of choosing the restricted license.
Question 5: Is a driver with an existing P endorsement allowed to test for the S endorsement under this waiver?
Answer 5: No. If a driver currently holds a CDL with a P endorsement, a State should not test the individual under the terms of this waiver. The State would test the CDL holder in accordance with current testing procedures for the S endorsement.
Question 6: If a driver already has a Class A or Class B CDL and decides to pursue a school bus and passenger endorsement under this waiver, do the K and school bus-only restrictions only apply to the driver’s school bus operations? Could the driver still operate a Group A property-carrying vehicle in interstate commerce?
Answer 6: No. This waiver is intended for individuals who do not currently hold a CDL and are seeking only to operate school buses in intrastate commerce. Individuals who currently hold a CDL and are looking to operate a school bus or commercial passenger vehicle are not covered by this waiver.
Question 7: How should States score skills tests administered pursuant to this waiver?
Answer 7: If a State issues CDLs under this waiver, the State can decide how to score the items that have been waived to achieve the goals of the waiver, including giving applicants credit for the engine compartment portion of the skills test. The waiver waives 49 CFR 383.133(c), which requires that States administer and score the CDL skills test based solely on the standards contained in the FMCSA pre-approved examiner information manual that conforms to the AAMVA Test Model (49 CFR 383.131(b)). States acting under this waiver may deviate from the skills tests scoring standards set forth in the AAMVA Test Model.
Question 8: Does a State have the option to present only the Form B test for the pre-trip portion of the skills test to school bus applicants subject to the waiver?
Answer 8: No. The State may not present only the Form B test to school bus applicants subject to this waiver. The State may continue to follow its current form selection procedure for the vehicle inspection portion of the CDL skills test.
Question 9: For States that do not have a “school bus only” restriction code, will FMCSA allow flexibility in labeling restricted CDLs issued under this waiver? For example, could a State mark (with a stamp, punch, or label) documents and noted on the license record as “school bus only.”
Answer 9: Yes. A State acting under this waiver is responsible for ensuring that the issued credential clearly states that the driver is restricted to operating a school bus only (in addition to the K restriction) and note that restriction on the CDLIS driver record in accordance with current regulations. If a State does not have a “school bus only” restriction code, the State can physically mark the CDL credential, as long as the mark clearly indicates that the driver is restricted to intrastate operations for school buses only. A punch will not satisfy this requirement unless roadside enforcement officers can easily distinguish that the CDL is valid only for the intrastate operation of school buses.
Question 10: Will FMCSA reimburse States that have incurred additional costs due to making system modifications to their IT system(s) as a result of implementing this waiver?
Answer 10: At this time, FMCSA does not intend to reimburse States for costs incurred as a result of this waiver under the terms of an existing Commercial Driver’s License Program Implementation (CDLPI) grant. If a State needs to modify IT systems as a result of this waiver, the State may submit the project under the Agency’s FY 2022 CDLPI Notice of Funding Opportunity. Applications will be considered under the existing CDLPI grant review process.
Question 11: How will drivers who are issued CDLs under this waiver get the ‘school bus only’ and ‘K’ restrictions removed?
Answer 11: If a State issues CDLs under the waiver, the State can develop its own procedures for removing the school bus only restriction in the future. For example, the SDLA may require the driver to retake the full CDL skills test in the future or simply require that the driver be tested only on the engine compartment Version 1: January 27, 2022 component of the pre-trip vehicle inspection portion of the skills test. States would rely on their current procedures for removing the K restriction.
Question 12: How do States treat reciprocities (license transfers) for individuals obtaining a CDL under this waiver?
Answer 12: A CDL issued under the waiver is valid only within the State that initially issued the CDL. Example: Pursuant to the waiver, State A issues a K-restricted school bus only CDL to an individual who later moves to State B. What happens next depends on whether State B has chosen to issue CDLs pursuant to the waiver. If so, State B would issue the restricted CDL in accordance with the procedures it established to implement the waiver. If State B chose not to issue CDLs pursuant to the waiver, the K-restricted school bus only CDL is not an option for the individual who has moved to State B. In order to obtain a CDL with the S and P endorsements, the individual would be required to follow State B’s regular procedures.
Question 13: How does this waiver impact a driver who would also like to drive charter motorcoaches?
Answer 13: Restricted CDLs issued under this waiver do not permit the holder to operate a charter motorcoach or any commercial motor vehicle other than a school bus in intrastate commerce. Drivers seeking to operate a motorcoach in intrastate or interstate commerce, in addition to a school bus, will be required to obtain a CDL with the S and P endorsements with no restrictions in accordance with current requirements.
Version 1: January 27, 2022
COMMENTS
I failed the road test by touching a curb but did fine on the rest. For the pre trip simply walk around and point at everything you see. start with driver steps, window, miror door, rim tire, axle, hub seals, brakes (pad, slack adjuster, hose etc.) steering, etc...we haven't event moved from right outside the door yet and i got all that.
Memorizing the CDL pre-trip inspection is no doubt one of the more daunting tasks you will encounter on your way to getting your commercial driver's license. Relax, it can be done. The pre-trip is one of the things that students fear the most and fail the most. Let's face it, the pre-trip is intimidating because there is so much stuff to ...
Quick summary: The Pre-Trip Inpection is one of the three parts of your CDL Skills test, You will be required to demonstrate a thorough pre-trip inspection of your vehicle to ensure it is safe to drive. This includes checking the engine compartment, brake system, fuel system, and more. The CDL Pre-Trip Inspection Exam is an integral part of ...
Due to heavy memorization, the pre-trip inspection is one of the hardest aspects of the CDL test. Also called the "Vehicle Inspection Test," the pre-trip is one of the tests that trucking students fail the most. With this pre-trip inspection checklist, we tell you everything you need to know and what you need to check for.
Pre-Trip Inspection Study Guide
Here are some of the most commonly overlooked inspections items: 1. Chock Your Wheels. Everyone knows they are supposed to do it, but it's one of those common sense things that people forget when rushing. Chocks are a simple safety measure that help prevent accidental movement of the vehicle.
Pre-trip inspecting your bulkhead. The next step in your pre-trip inspection is to check the front of your trailer, also known as the bulkhead. Wall - Check for any damage on the wall. Inspection Sticker - Check for a DOT inspection sticker. Make sure it's up to date to meet the DOT requirements for trailers.
A pre-trip inspection checklist is a list of vehicle items that truckers must thoroughly examine before starting a trip. It helps identify and address mechanical and maintenance issues early on and prevent unexpected delays, breakdowns and severe accidents. Performing thorough pre-trip inspections promotes safety, ensures compliance and reduces ...
The pre-trip is detailed and must be completed without aids. Introduction. The pre-trip inspection for the purposes of a road test. The first thing I want to say about a pre trip for the purposes of a road test: you are not determining if the vehicle is safe! Let me repeat that: you are not determining if the vehicle is safe.
Download free and print it! Printable Pre Trip Inspection Checklist (PDF) There are many sections to learn but the test is not as difficult as it may seem. Studying our simplified Class-A pre-trip inspection checklist and taking classes at your local CDL training school will get you prepared. Engine Compartment. Driver Door Fuel Area.
Tips for passing the pre-trip can be found in this fantastic article. Enough talking, you need to know how to pass the cdl road test. Everyone that has a CDL felt the same way you do right now. My goal is to make sure you too pass the road test and in order to help you I put together a list of 15 things to do and/or avoid doing while taking the ...
THE NEXT 4 STEPS MUST BE PERFORMED to avoid an automatic fail on the Pre-Trip. Pay special attention to the notes below regarding the engine and the key. Air Compressor check: The engine is running. Perform a Safe Start. Next, fast idle the truck up to 120-140psi, at which point the governor cut-out should occur.
Out on the road, a thorough pre trip shouldn't take more than 10 to 15 minutes. DVIRs - Daily Vehicle Inspection Report. According to federal law (FMCSR Section 396.11 ), every day, a driver must submit a Daily Vehicle Inspection Report (DVIR) for each power unit he operates. Multiple trailers can go in one report.
A pre-trip truck inspection is a thorough check of the truck and its major systems to maintain safety on the road. Inspections need to occur before the start of a driver's shift and at least once every 24 hours while on the road. Truck pre-trip inspection needs to be performed by the driver while on duty, but before driving starts.
This includes checking brake pads, drums or rotors, brake lines, and ensuring proper brake fluid levels. Faulty brakes can lead to accidents or breakdowns, so it is essential to identify any issues before hitting the road. Lights and signals are another critical component of a pre trip inspection. Drivers should check all exterior lights ...
A CDL pre-trip inspection checklist systemizes the driver's vehicle inspection to ensure care and consistency. While a pre-trip inspection would be a best practice no matter what, the Federal Motor Carrier Safety Administration (FMCSA) requires these checks for commercial vehicles. Part 396.3 (a) calls on every motor carrier to ...
In this episode: 00:00 Intro to Trucking Law myths. 00:31 Myth 1:- Pre-trip inspection report. 01:21 Myth 2: Must perform a pre-trip inspection. 01:58 Myth 3: Must record at least 15 minutes on ...
Under the Hood: Examining the Engine. Start your pre-trip inspection by looking at the engine. Lower the gear guard so you can open the hood. Remove pins and unlatch the hood to do so. Once the hood is open, step back and look underneath the truck to see if there are any leaks.
Pre-trip inspection FAILS - see what happens to truck and trailer maintenance when pre-trip inspections are not done properly. 🔔 Subscribe for videos from ...
1) minimum 24 hours; 2) every time you get new equipment; 3) and when you're working the same piece of equipment with another driver. Don't put your driver's license on a pre-trip inspection form or log book. If the thieves get hold of your license number it's very easy to steal your identity.
Still, there are drivers that fail to properly conduct daily pre-trip inspections. Here are the main reasons why: They are time-consuming There are truck drivers that rush through completing pre-trip inspections, if at all. Conducting a thorough truck inspection-checking the engine compartment, lights, coupling system, tires, fuel tank, fire ...
Pre-trip Inspection: A pre-trip inspection is a thorough inspection of the truck completed before driving for the first time each day. Federal and state laws require that drivers inspect their vehicles. Federal and state inspectors also may inspect your vehicles.
The Federal Motor Carrier Safety Administration's (FMCSA) waiver, effective January 3, 2022, permits States to waive the engine compartment component of the pre-trip vehicle inspection skills testing requirement in 49 CFR 383.113(a)(1)(i), known informally as the "under-the-hood" component, for commercial driver's license (CDL) applicants seeking the school bus (S) and passenger (P ...