
Simple Beef Jerky Recipe
This post may contain affiliate links.

Smokey, salty, and just the right amount of sweet, beef jerky is a perfect snack for hiking, camping, and road-tripping. Learn how to make your own flavorful and tender beef jerky using either a dehydrator or an oven!

Making your own beef jerky at home is not only incredibly simple, but it is also cheaper than buying quality store-bought jerky. Plus, you’ll be able to control all the ingredients that go into making it; no weird stabilizers or unpronounceable additives.
So if you’re ready to start making your own beef jerky, you’ve come to the right place. In this article, we share everything we know about making tender homemade beef jerky.
Save time at the campsite and get our best menu ideas for your next campout (without the fuss)!
Why We Love It:
- Versatile hiking, camping, travel snack
- Cheaper than buying store-bought jerky
- Great way to make use of cheaper cuts of meat
- Lots of opportunities to develop your own customized flavors
Quick Tips for Making Beef Jerky
- Chewy = cut with the grain. Tender = against the grain.
- Partially freeze your beef before slicing it. Firm beef is much easier to cut.
- Tenderizing your beef with a mallet is definitely worth the effort
- Use a Ziploc bag or reusable alternative for the marinade, which allows you to coat each strip of beef by massaging the outside of the bag.
- Preheat your dehydrator, and dehydrate at 160 F to ensure beef remains at food-safe temperature.
- Set a timer! Beef jerky can become over dehydrated if left in for too long, so you will want to pull it before 100% of the water has evaporated.

Best Cuts of Meat for Beef Jerky
Any lean cut of beef will work great for making jerky. In fact, when you’re selecting a cut for your jerky, the leaner, the better.
The reason is that fat doesn’t dehydrate. Water moisture will evaporate out of the beef during the dehydration process, but the fat will remain. And excessive amounts of fat can lead to your jerky going rancid.
So while a nicely marbled ribeye steak might be great for searing, all that intermuscular fat will be no good for making jerky.
By choosing a lean cut of beef, you reduce the amount of fat you need to remove. Plus, these are often the cheaper cuts of meat!
These are our go-to cuts for making beef jerky:
- Eye of Round
- Top Sirloin
- London Broil
However, if you’re looking for a really “primo” cut of beef to use for jerky, we’d suggest using flank steak. It’s by far the priciest option, but it has a really great flavor and can be cut into long thin strips.

What Do With Fat?
Nearly all cuts of beef have some fat, but not all of it needs to be removed.
You will want to cut away any large caps of fatty gristle. This can be accomplished by running your knife underneath it, lifting up a tab of fat, and shaving away at a shallow angle with your knife.
You may also notice some thin “veins” of intermuscular fat running through the meat. Whether you want to cut these out is entirely up to you.
If you are really trying to maximize storage life, you can go ahead and carefully cut these out. But if you’re planning on eating in your jerky relatively soon, it is fine to leave them. We only ever cut out the really big line of fat and leave the rest.

How to Cut the Beef
After you’ve selected the cut of beef, the next step is to decide which direction you want to slice it.
There are two schools of thought on this:
- If you want your jerky to be chewy, then you will want to cut with the grain .
- If you want your jerky to tender, you will want to cut against the grain.
We tend to favor slicing against the grain, but it’s totally up to you.
In terms of thickness, you want to slice the beef as thin as you can. Perhaps not paper-thin (which is kind of impossible with beef), but somewhere in the 1/8 to 1/4 of an inch zone. If the jerky is too thick it will be harder to dehydrate and will end up being much tougher to chew.
If you buy your meat from a butcher counter, the easiest way to slice your beef is to ask the butcher to do it for you! This is usually a free service, plus they have these amazing industrial meat-slicing machines, so each piece will come out perfectly uniform.
No butcher around? No worries! It’s easy to slice the beef with a knife at home IF you follow this one trick!
To make the beef easier to slice, place it in the freezer for 1-2 hours beforehand or until it becomes semi-frozen. (not frozen like a rock, just firm) Beef is so much easier to slice when it’s semi-frozen.
Also, it might seem obvious, but use a sharp knife! Dull knives cause all sorts of kitchen accidents, and, in this particular instance, makes cutting the beef absolutely excruciating. A recently sharpened knife will make this process so much easier (and safer!) We own this Chef Choice Model 15XV and it works great.

The Importance of Tenderizing
One of the most common complaints about beef jerky (whether homemade or store-bought) is that it feels like chewing tree bark. We get it, nobody wants to gnaw away on a beef-flavored woodchip. So what’s to be done?
The first thing you can do is choose the right direction to slice your beef, which we covered above. Against the grain = more tender .
The next step is to ensure that you properly tenderize your meat. There are two ways to do this: manually or with a powder .
Pounding the beef with a meat tenderizing mallet will physically break down the muscle fibers, resulting in a more tender texture. While a little labor-intensive, this method is very effective (sometimes a little too effective). Make sure not to over tenderize! The beef slices need to retain some structure, so you don’t want to pound them into mush. This method also has the added benefit of helping to ensure the slices are all pounded to an even thickness.
Meat tenderizing powders are made from enzymes. They are most commonly derived either from papain, which comes from papayas, or from bromelain, which comes from pineapples. These can be sprinkled onto the beef and will start working to break down the fibers as soon as they get placed into the dehydrator (activated by heat).
The other essential part of tenderizing is using a well-salted beef jerky marinade. Salt will naturally start to break down the muscle fibers, yielding a more tender jerky.

Beef Jerky Marinade
Just like with BBQ sauces, the marinade is the secret X factor in every beef jerky recipe. The exact ingredients and proportions are often highly coveted trade secrets.
Thankfully you won’t have to twist our arm to get our recipe (it’s in the recipe card below!) Our recipe does a great job recreating that classic “original” jerky flavor, but you can totally adjust the spices to make this recipe your own.
Just remember not to add any fats or oils to your jerky marinade (lots of grilling marinades call for fats) if you plan on storing it for any length of time.

Which is Better: Oven or Dehydrator?
You can make delicious-tasting beef jerky using either. However, you will get better and more consistent results if you use a dehydrator.
Dehydrators offer much better temperature control (especially at the lower temperatures needed for dehydrating), and they provide vastly better airflow.
We will give instructions for both methods, but if you want to get serious about making jerky, then you should consider picking up a dehydrator. They can be very affordable and have a ton of other great uses.
Equipment Spotlight: Dehydrators
If you’re in the market for a dehydrator, we recommend buying one that has an adjustable temperature, which will allow you to dial in the drying temp to give you the best results for individual ingredients. The dehydrator we use and recommend most often is the COSORI Premium . You can find our other favorite dehydrators here .

How to Dehydrate Beef Jerky
To dehydrate your jerky, preheat your dehydrator to 160F. If you’re using your oven, preheat to 160F or as low as you can set it.
Load the trays, making sure no pieces of meat overlap, and then place them in the dehydrator or oven.
The drying time will depend on how thick the beef was sliced, the total load, the humidity in your space, and your particular machine—double-check your dehydrator’s manual. We find that jerky usually takes 4-6 hours. Every so often, use a paper towel to blot any fat, and shuffle or rotate the trays if needed to promote even drying.
Properly dried jerky should crack when bent, but not break. Be sure to test using a cooled piece.

Best Ways to Store Beef Jerky
How you store your beef jerky will often depend on when you intend to eat it. The longer you want to store it, the more specific the storing process needs to become.
Up to a week: Beef jerky will be fine for up to a week in a non-airtight reusable or plastic baggie. The less exposure to air the better, and it’s a good idea to keep out of direct light.
Up to a month : You will want to use an airtight container (Mason jar, resealable container with gasket lid). It can be stored at room temperature but should be kept away from direct light.
3-6 months: For anything over a month, beef jerky should be vacuum-sealed in an airtight container. FoodSaver makes a variety of ways of vacuum-sealing food either in plastic pouches or reusable Mason jars. You will want to store it in the refrigerator.
Up to a year: To maximize the storage time of your beef jerky, you will want to vacuum-seal it in an airtight container and store it in the freezer. You may also consider using a moisture-absorbing packet.

Simple DIY Beef Jerky
Ingredients.
- 2 pounds beef , (lean cuts are best & will keep longer)
- 1/4 cup soy sauce
- 2 tablespoons worcestershire sauce
- 2 tablespoons brown sugar
- 2 teaspoons salt
- 1 teaspoon garlic powder
- 1 teaspoon onion powder
- 1 teaspoon smoked paprika
- 1 teaspoon black pepper
- 1 teaspoon meat tenderizer , *optional
Instructions
- Thinly slice the meat* and cut off all visible fat.
- Pound slices with a meat tenderizer mallet until pieces are uniform thickness (aprox nickel width).
- Place the beef strips in a zip-top bag. Mix remaining ingredients and pour over beef.
- Cover & marinate for 12-36 hours. Shake the bag a few times as it's marinating to make sure the beef is evenly coated.
- Spread the meat in a single layer, shaking off any excess marinade, on the dehydrator trays.
- Dry at 165F/74C for 4-6 hours, occasionally blotting off any fat droplets that appear on the surface. Test using a cooled piece. Properly dried jerky, when bent, should crack but not break.
- Package jerky in and air-tight container or vacuum seal (*see storage notes below). Store in a cool, dark & dry place.
Nutrition (Per Serving)
*Nutrition is an estimate based on information provided by a third-party nutrition calculator
This recipe was originally contributed by Kira and Brendon of Adventurehaks.com and was updated 1 1/21 with additional information | Recipe adapted from Allrecipes.com
Save this post!
Enter your email and we'll send this post to your inbox! Plus, you'll receive our newsletter full of great tips for all your outdoor adventures.
Megan & Michael are the creators of Fresh Off The Grid, a blog dedicated to helping you fuel your adventures by sharing camp cooking recipes, backpacking meals, and outdoor travel guides. Their recipes and outdoor cooking expertise have been featured in Backpacker Magazine, Outside, REI Co-Op Journal, Food & Wine, and New York Times Cooking.
Leave a Reply Cancel reply
Your email address will not be published. Required fields are marked *
Save my name, email, and website in this browser for the next time I comment.
This site uses Akismet to reduce spam. Learn how your comment data is processed .
29 Comments
Dehydrator not required! I get great results with just an oven and some wooden skewers. Soak the skewers in water overnight, string meat onto said skewers, and drape through the bars of an oven grate (I recommend lining the bottom of your oven with foil). “Cook” at around 170F for ~4-5 hours, then let cool for at least 6 hours.
N.B., to assist with air circulation, either set your oven to convection (if that’s an option), or wedge open the oven door a tad with a wooden spoon.
Thanks for the info, Ben! Super helpful for those of us without a dehydrator. Looking forward to trying out your method before our summer road trip.
My dehydrator does not have a temperature gauge, is that important?
I am sure there is a way around it but it is somewhat important. Different foods require different temperatures and times. I would suggest checking the jerky frequently (a cooled piece should crack and not break when it is done). If your dehydrator doesn’t get warm enough you could finish it off in the oven at a higher temperature.
Thank you for you recipes I looking forward to trying it reguards bob lucas
Use toothpicks soaked in cooking oil. It is easier to remove jerky from toothpicks than water!
My hubby borrowed this round dehydrator yrs ago from a friend that pasted. It’s in the shed. I am disabled n was thinking of making jerky n selling to bars, small stores ect but can I make money on it.n sell for how much. Not sure what kind it is. Thank you for any help.
Thank you so much for posting this recipe. I have a friend who passed several years ago, and he made the best jerky in the world. He never would give up his recipe, but I know it contained Dr. Pepper. Instead of the jalapenos he used red pepper seeds. My hope is that your recipe is similar. Thanks again for sharing!
On the NESCO 13 1/2 inch round tray, approximately how much raw meat can you put on each tray?
It will depend on the size of your slices, but we usually use 4 trays for 1 pound of meat. You might be able to fit more on each tray, though. We like to give our jerky a lot of breathing room.
Kira and Brendon; A friend, gave me a batch of her first go at your Jerky mix. Rhi didn’t use the MSG or pound the product down to get a consistent thickness – but the product was great! I’ve got my first batch down in the brine. Had to double the brine as the 1.5 kg (2-ish lbs) Roast Beef I used seemed to need the extra juice. Anyway – cross your fingers. Rhi’s batch was a winner for me. Armed with my new Excalibur – should make a great product. Followed by Vac-seal, I should have lots of Jerky for Trekking or simply munching on in the “Man-cave”. I’ll let you know how it turns out. I gave the mix a four star but may upgrade that based on how my batch turns out.
Firstly I have to say that I’m totally in love with your variety of camp recipes and guides! The entire site has been incredibly helpful. Secondly I’m wondering if you would consider putting up a vegan/veggie jerky recipe option in the future!?
Thank you. We can certainly look into doing a vegan jerky option. I know there are a variety of brands that make vegan jerky, which means it must be possible to pull off. We’ll have to dig a little bit into it and see what we can find out.
What’s the best liquid to use for marinade for beef jerky I’ve tried several and they’re just not tasty
We’ve always had success with a combo of soy sauce, Worcestershire sauce, and sugar for a basic marinade, but you could certainly play around to find a combo that works for you! You can add other spices in to bump up the taste (ground black pepper, chiles, jalapeno, garlic powder, etc). I would imagine you could also use some beef bullion if you want to up the savory “beefiness” of the jerky.
Do you need to cook the beef before you dehydrate
We do not pre-cook our beef before dehydrating, but some people do. It all depends on how far you want to go to minamize potential bacteria.
If you are using fresh meat, working in a clean kitchen, marinate your beef in the refrigerator (34-38 F), and then dehydrate at a temperature at or above 160 F + using a well-cleaned dehydrator, you are already doing a lot to reduce the risk of bacteria.
160 F is the temperature where nearly all food-borne bacteria are killed off. But since dehydration takes time and the beef doesn’t immediately rise to that temperature once you turn on the dehydrator, there is a chance (very small) that the beef could become contaminated during that time.
If you want to really follow the book, the USDA would advise you precook your beef in an oven so that it reaches an internal temperature of 160 F + much more rapidly. You can then transfer to a dehydrator to continue the dehydration process. However, this will produce a jerky texture that is unlike traditional jerky.
So it’s really up to you how far you want to go with it.
What cuts of beef would work best?
The leaner the cut, the better. Eye of round or top sirloin are both good options.
Sorry, this came out too salty for you! Salt can be really tricky to dial in. There are so many differences between regular & low sodium soy sauce, different kinds of salt (kosher, sea salt, etc), and of course individual preference. So if this was too salty for you, feel free to dial it back as much as you like.
Friends and I have been using this recipe for years. Jerky has been a staple on many a trek, adventure – in all seasons. A couple ideas, what a Jerky with more snap – use Hot Hungarian Paprika. As well, there are lots (4 that I use) of Liquid Smoke that give different depths to the Jerky.
If you really want to elevate the jerky flavor put the dehydrator anyway. Most people have a smoker or pellet grill these days, that can operate at 165.
Rate This Recipe
- Search the site Please fill out this field.
- Saved Recipes & Collections
- Add a Recipe
- Manage Your Subscription
- Give a Gift Subscription
- Newsletters
- Sweepstakes
- Appetizers and Snacks
- Meat and Poultry
- Jerky Recipes
Homemade Beef Jerky
This beef jerky recipe uses a relatively quick method. While you can find many artisan brands out there, making homemade beef jerky is fun, easy, and all the rage! Have your butcher slice the beef for you.
:max_bytes(150000):strip_icc():format(webp)/chef-john-c50f1c2cb23f4e7786d66c30bddf8bcb.jpg "quick trip beef jerky")
Ingredients
¾ cup Worcestershire sauce
¾ cup soy sauce
1 tablespoon smoked paprika, or to taste
1 tablespoon honey, or more to taste
2 teaspoons freshly ground black pepper
1 teaspoon red pepper flakes
1 teaspoon garlic powder
1 teaspoon onion powder
2 pounds beef top round, thinly sliced
Whisk together Worcestershire sauce, soy sauce, smoked paprika, honey, black pepper, red pepper flakes, garlic powder, and onion powder in a large bowl. Add beef; mix until completely coated with marinade. Cover the bowl with plastic wrap and marinate in the refrigerator, 3 hours to overnight.
Dotdash Meredith Food Studios
Preheat the oven to 175 degrees F (80 degrees C). Line a baking sheet with aluminum foil and place a wire rack on top.
Transfer beef to paper towels to dry. Discard marinade.
Arrange beef slices in a single layer on the prepared wire rack on the baking sheet.
Bake in the preheated oven until dry and leathery, 3 to 4 hours.
Cut jerky with scissors into bite-sized pieces.
DOTDASH MEREDITH FOOD STUDIOS
Editor's Note:
Nutrition data for this recipe includes the full amount of marinade ingredients. The actual amount of marinade consumed will vary.
Nutrition Facts (per serving)
* Percent Daily Values are based on a 2,000 calorie diet. Your daily values may be higher or lower depending on your calorie needs.
** Nutrient information is not available for all ingredients. Amount is based on available nutrient data.
(-) Information is not currently available for this nutrient. If you are following a medically restrictive diet, please consult your doctor or registered dietitian before preparing this recipe for personal consumption.
Powered by the ESHA Research Database © 2018, ESHA Research, Inc. All Rights Reserved
Photos of Homemade Beef Jerky
You’ll also love.
- Skip to primary navigation
- Skip to main content
- Skip to primary sidebar
- Hire a Chef!

The Best Beef Jerky Recipe
Published: Mar 10, 2022 •Modified: Apr 12, 2023 by Mike Cleavenger • This post may contain affiliate links, which can earn us a commission • 1 Comment
The best beef jerky recipe to satisfy your snack cravings is here! A delicious meat snack with only 5 ingredients. Our beef jerky is sugar-free, Paleo, and Whole30 approved what's not to LOVE!

Whether you're driving in your car or at a live sporting event, beef jerky makes the best snack! Not only is it delicious, but it's packed with protein.
So let's talk about this beef jerky! We use flank steak, which comes from the cow's lower chest. This cut is inexpensive, flavorful, and versatile. Making it the perfect steak for beef jerky.
I have a quick chef tip for you: Place meat in the freezer before slicing allowing you to get paper-thin slices perfect for beef jerky.
During my first round of Whole30, I wanted to eat beef jerky, but I couldn't find a sugar-free option. Many store-bought brands are loaded with sugar and unhealthy preservatives.
I made it my mission to create a mouthwatering meat snack that is healthy and sugar-free. Coconut aminos are used for a touch of sweetness and emulate soy sauce. Paleo powder is a spice blend of salt, pepper , oregano, basil, cumin, and cayenne pepper . If you can't find this spice blend, use any combination of your favorite spices.
If you are a snack lover like me check out my buffalo cauliflower with Whole30 Ranch Dressing.
Why this beef jerky recipe is the best
Ingredients, how to make the best beef jerky recipe, step by step video, substitutions, how long does beef jerky last, how to make beef jerky last longer, frequetnly asked questions, more paleo recipes to try....
- Protein-packed snack. I love a snack that will fill me up and energize me for hours, and this beef jerky does that.
- Sugar-Free. For all you Whole30 dieters, this is the perfect grab-and-go snack for you.
- Oven method. Don't have a dehydrator? We got you covered, this recipe is made entirely in the oven.

- flank steak - if you can't find flank steak, top round or bottom round are great choices
- coconut aminos - a great soy sauce alternative that adds a bit of sweet flavor to the beef jerky
- Worcestershire sauce
- liquid smoke - a little bit goes a long way
- paleo powder - I used the low fodmap paleo power but utilize your favorite spice blend
See recipe card for quantities.

Making beef jerky is so easy, here's how to make it:
Step 1: Place flank steak in the freezer for 30 minutes to make slicing a breeze. Thinly slice the beef against the grain to prevent chewy meat.
Step 2: In a medium-sized bowl whisk, coconut aminos , liquid smoke, Worcestershire sauce, and spices.

Step 3: In a ziplock bag, combine sliced beef and marinade. Mix very well and refrigerate for at least 6 hours or better yet, overnight.
Step 4: Place wire cooling rack over a parchment-lined baking tray . Layflat beef making sure not to overlap them. Place in a 165-degree oven for 4 hours. Enjoy!
Coconut aminos - Replace with soy sauce for a delicious flavor! Most beef jerky marinades start with soy sauce.
Flank Steak - If you can't find flank steak at your local butcher, flat iron, top round, and bottom round, all make great choices.
Paleo Powder - I use this spice blend in many of my recipes because I love it! Utilize your favorite mixture of spices or make your own.
- Baking tray
- Cooling rack
- Coconut aminos

I like to store my homemade beef jerky in ziplock bags
- Dry Storage - 1 week
- Refrigerator - 2 weeks
- Freezer - 12 months
- Low-Fat Content - Fat will make your beef jerky spoil quickly. Make sure you purchase a lean cut of beef and trim off excess fat.
- Curing salt - This is a non Whole30 approach. Commercial companies use sodium nitrate to extend the life of beef jerky.
- Drying - The longer you dehydrate your beef, the longer it will last. Proceed with caution because overly dried jerky is tough to eat.
- Removing oxygen - Vacuum sealers help prolong the life of beef jerky.
- Use lean cuts of meat like flank steak, flat iron, top or bottom round .
- Cut beef into paper-thin slices by freezing the meat . Place flank steak into a freezer for 30 minutes .
- Dehydrate at a food-safe temperature of 160 degrees or higher to kill off any harmful bacteria.
- Before embarking on your beef jerky adventure, check out food safety to avoid any foodborne illness.
- Beef jerky will weigh ¼ its original raw weight.

Beef jerky should marinate between 6-24 hours. Allow enough time for the marinade to penetrate the beef. Make sure the meat is submerged in the marinade.
Beef jerky made without soy sauce is gluten-free. Our recipe consists of coconut aminos, so it's gluten-free. Another option is to look for gluten-free soy sauce.
Flank steak, top round, and bottom round are great options. Ideally, you are looking for a lean piece of meat without a lot of fat. Nothing with make your jerky go rancid faster than fat.
Yes! Store-bought brands are packed full of nitrates, making them last longer. Homemade recipes tend to have a shorter lifespan. If the meat smells rotten or shows signs of mold, throw it out.
Freezing beef jerky is a great option. If you are not planning on eating jerky right away, package in an airtight container and freeze for 6-12 months.

Did you make this recipe? Leave a ⭐️ review below and tag @thefrizzledleek on Instagram , Facebook , and Pinterest !

Ingredients 1x 2x 3x
- ▢ 2 pounds beef flank steak
- ▢ ½ cup coconut aminos
- ▢ 2 tablespoons Worcestershire sauce
- ▢ 1 teaspoon liquid smoke
- ▢ 1 tablespoon paleo powder
Instructions
- Preheat oven to 165 degrees.
- Place flank steak in the freezer for 30 minutes. Freezing the steak will make it easier to slice. Thinly slice flank steak against the grain.
- In a medium-sized bowl, mix together coconut aminos, Worcestershire sauce, liquid smoke, and paleo powder.
- In a ziplock bag, combine sliced beef and marinade. Refrigerate for 6 hours or overnight.
- Line a baking tray with parchment paper. Place a wire rack on top. Lay beef strips on top of the wire rack. Don't overlap.
- Cook for 4 hours at 165 degrees. Cool to room temperature and store in a ziplock bag, and refrigerate.
- Slice beef against the grain, so it's not chewy.
- You can make this recipe in the oven or dehydrator.
- You can buy Paleo Powder at sprout or on amazon. If you can't find this seasoning mixture use your favorite spice blend.
- This recipe has to be refrigerated.
More Snack Recipes

Reader Interactions
mikecleavenger
March 10, 2022 at 12:32 pm
Leave a Reply Cancel reply
Your email address will not be published. Required fields are marked *
Save my name, email, and website in this browser for the next time I comment.

Rate This Recipe
Recipe ratings without comment.
- Skip to primary navigation
- Skip to main content
- Skip to primary sidebar
- Skip to footer
Low-Carb, So Simple!
Tender Homemade Beef Jerky (with a Secret Ingredient!)
November 21, 2021 By elviira 5 Comments

How to Make Homemade Beef Jerky
This is a straightforward beef jerky recipe with just 5 ingredients. Although the jerky takes some time to make, the preparations are pretty easy. You just slice the meat, let it marinate overnight, spread onto a baking rack, let bake for about 6 hours at a very low temperature, and you are done. So, as you see, there is only a little work in this recipe and lots of waiting time — which you can use for doing something you love!
This recipe makes two batches. While the first batch is drying in the oven, you can keep the rest of the marinated beef in the fridge and dry in the oven once the first batch is done.
But let’s talk about the ingredients. For the meat, I’ve noticed that sirloin works best. Everything else tends to make tough jerky.
Over the years, I’ve tried several types of meat and always return using sirloin because it makes the best and the most tender jerky. To maximize the nutritiousness and the health benefits, go for grass-fed and grass-finished beef if you can.
For the marinade, I prefer to use coconut aminos or tamari (fermented soy sauce) as the base. Sometimes, I use just coconut aminos and sometimes just tamari, but I often combine these two in different ratios.
Just notice that coconut aminos contain more carbs than tamari. And if you go for tamari, use the traditional type, which is fermented (no shortcuts here!) and doesn’t contain wheat or gluten.
Now, you must be dying to hear the secret ingredient: it’s raw apple cider vinegar, i.e., good old ACV. Having numerous health benefits , this incredible ingredient also helps make meat more tender. That’s one of the reasons why I use it in my beef jerky.
Apple cider vinegar also lends an appetizing tang to the meat, so that’s another reason I love using it in my jerky.
There are several spices you can use in your beef jerky, from mild to fiery. As I make a whole-family version, I favor mild flavors. This recipe uses onion powder as a natural flavor enhancer and either black or white pepper to lend a tongue-tickling kick.
Actually, I often use a combination of black and white pepper, but lately, I’ve used only white pepper because I prefer the exciting note and black pepper seems to be somewhat worn and a bit too obvious spice.
Naturally, other spices work, too. Check for more tips at the Tips for Variations section below.
Step-by-Step Instructions on How to Make Homemade Beef Jerky
So, that’s it, let’s take a look at how to prepare this superb snack:
Take about 2 lbs (910 grams), preferably grass-fed and grass-finished sirloin.

Slice it as thinly as you can.

Like this. Set aside for a while and make the marinade.

To make the marinade: take a steel or glass bowl and combine 1/2 cup (120 ml) coconut aminos or tamari (I use coconut aminos here)…

…2 tablespoons raw apple cider vinegar…

…1 teaspoon onion powder…

…and 1 teaspoon ground white pepper or black pepper (I use white pepper here).

Whisk until well combined.

- Place the beef slices one by one into the marinade, ensuring the slices are completely covered with the marinade.

Here we go. You can still toss the meat gently that the marinade covers it completely.

- Cover with a plastic wrap and let marinate in the fridge overnight, or at least 6 hours.

The next day, take the marinated beef slices from the fridge. (Notice how the color has changed!)

Line a baking sheet with parchment paper.

Place a baking rack on top of the baking sheet.

Spread the beef slices evenly on the baking rack, next to each other. The slices can touch each other, but don’t let them overlap.

- Place the baking rack with the beef slices on the top oven rack.

- Place the parchment paper-lined baking sheet on the low oven rack. This is to catch the possible drippings from the meat.

Dry at 140 °F (60 °C) for six hours, or until dry and crispy.

Looks good!

Serve as a snack or appetizer.

I’ve stored the jerky for several weeks at room temperature, and it was still good. However, I really cannot say how well it stores other than it stores pretty well!
How I Came up with This Easy Jerky Recipe
I’ve come a long way with making beef jerky, improving the recipe and the method how I make it.
I remember I did my first beef jerky experiments several years ago. I read blog posts and other articles for successful homemade beef jerky.
Most of the recipes guided you to make the beef slices “hang” from the baking rack while drying them in the oven. However, this hanging didn’t work for me, as the dried meat was super difficult to remove from the rack as it had got stuck to the rack so badly.
Maybe that was why I gave up homemade beef jerky and settled with the inferior commercial creations filled with dubious ingredients.
However, at some point, after getting fed up with those inferior commercial creations (which were without exception also teeth-breakingly tough), I decided to dig up my notes about the homemade beef jerky experiments and start exploring again to find out if there are ways to improve the recipe.
I decided to try how the jerky turns out if I place the meat slices horizontally on the rack, not hanging from it.
My joy was indescribable when I noticed that this method worked wonders. The meat dried wonderfully and equally, and the slices were so much easier to remove from the rack. Awesome!
I still was playing with different oven temperatures and drying times before I found out that I got the best result when drying the meat at 140 °F (60 °C) for six hours.
A bit higher temperature baked the meat rather than dried it, and the baked meat certainly tasted dull, and the texture wasn’t that pleasant compared to the flavorful dried meat. Actually, 140 °F (60 °C) is the maximum temperature I recommend. Even 122 °F (50 °C) would give a good result, however, you might need to dry the meat longer than six hours.
Now, when I had found the ultimate drying method and the ideal temperature, I continued experimenting with spices. I tried different marinades – or not marinades at all but just drying the seasoned beef slices. I also tried dry rubs. Soon, I noticed that the jerky benefits from proper marination to become the most tender and to gather enough flavors.
As a base for the marinade, I used tamari and coconut aminos, which worked equally well. They gave a bit different result actually: tamari lent a really salty flavor, so there was no need for additional salt, and coconut aminos gave a delightfully sweet and pleasant note. Like said, I often combined these two to get both enough salt and sweetness to the jerky.
At some point, I decided to add apple cider vinegar to the marinade. My first thought was to get more flavor and maybe reduce the carbs by replacing part of the coconut aminos or tamari with practically carb-free vinegar. However, I noticed that this marvelous ingredient made the jerky super tender! This was so important observation that nowadays I always add apple cider vinegar to the marinade. Now, I don’t have to suffer from tough jerky ever again!
As you might know, onion powder is my favorite natural flavor enhancer, and I use it everywhere. No wonder I decided to try out how it works with jerky.
To my satisfaction, it worked wonders, so it was definitely a keeper. I also tried garlic powder in addition to onion powder, and I was also happy with it.
I also tried out different peppers, chilis, and seasoning mixes. In the end, I was happy just with white pepper and black pepper, so those ended up at my final recipe.
In fact, I was so happy with the recipe that it ended up in one of my Finnish keto books, Järkevä ketoruokavalio , which was published a bit over one year ago.

This beef jerky is my to-go snack, and I basically have it all the time with me, also while traveling. This jerky is also my son’s favorite. I make sure that he always has access to this flavorful and nutritious snack.
Here’s the recipe for you to enjoy:

Tender 5-Ingredient Homemade Beef Jerky (with a Secret Ingredient!)
This beef jerky is my to-go recipe for an easy, nutritious, satisfying, and easily-portable snack. I’ve fine-tuned the recipe over the years and simplified it, so that it’s both easy to make and incredibly tasty.
A secret ingredient — that also has lots of health benefits — makes this jerky extra tender. Read on to find the secrets (including the secret ingredient!) on how to make the best and the most tender beef jerky!
Ingredients
- 2 lbs = 910 g sirloin, preferably from grass-fed and grass-finished beef
- 1/2 cup = 120 ml coconut aminos or tamari
- 2 tablespoons raw apple cider vinegar
- 1 teaspoon onion powder
- 1 teaspoon freshly ground white pepper or black pepper
Instructions
- Slice the meat as thinly as you can. Set aside for a while when you make the marinade.
- To make the marinade: combine the coconut aminos or tamari, vinegar, onion powder, and the pepper in a steel or glass bowl. Whisk until well combined.
- The next day, take the marinated beef slices from the fridge. Preheat the oven to 140 °F (60 °C).
- Line a baking sheet with parchment paper. Place a baking rack on top of the baking sheet.
- Spread the beef slices evenly on the baking rack, next to each other. The slices can touch each other, but don't let them overlap.
- Dry for about 6 hours, or until dry and pliable. A longer drying time makes the meat crispy (which I prefer!).
- Serve as a snack or appetizer. Store in an airtight container at room temperature for a couple of weeks.
Recommended Products
As an Amazon Associate and member of other affiliate programs, I earn from qualifying purchases - without any extra costs for you.

Tips for Variations
You can vary this jerky endlessly with different spices and seasonings. However, not all spices stand long drying as their taste might turn out pungent. Over the years, I’ve tried several spices and noticed that at least these work:
- Cajun seasoning
- Barbecue seasoning
- Cayenne pepper
- Chili flakes
- Red pepper flakes
- Onion powder
- Garlic powder
- Black pepper
- White pepper
- Liquid smoke
- Smoked paprika
- Ranch seasoning
- Brown sugar substitute (I use Sukrin Gold)
Actually, another way to tenderize the meat is to use a little bit of baking soda. I’ve heard of this method but didn’t try it so far as I have been so satisfied with the tenderizing properties of ACV and the mouth-watering tang it provides.
I bet other kinds of vinegar work, too. However, I recommend using flavorful and relatively mild vinegar, such as coconut or rice vinegar. Just make sure they don’t have any added sugar.
Fresh pineapple or papaya juice are also excellent meat tenderizers, thanks to their meat protein-breaking enzymes bromelain and papain, respectively. However, they are pretty high in carbs for a keto diet, so if you use them, go easy on them.
Talking about carbs: As coconut aminos are also relatively high in carbs (luckily, the jerky is still very low in carbs even if you use coconut aminos) compared to tamari, you can reduce the carb count using tamari in your jerky.
General Prattling
This week was unbelievably busy but gratifying. I’ve taken lots of photos for our Ketokamu products, written plenty of text, and recorded exciting videos.

On Friday, we recorded videos of making Fathead dough with our Ketokamu baking mix . The result was beyond fantastic, especially the Finnish Christmas pastries I made with it.
Yes, I have been a bit obsessed with these traditional star-shaped seasonal pastries lately, and I’m so happy I managed to develop a perfect keto substitute for the wheaty and sugary pastries!

Related posts:

Reader Interactions
March 25, 2024 at 07:30
I just met a gal who adds Cardamon to her jerky seasoning. Have you considered such an experiment?
March 25, 2024 at 08:04
Sounds fascinating, I’ve never thought of adding cardamom. I bet it would fit with other warm spices to create an Asian-style flavor.
November 21, 2021 at 19:06
Hi Elviira! I’m really happy to see this recipe, and have saved it to my recipe app (without my usual process of looking at it again before I decide what to do with it). I am wondering if I could use my dehydrator for drying the jerky, given that my oven goes no lower than 180ºF? Thank you!
November 21, 2021 at 20:47
Hi Susan, so happy to hear you like the recipe! Yes, dehydrator should do the job. Just adjust the time accordingly.
November 21, 2021 at 20:49
Thank you. I look forward to trying this.
Leave a Reply Cancel reply
Your email address will not be published. Required fields are marked *
Notify me of follow-up comments by email.
Notify me of new posts by email.
- Privacy Policy, Disclaimer and Affiliate Disclosure
Ultimate Smoked Beef Jerky in 7 Easy Steps (HUGE FLAVOR)
Looking to make some tasty beef jerky to snack on? You’ve come to the right place! Our favorite recipe for smoked beef jerky will give you an incredible, flavor-packed snack that is high in protein and low in fat!
For this recipe we’ll be using beef to make our jerky, but there are benefits to using a variety of different meats with yours – check out our guide for different meats you can make jerky with!
Jump to Section
How to make Smoked Beef Jerky
When making jerky, you will want to buy top round, bottom round, lifter, or pectoral cuts. These aren’t the only cuts of meat you can use, however, as any cut that is lean and full of flavor has the potential to make delicious jerky . For this recipe, we’re using top round.
Over the years we’ve made beef jerky from every cut of meat you can imagine, so keep reading to learn all about what we’ve discovered and find out which meat is the best for making beef jerky.

What cut of beef to use for Smoked Beef Jerky
When you are thinking about making homemade beef jerky, there are a few aspects you need to look for in the meat no matter what type of cut you are thinking of purchasing, such as:
- Amount of Fat
Read below to find out more about each of these aspects when it comes to choosing a cut of meat to make jerky.
The Amount of Fat in the Meat
Although fatty meat might be preferential for a big grilling steak, you actually need the opposite when making beef jerky. The fat in meat never fully dehydrates, so fatty meat that is dehydrated can spoil quite quickly, which defeats one of the reasons many people make beef jerky in the first place.
As you shop for meat to make beef jerky, you will want to look for the leaner cuts, like flank steak or lifter cuts when you want to make beef jerky that will last a long time . If you are the type of person who eats all their jerky in a day or two, then you probably don’t have to worry too much about selecting the leaner cuts.
Marbling (Intramuscular Fat)
You don’t want too much fat in a cut of meat used for beef jerky, but you do want some, specifically the fat in the muscles, commonly referred to as marbling or intramuscular fat. This intramuscular fat ensures you will have tender and flavorful jerky.
Lifter and pectoral cuts have a decent amount of marbling to result in a tender batch of beef jerky. Flank steak also has some marbling that can make nice tender jerky, but it comes at a much higher cost.
Speaking of higher costs, making beef jerky can get expensive. Therefore, many seasoned jerky makers must balance the amount of fat they want in the meat with the price they will pay per pound.
Making beef jerky for a special occasion may call for a more expensive cut, but when you are first starting out, it is better to pick a cheaper variety like a pectoral cut. That way, if you mess up your first or second try, you aren’t out an expensive cut of meat!

Slicing your meat to make jerky
The first step to prepare your beef jerky is to slice your meat. This can easily be done by hand, but there are a variety of meat slicers out there that can help you ensure consistency in your thickness.
For smoked beef jerky, we recommend cutting your meat in to 1/4″ slices. This will give you a robust piece of jerky that doesn’t get too dry or crumbly after smoking. With a sharp knife or automatic slicer set to 1/4″, cut your meat against the grain all the way through. It is important to cut against the grain, otherwise your smoked jerky will come out tough to bite and chew.
When slicing, make sure you also trim away any membrane and fat that you come across. After smoking, these items become very tough and make the experience of eating your jerky tedious. Unlike a smoked brisket where the fat helps to moisten the food and ensure a tender juiciness, the fat on smoked jerky will do the opposite.

Marinate your Beef Jerky
For our Smoked Beef Jerky, we’ll be doing a simple marinade that we’ve found compliments the smoke flavor beautiful. The jerky marinade is quick and easy and consists of the following ingredients:
- 1/2 cup Soy Sauce
- 1/2 cup Dark Brown Sugar
- 3 tbsp Worcester Sauce
- 2 tsp Onion Powder
- 1 tsp Garlic Powder
- 1 tsp Black Pepper
- OPTIONAL: 2 tsp Cayenne Pepper (powdered)
In a bowl, mix all ingredients until completely mixed. If you’d like your smoked beef jerky to have a spicy kick, feel free to add in the optional 2 tsp of powdered Cayenne Pepper.
Now, transfer the marinade and sliced meet into a gallon ziplock bag, ensuring all cuts are submerged in the marinade and as much air has been removed as possible. You can separate into multiple bags if necessary.
We recommend a minimum marinade time of 12 hours (overnight) for the flavor to set in, but always encourage up to 24 hours if your schedule allows for it. Beyond that, there will be only marginal flavor benefit to your smoked beef jerky.

Smoking Beef Jerky
To smoke your beef jerky, you’ll first need to bring the temperature on your smoker up to a low, sustainable heat. We recommend that you keep this temperature between 175 degrees and 180 degrees Fahrenheit to get our beef jerky to a safe internal temperature while also dehydrating it at a steady pace. For more information on safely cooking your beef jerky, you can refer to the USDA’s guidelines by visiting their website here.
Prep your marinated beef jerky for the smoker
While your smoker is getting to temperature, remove your beef jerky from the fridge and marinade bags. We recommend that you lightly pat the sliced meat with a paper towel when removing from the marinade to soak up excessive moisture on the outside of the meat. It’s okay to leave a small amount – it will caramelize when smoking and impart a strong flavor when done! While patting, place your raw jerky meat on a wire or mesh rack to bring to room temperature before placing onto the smoker.
Place the meat on the smoker
Once your smoker is up to temperature, add your preferred wood to smoke over. We prefer light fruit woods, but feel free to use Mesquite, Hickory, or Oak for a heavier smoke flavor!
Place your jerky directly on the grill grates or mesh rack with indirect heat. Typically, you will only need to smoke your jerky for around 2 to 4 hours, but this can vary from smoker to smoker. The best way of testing is to make sure the internal temperature reaches a safe 165 degrees Fahrenheit and the beef become firm with only a slight, springy bend when shaking. At this point, remove from the smoker and place on a cooling rack until it has cooled to room temperature. Store in a zip lock storage bag or airtight storage container and refrigerate (if you have any left!)
Curious about how long jerky lasts after you have made it? Check out our article How Long Does Jerky Last for more information on how long you can keep your homemade jerky!
Smoked Beef Jerky
Ingredients .
- 2 lbs Beef your choice of cut - we're using Top Round
- 3/4 cup Soy Sauce
- 3/4 cup Dark Brown Sugar
- 1/4 cup Worcester Sauce
- 2 tbsp Black Pepper
- 1 tbsp Onion Powder
- 1 tbsp Garlic Powder
- OPTIONAL: 1 tbsp Cayenne Pepper powdered
Instructions
- Using a knife or meat slicer (preferred) slice your beef against the grain into 1/4" slices. Trim away any excess fat or membrane you come across.
- Prepare your marinade by mixing all ingredients except for beef in a bowl. Stir until completely mixed.
- In a storage bag, add your sliced beef and marinade mixture, ensuring all beef is submerged in the mixture. Remove as much air as possible from the bag, then seal and refrigerate for 12-24 hours.
- After marinading overnight or longer, remove your beef from the marinade and use a paper towel to soak up any excess moisture on the outside of the strips. Don't worry about getting it perfectly dry, the smoker will take care of the rest. Place individual beef slices on wire or mesh rack and allow them to come to room temperature while you prep your smoker.
- Get your smoker up to a temperature of 175 to 180 degrees Fahrenheit. Add your preferred wood - we like Hickory for a strong smoky flavor, or apple/cherry for a sweeter, more subtle smoke flavor.
- Smoke your beef jerky until it reaches an internal temperature of 165 degrees Fahrenheit and has only a slight bend when shaken.
- Remove finished jerky from smoker and place on a cooling rack until the beef returns to room temperature. Store in a sealable container or enjoy right off the rack!
- For the heat-chasers, add cayenne pepper liberally to your marinade mixture!
- Don't over-smoke your jerky, or else it will become tough and dry. Remove from the smoker while the meat still has a slight give to it but isn't soft or floppy.
- Be careful when sharing with friends or family - you may not get any for yourself!
If you want to learn more about grilling , check out these other helpful resources!

Related Posts

2 thoughts on “Ultimate Smoked Beef Jerky in 7 Easy Steps (HUGE FLAVOR)”
Leave a comment cancel reply.
- Watch Full Seasons
- TV Schedule
- Newsletters
- Sweepstakes
- Restaurants
- Recipes on TV
- Food Network on Max
- 4th of July Favorites
- Comfort Food
- Summer Baking Championship 8am | 7c
- Summer Baking Championship 9am | 8c
- Food Paradise 10am | 9c
- Food Paradise 11am | 10c
- Food Paradise 12pm | 11c
- Guy's All-American Road Trip 1pm | 12c
- Diners, Drive-Ins and Dives 2pm | 1c
- Diners, Drive-Ins and Dives 2:30pm | 1:30c
- Diners, Drive-Ins and Dives 3pm | 2c
- Diners, Drive-Ins and Dives 3:30pm | 2:30c
- Diners, Drive-Ins and Dives 4pm | 3c
- Diners, Drive-Ins and Dives 4:30pm | 3:30c
- Diners, Drive-Ins and Dives 5pm | 4c
- Diners, Drive-Ins and Dives 5:30pm | 4:30c
- Diners, Drive-Ins and Dives 6pm | 5c
- Diners, Drive-Ins and Dives 6:30pm | 5:30c
- Diners, Drive-Ins and Dives 7pm | 6c
- Diners, Drive-Ins and Dives 7:30pm | 6:30c
- Diners, Drive-Ins and Dives 8pm | 7c
- Diners, Drive-Ins and Dives 8:30pm | 7:30c
- On Tonight Guy's All-American Road Trip 9pm | 8c
- Diners, Drive-Ins and Dives 10pm | 9c
- Diners, Drive-Ins and Dives 10:30pm | 9:30c
- Diners, Drive-Ins and Dives 11pm | 10c
- Diners, Drive-Ins and Dives 11:30pm | 10:30c
- Guy's All-American Road Trip 12am | 11c
- Diners, Drive-Ins and Dives 1am | 12c
- Diners, Drive-Ins and Dives 1:30am | 12:30c
- Diners, Drive-Ins and Dives 2am | 1c
- Diners, Drive-Ins and Dives 2:30am | 1:30c
- Diners, Drive-Ins and Dives 3am | 2c
- Diners, Drive-Ins and Dives 3:30am | 2:30c
- Diners, Drive-Ins and Dives 4am | 3c
- Diners, Drive-Ins and Dives 4:30am | 3:30c

- Trending Eats

- Product Reviews
- Shop Everything

- Throw It On the Grill
- All Sweepstakes + Contests

- Alton Brown
We're sorry, there seems to be an issue playing this video. Please refresh the page or try again in a moment. If you continue to have issues, please contact us here .

- Level: Advanced
- Total: 20 hr 20 min
- Prep: 20 min
- Inactive: 8 hr
- Cook: 12 hr
- Yield: 10 to 12 ounces
Ingredients
Deselect All
1 1/2 to 2 pounds flank steak
2/3 cup Worcestershire sauce
2/3 cup soy sauce
1 tablespoon honey
2 teaspoons freshly ground black pepper
2 teaspoons onion powder
1 teaspoon liquid smoke
1 teaspoon red pepper flakes
Special equipment:
- Trim the flank steak of any excess fat, place in a zip-top bag, and place it in the freezer for 1 to 2 hours in order to firm up.
- Remove the steak from the freezer and thinly slice the meat with the grain, into long strips.
- Place the strips of meat along with all of the remaining ingredients into a large, 1-gallon plastic zip-top bag and move around to evenly distribute all of the ingredients. Place the bag into the refrigerator for 3 to 6 hours.
- Remove the meat from the brine and pat dry. Evenly distribute the strips of meat onto 3 of the air filters, laying them in the grooves and then stacking the filters on top of one another. Top these with 1 empty filter. Next, lay the box fan on its side and lay the filters on top of it. Strap the filters to the fan with 2 bungee cords. Stand the fan upright, plug in and set to medium. Allow the meat dry for 8 to 12 hours. If using a commercial dehydrator, follow the manufacturer's directions.
- Once dry, store in a cool dry place, in an airtight container for 2 to 3 months.
Tools You May Need
My private notes, categories:, kickoff snacks, looking for something else.

👩🍳 What's Cooking

Shop With Us

Our Newsletter
Sign up for the Food Network Shopping Newsletter
By entering your email address, you agree to our Terms of Use and acknowledge the Privacy Policy . Food Network and its affiliates may use your email address to provide updates, ads, and offers.
To withdraw your consent or learn more about your rights, see the Privacy Policy .
Related Pages
- Sirloin Steak Recipe
- Gyro Meat with Tzatziki Sauce Recipe
- Jerky Recipe
- Salmon Jerky Recipe
- Homemade Beef Jerky Recipe
- The Country Cat's Beef Jerky Recipe
- Oven Beef Jerky Recipe
- Smoky Cola Jerky Recipe
- Starbucks Is Now Topping Coffee with Beef Jerky
- Skip to content
- Skip to primary sidebar
- Skip to footer
by Renee Muller | July 02, 2023 | 21 comment(s)
The Best Homemade Beef Jerky
You will never buy jerky again. we can promise you that..
So, let me explain this to you, in a way that you will understand, without saying too many words, about how my boys have been bragging about the “jerky that my mom made” to anyone willing to listen. Also, I became the cool mom in Mesivta and in camp. I think it might be all connected.
I have a household of boys, in the sense that, even my girls, are not scared to have fleishigs for breakfast. Beef is and will always be better than anything, especially dairy. Staying milchig is not a thing. I’m the only one that does that in this family.
So, when I went to visit my friend Shifra one Friday and her house smelled so amazing, I naturally inquired. She showed me her dehydrator, on her counter, and showed me its contents. I knew right then and there that I needed to learn how to make my own jerky too, just because seeing such magic and not acting upon it would have been…cruel.
Shifra kept saying things like “it’s so easy” and “my kids are obsessed with it.” I listened and took notes.
Ever since that Amazon box with the dehydrator arrived (about a month ago) I believe that I have been through roughly 22 lbs of meat and there is none to show for it since it all got eaten right away. Even my youngest, who is 3, loves it. It’s chewy in a satisfying way, not hard.
It’s delicious because it’s fresh and also, because you can customize it to your liking.
And yes, the dehydrator costs about $85 but think of it, you make your money right back. One batch, and you made your money back. Jerky isn’t cheap, that we know. But when you make it yourself, it becomes affordable. And tasty.
Oh, another cool feature: you can add trays to the dehydrator! True, you will need to add “drying time” but it’s worth it if you’re planning to do big batches.
When making jerky, you need time. Plan time to marinate the meat (overnight and up to 24 hours) and then, the dehydrating part itself can take between 2 ½ to 4 hours depending on the size of the meat.

Also, when you order the dehydrator make sure to order this meat tenderizer as well. And if you can’t find it in your local grocery, get this liquid smoke (but any type or flavor will work).

Start by combining all the marinade ingredients in a resealable bag,

but not the meat just yet.

Combine all ingredients well, making sure it’s all smooth and that the brown sugar is melted.

Add the meat. Don’t worry about mixing sizes. You will divide the meat on the trays by size.
After you try this once you will learn if your family prefers small bites (like candy!) or bigger pieces you bite into.

Seal the bag and make sure marinade covers all of the meat. Use your hands to make sure it gets everywhere.
Place in a bowl or tin to catch any eventual spills and refrigerate at least overnight but preferably for a 24 hour period. This will make sure the meat has a chance to tenderize and absorb taste.

Start from the bottom. Place the tray to catch splatters (the one that looks like a plate). (Note: You don’t need the trays that look like a mesh. Those are for other recipes like dried fruit etc.)
Place the pieces of meat on one layer.

Try to divide the sizes on trays. This way, when the smaller pieces are ready before the bigger pieces you will remove that tray and let the rest cook for longer.

Fill up all the trays and plug in the machine. Set the knob on “jerky,” the highest setting.

Set your timer for 2 ½ – 3 hours and check if done. The jerky won’t change while “chilling,” so taste a piece and decide if it’s dried enough to your liking.

Remove the tray/pieces that are ready and replace the lid to continue drying.

As you can see, this dehydrator can be used even if you are drying only one tray.

Store your jerky in a resealable container for a few days in your fridge, or, vaacum pack for longer shelf life.
We haven’t tested out how long it actually lasts due to the fact that it never survived too long. Sorry about that. If you figure that one out, let us know in comments.
Also, place all the trays in the dishwasher! They come out super clean. (Obviously, do not put the top part, the motor, in the dishwasher. Just wipe it clean. It usually doesn’t get dirty anyway.)
When storing, place a piece of paper towel between layers. (It’s hard to dry it well.) For our oven beef jerky recipe (softer texture), see this original version and this teriyaki version. For more beef jerky tips, see this post.

Ingredients
- 2-3 lbs thinly sliced shoulder meat, like pepper steak
- 1½ cups dark brown sugar
- 1 cup honey
- ½ cup teriyaki sauce
- ¼ cup soy sauce
- 2 tbsp Worcestershire sauce
- 2 tbsp liquid smoke
- 2 tbsp meat tenderizer
- 1 tsp salt
- 1 tsp pepper
- 1 tsp garlic powder
- 1 tsp paprika
Instructions
- In a Ziploc bag, combine all marinade ingredients and mix well until brown sugar is dissolved. Add meat and seal bag, making sure marinade covers all parts of the meat. Refrigerate overnight or, preferably, for 24 hours.
- Remove meat and place on dehydrator trays. Group similar sized pieces of meat together. This way, when the smaller pieces are ready before the bigger pieces you will remove that tray and let the rest cook for longer.
- Plug in the machine. Set the knob on “jerky,” the highest setting. Dehydrate for 2 ½ – 3 hours. Remove the tray/pieces that are ready and replace the lid to continue drying.
- Store your jerky in a resealable container for a few days in your fridge, or, vaacum pack for longer shelf life. Jerky can be frozen for months (in a Ziploc bag, any bag or container)
Back in 2019, ChantzyW taught us how to make oven baked jerky. It is good! Read 5 tips for better jerky from JerkyJoy.
Over the years we still had kids that liked the sticky ones that you get from store bought…
FOR EXCLUSIVE CONTENT AND A PEEK BEHIND THE SCENES, MAKE SURE TO JOIN OUR WHATSAPP STATUS HERE. JOIN OUR WHATSAPP GROUP AND WE’LL LET YOU KNOW WHEN A NEW POST IS UP!
Add-A-Trays
Meat tenderizer, liquid smoke.
Renee Muller
Renee is a sought-after food and lifestyle stylist and the author of two cookbooks. With dishes and linens as her paint palette, it’s her artistry that weaves a beautiful story in the photos on this site.
Reader Interactions
July 2, 2023 at 5:57 pm
We’ve been using the oven method from an earlier post very successfully until now.
July 2, 2023 at 10:40 pm
My oven has a dehydrate mode. Do u know how long I wud need with that?
August 3, 2023 at 8:39 pm
We never tried, but must be similar timing. Try it. The jerky is done when dry to touch
July 3, 2023 at 12:54 am
What temperature is the jerky level? I have an air fryer that also dehydrates.
July 3, 2023 at 8:48 am
Hi, thank you for all your amazing content. I’ve been making jerky at home for about 6 months, since I bought my own machine on amazon. I just wanted to post about it here since the one I bought is half the price then the one you posted. It works great (needs about 3-4 hours depending on the thickness) and you can also buy extra trays to it. I am posting the name if you want to check it out. NESCO JerkyXpress Food dehydrator
July 3, 2023 at 7:52 pm
This is great! We are new at dehydrating in my house. I want to add an awesome tip my son had because yes it’s hard to dry the trays… turn the dehydrator back on with the clean trays and it will dry out all the water perfectly!!
July 4, 2023 at 10:44 pm
Love this tip! Thanks for sharing.
July 3, 2023 at 8:30 pm
Would the dehydrator become fleishigs or remain parve.
August 3, 2023 at 8:40 pm
I would say it becomes fleishig, but ask your LOR
July 4, 2023 at 12:00 am
Do you ask the butcher to make the pepper steak thinner ? Or can you use regular pepper steak ?
August 3, 2023 at 8:41 pm
Both work. Thicker pieces need more time in the oven tho
July 10, 2023 at 9:11 pm
Once vaccine packed, can it be stored out of the fridge? Or must be frozen or refrigerated?
August 3, 2023 at 8:42 pm
In the fridge it lasts at least a week. And in freezer much longer. But, do realize that it will get eaten, way faster than that
July 14, 2023 at 11:44 am
This is the best jerky I have ever had. Thanks so so much!!!
July 21, 2023 at 2:35 pm
Can I freeze the meat in the marinade to dehydrate at a different time?
August 3, 2023 at 8:43 pm
Never tried. Not sure if its safe, but it might be.
August 3, 2023 at 3:52 pm
Has anyone ever tried replacing meat tenderizer with baking soda? Online it says to do 1/4 tsp BS per 1 tip tenderizer
August 29, 2023 at 1:03 pm
Anyone know how to do it in an air fryer
December 28, 2023 at 10:39 am
what temp would you recommend on the oven, don’t have a dehydrator
January 21, 2024 at 6:03 pm
Oh. And my kids won’t eat beef jerky from any takeout after eating mine ….
March 20, 2024 at 8:19 am
Has anyone used the leftover marinade to make another batch righter after removing the meat to dehydrate?
Leave a Reply Cancel reply
Your email address will not be published. Required fields are marked *
This site uses Akismet to reduce spam. Learn how your comment data is processed .
A lifestyle site for the busy jewish woman
Disclaimer: Between Carpools LLC is an affiliate with many of the merchant links on Betweencarpools.com. This means we will be compensated if you choose to utilize the links located throughout the site. Betweencarpools.com is a participant in the Amazon Services LLC Associates Program, an affiliate advertising program designed to provide a means for sites to earn advertising fees by advertising and linking to amazon.com. © Between Carpools, 2024. ALL RIGHTS RESERVED
Get our BCP Lifepages Planner by signing up to our email list!
Quick and Easy Homemade Beef Jerky Marinade (Only 5-Ingredients!)
If you’re going to make beef jerky, you absolutely must have a good marinade for it. This homemade beef jerky marinade only has 5 simple ingredients. The ingredients are low-sodium soy sauce, Worcestershire sauce, liquid smoke, onion powder, and garlic powder. You should also have salt and pepper to taste. The ingredients are cheap, easy to find, and will flavor your beef jerky perfectly every single time. We highly recommend making a big batch of marinade especially if you’ll be cooking beef jerky often to save on preparation time. Store the marinade in an airtight jar and keep it in your refrigerator until it’s ready to be used.

More Homemade Beef Jerky Recipes:
The Best Grass-Fed Beef Jerky Recipe Ever (Try this!) Homemade Korean Beef Jerky (Healthy High Protein Snack) No-Fuss Oven Baked Teriyaki Beef Jerky (Easy Jerky Recipe) Apple Cider Vinegar Black Pepper Beef Jerky (Yum!) Bacon Burger Jerky – Homemade Ground Beef Jerky Recipe How to Make the Best 5-Ingredient Homemade Beef Jerky (Easy!)

★ 5 Stars ☆ ★ 4 Stars ☆ ★ 3 Stars ☆ ★ 2 Stars ☆ ★ 1 Star ☆
- Author: Evelyn - HealthySubstitute.com
- Prep Time: 2 minutes
- Total Time: 2 minutes
- Yield: 2/3 cup 1 x
Ingredients
½ cup low-sodium soy sauce
2 tbsp Worcestershire sauce
1 tsp liquid smoke
1 tsp onion powder
½ tsp garlic powder
salt, black pepper
Instructions
- In a bowl whisk together the soy sauce, Worcestershire sauce, liquid smoke, onion powder, garlic powder, 2 teaspoons of salt and 1 teaspoon of black pepper until combined.
- Transfer in a jar and refrigerate until ready to use.
- This marinade as listed will marinate 2 pounds of meat.
Print Recipe
Ask a Question Rate this Recipe
Ask a Question/Comment Cancel reply
Cue the fireworks! These early Fourth of July deals are worth shopping — starting at $4
- Share this —

- Watch Full Episodes
- Read With Jenna
- Inspirational
- Relationships
- TODAY Table
- Newsletters
- Start TODAY
- Shop TODAY Awards
- Citi Concert Series
- Listen All Day
Follow today
More Brands
- On The Show
- TODAY Plaza
I tried 10 beef jerkies and my favorite was the tenderest of the bunch
When 3 p.m. rolls around and not even an iced coffee can get me through the remainder of a trying work day, I rely on good ol’ beef jerky to carry me to the finish line. The flavorful snack is not only energy-boosting with its high protein content and simple ingredients, but also a case of mouth gymnastics with a trademark chewy texture that will wake anybody up from an afternoon slump.
But when it comes to the dehydrated red meat, I’m no expert — I buy whatever is readily available and rarely think twice about what makes a bag the best of the best.
Matt Kreider, executive chef of W Fort Lauderdale ’s Steak 954 , certainly is, and after what I can only describe as an epic spread of steak (everything from filets to rib-eyes to A5 wagyu) during an epic Florida vacation, I sought him out to walk me through what makes the the perfect beef jerky.
“The beef is obviously the most important place to start,” he confirms. “You want a high-quality beef that has been humanely raised and fed on a nutritious diet.”
Unfortunately, this isn’t always what you find with mainstream grocery options, so the second thing to look out for is excessive sodium content.
“A lot of store-bought products have more salt than necessary, so paying attention counts,” adds Kreider, who also encourages consumers to keep processing methods in mind. (You want a jerky that isn’t full of too many additives to achieve that crave-worthy taste and texture.)
While I’ll never pretend like beef jerky will take the place of the perfectly-grilled steaks I enjoyed at Kreider’s restaurant, it does conveniently provide the sustenance I need during any unexpected (or expected, if we are being honest) bout of hanger.
Check out how 10 of the most mainstream brands fared below.
TODAY independently determines what we cover and recommend. When you buy through our links, we may earn a commission. Learn more .
10. Trader Joe’s Natural Original Beef Jerky
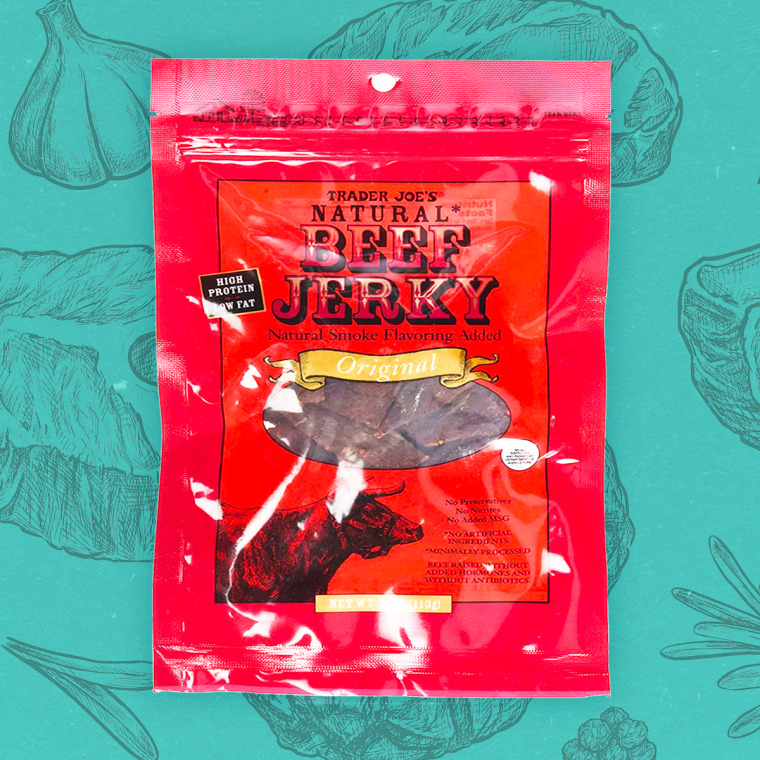
This may come as a shock to the masses, but not everything Trader Joe’s makes is a homerun. And while I wouldn’t mind picking this up as a last-minute snack before a camping or road trip, it’s not something I’m going to rush and buy on a weekly basis. The pieces I ate were a touch fatty, very dry and far too sweet (basically a description of me, if I’m being completely honest). Skip it and opt for one of the beloved chain’s hundreds of certifiably delicious snacking alternatives .
9. Cattleman’s Cut Original Beef Jerky
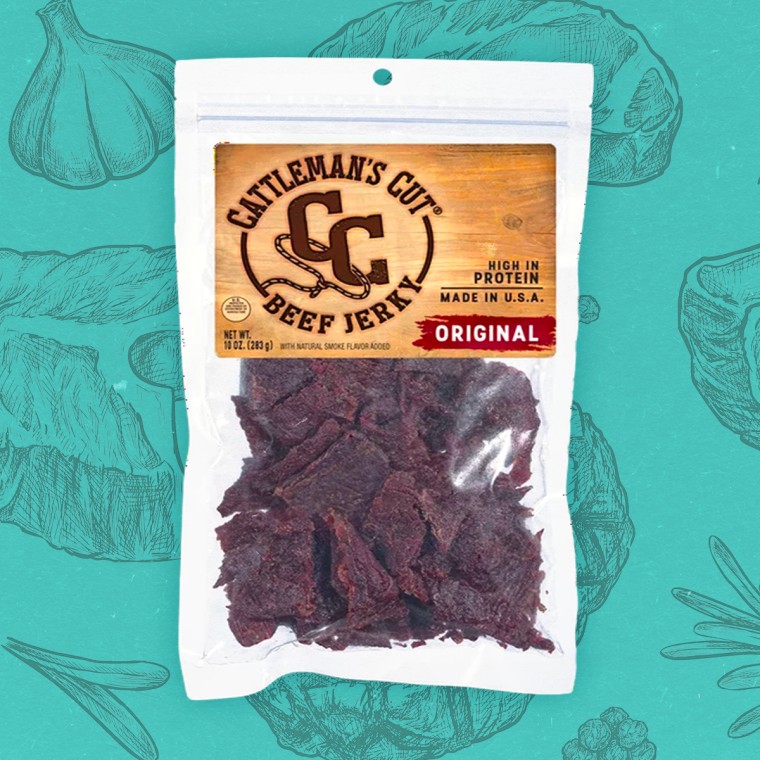
Mr. Cattleman has created a pretty solid jerky, though my nitpicky self unsurprisingly stumbled across a few issues. I appreciated the softness, despite the inconsistency, but my major problem was with the somewhat sour aftertaste. It didn’t taste rancid, by any means, but it was distinct enough to prevent me from going back for more. Also, the pieces were quite oily and I, frankly, only have the mental capacity to deal with my oily Sicilian forehead on a daily basis. That said, I really dig Cattleman’s Cut jerky sticks — look for those instead and you’ll thank me later.
8. 365 by Whole Foods Market Organic Grass-Fed Beef Jerky
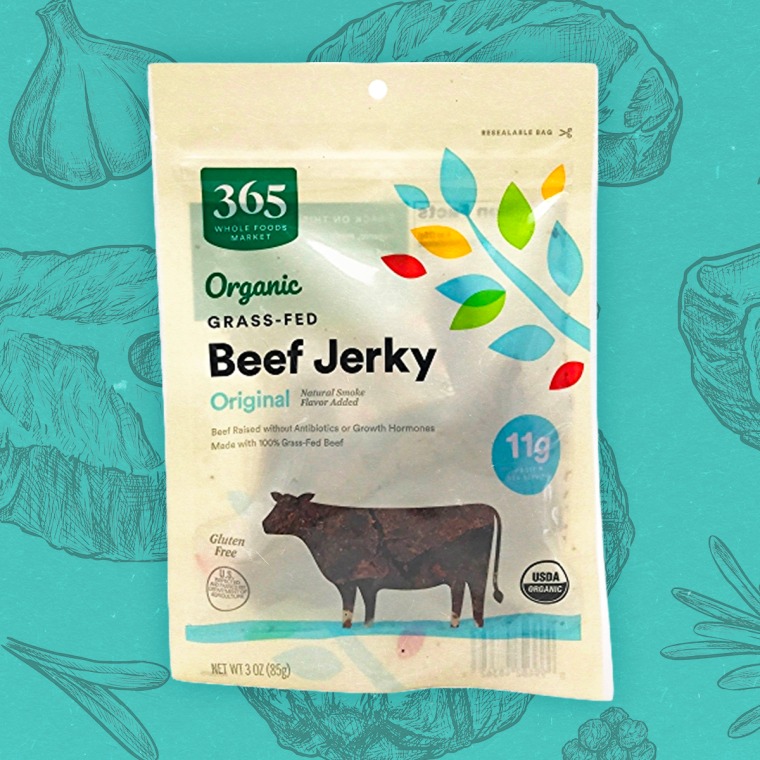
Holy salt content, Batman. This one will have you grabbing a tall glass of ice water to rid your mouth of overwhelming brininess. I did enjoy the texture, though — a perfect balance between soft and hard, though its smoky flavor tasted a bit too artificial for my liking. At least the product is certifiably organic, like Kreider recommended. Props to you, Whole Foods.
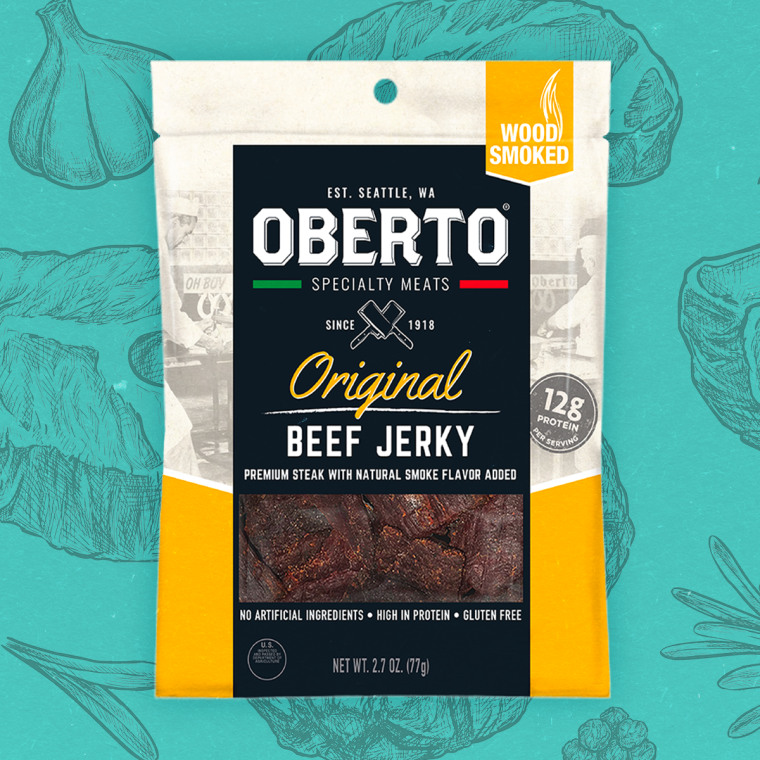
7. Oberto Original Beef Jerky
O berto’s jerky was very average, like my basketball skills and singing abilities, but I do think it’d be a hit among kids and picky eaters. There was nothing particularly special about its taste and texture, though I did admire the variation in sizes (you could gnaw on some pieces while consuming others in a bite or two). If you’re looking for an affordable, safe bet, go for it. But if you want something that feels a bit more gourmet, read on.
6. Jack Link’s Original Beef Jerky
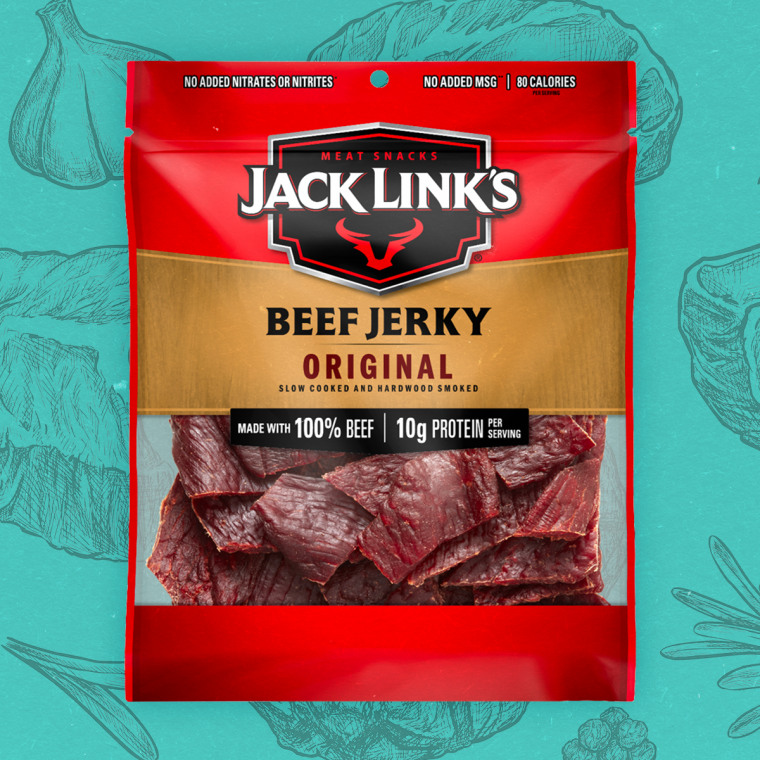
I don’t like hating on Jack Link’s because I think its flavored jerky iterations are oh-so-fun and clever (looking at you, Flamin’ Hot), but the brand suffers from a lack of consistency. You’ll chomp into a piece that is super soft and chock-full of bold smoke and salt, and then your next piece will literally be so tough that a T-Rex would have difficulty ripping through it. If I was guaranteed jerky perfection with each bite, this would have ranked a lot higher. But for now, it remains a strong sixth place.
5. Country Archer Original Grass-Fed Beef Jerky
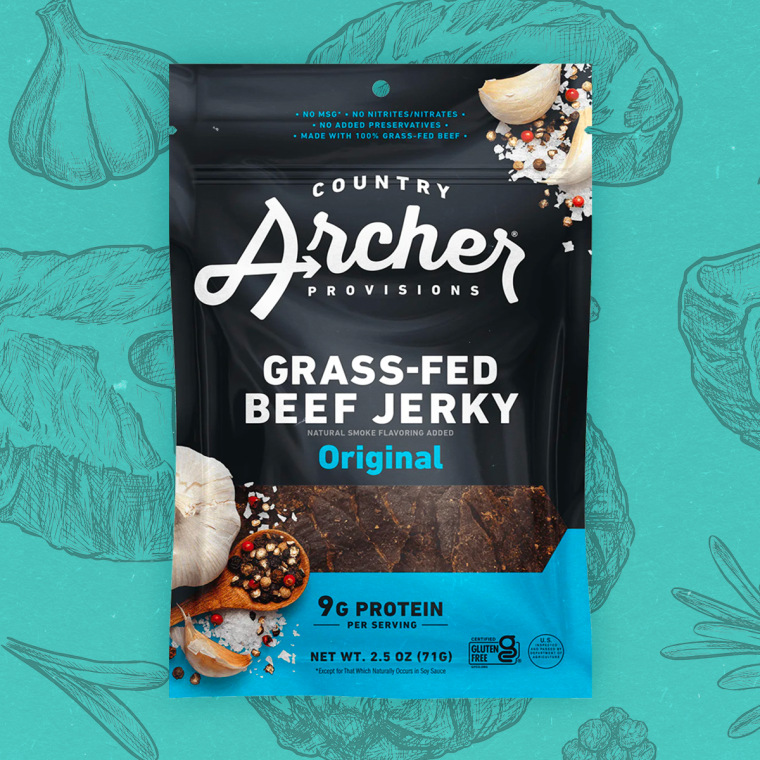
Country Archer really reigned supreme when it came to texture — the perfect hybrid of buttery softness and fibrousess (sounds so appetizing, right?). I know some weirdos people prefer their jerky to feel like chewing tobacco (which this is not), so they’ll savor the moments that take a bit more effort to swallow (without requiring the Heimlich maneuver). Another perk? A subtle spiciness in the form of black pepper, which is always welcomed.
4. Tillamook Old Fashioned Beef Jerky
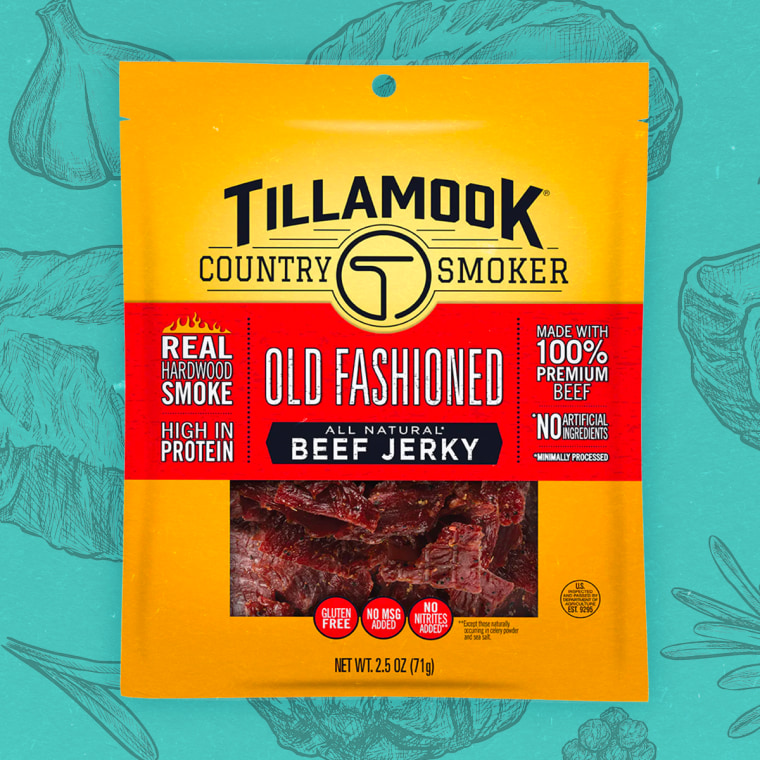
While I actually actually prefer Tillamook’s zero-sugar option , this was a pretty stellar jerky. It was a bit on the sweet side and not as smoky as I typically prefer, but it boasted great texture throughout and felt the most snackable. This would be the one I’d eat an entire bag of with all-too-great ease and then regret my choices an hour or two later when my stomach is in complete and utter distress. Worth it!
3. People’s Choice Original Beef Jerky
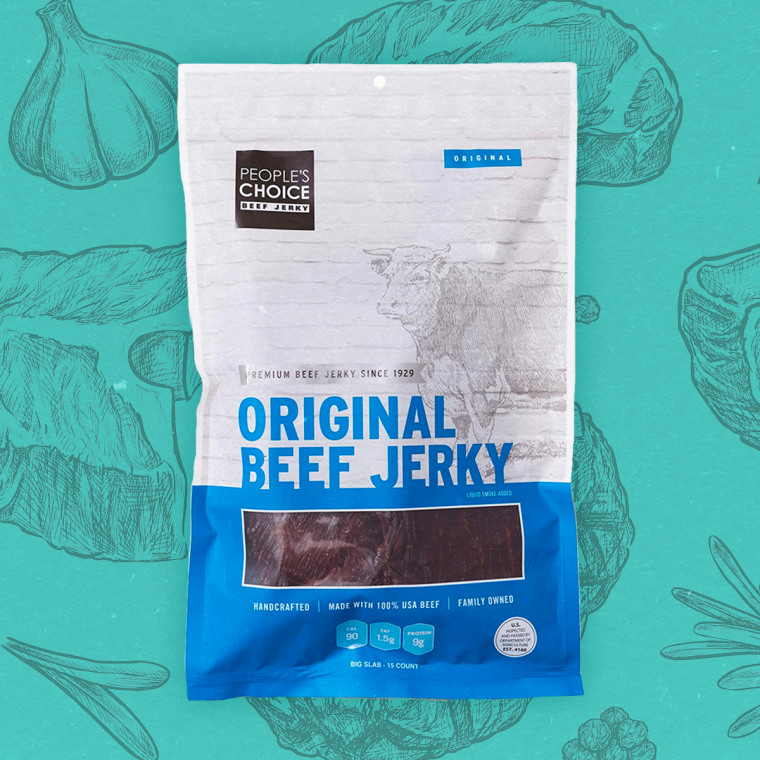
The sleeper hit of the bunch was People’s Choice , which offered a jerky that was uniquely rich and decadent, almost as if it was sourced from an expensive cut of meat. The texture was a bit crumbly and off-putting, but it was extremely beef-forward (in the best way possible) and an ideal choice for any ravenous carnivore who doesn’t like all the bells and whistles of added spices and flavors.
2. Aplenty Hickory Beef Jerky
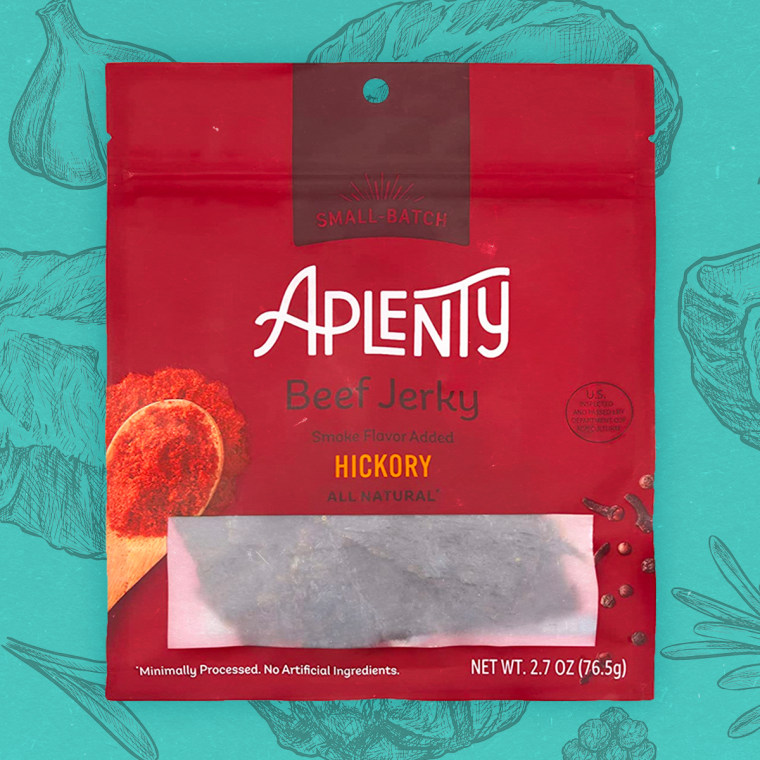
This was probably my favorite flavor of the bunch. I loved, loved, loved the hickory smoke, which imparted its way into every piece. And while it was a bit on the thinner side with strips that required too much labor on the jaw, Amazon has concocted another hit with its Aplenty line. Watch your backs, mainstream grocery stores. The e-retailer giant is coming for your gig.
1. Krave Sea Salt Original Beef Jerky
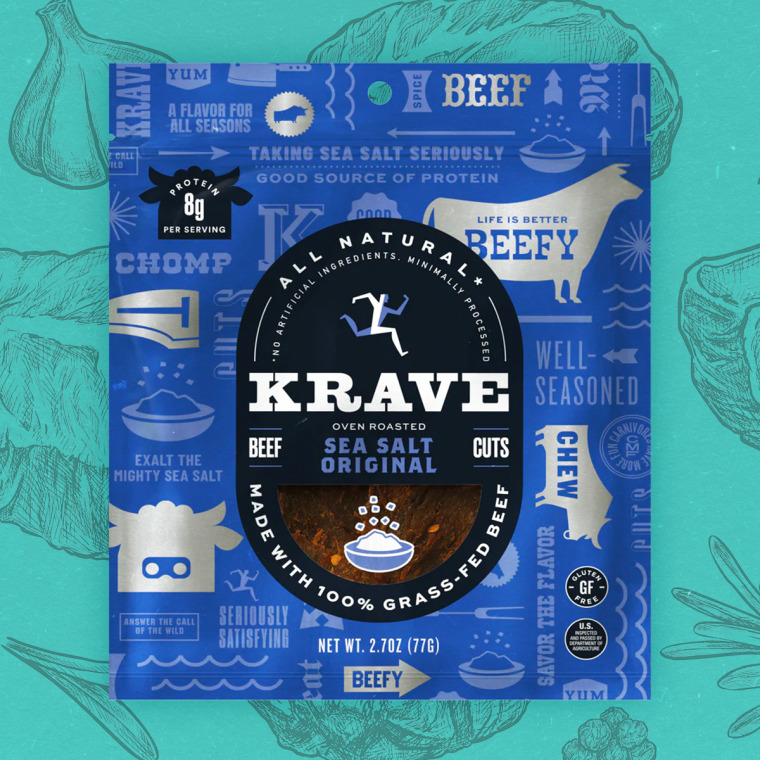
Come at me, bro. I don’t know about you, but I prefer a jerky that doesn’t cause my molars to loosen or my tongue to feel like it took part in an Iron Man. Krave was the softest of the bunch, making dehydrated meat-eating a joy and a pleasure and not an action that causes dentists to cringe. I unashamedly scarfed down an entire bag in one sitting and I’d do it all over again, thank you very much. (Except next time I’m going to need a flavor beyond boring and basic sea salt, which Krave offers. Yay!)
Joey is a writer/editor, TV/radio personality, lifestyle expert, former entertainment publicist and author of "Basic Bitchen."

6 LGBTQ+-owned food brands to support during Pride Month and beyond

Customers feel the squeeze as orange juice prices skyrocket. Why the cost keeps going up

Trader Joe’s $3.99 mini cooler bags are reselling for over $100 online

10 National Iced Tea Day deals for summertime sipping

Costco exec responds to rumors its hot dog combo price will increase

6 food and drink companies embracing florals for spring

A Maryland town was duped into believing a Trader Joe’s was opening. It was apparently a senior prank

Walgreens debuts a follow-up to its viral mango candy: Peelable banana gummies

What grocery stores are open on Memorial Day 2024? Here's a list

Chef Andrew Zimmern calls new Ozempic-friendly meals ‘about as messed up as it gets’
How To Make Perfect Beef Jerky Every Time In Your Ninja Foodi – A Must-try Recipe!
What To Know
- The longer the beef marinates, the more intense the flavor will be.
- With the Ninja Foodi, you have the power to create your own unique jerky recipes and enjoy the fruits of your labor.
- You can rehydrate beef jerky by soaking it in water or broth for a few minutes.
Indulge in the savory goodness of homemade beef jerky with the Ninja Foodi. This innovative kitchen appliance makes it a breeze to create this chewy and flavorful snack right at home. Follow our comprehensive guide to master the art of making beef jerky ninja foodi and tantalize your taste buds.
Ingredients You’ll Need:
- 1 pound flank steak or top round steak
- 1/4 cup soy sauce
- 1/4 cup Worcestershire sauce
- 1/4 cup brown sugar
- 1 tablespoon garlic powder
- 1 tablespoon onion powder
- 1 teaspoon black pepper
- 1/2 teaspoon red pepper flakes (optional)
Preparing the Marinade:
In a large bowl, whisk together the soy sauce, Worcestershire sauce , brown sugar , garlic powder, onion powder, black pepper, and red pepper flakes (if using). This marinade will infuse the beef with a symphony of flavors.
Slicing the Beef:
Trim any excess fat from the beef and slice it thinly against the grain. Thin slices will allow the marinade to penetrate and result in perfectly chewy jerky.
Marinating the Beef:
Transfer the sliced beef into the marinade and ensure that all pieces are submerged. Cover the bowl and refrigerate for at least 4 hours, or up to overnight. The longer the beef marinates , the more intense the flavor will be.
Dehydrating the Jerky:
Assemble the Ninja Foodi Dehydrator Rack and spread the marinated beef slices evenly over the rack. Close the lid and set the dehydrator to 165°F (74°C). Dehydrate for 4-6 hours, or until the jerky is dry and leathery.
Checking for Doneness:
Test the jerky by bending it. If it cracks and snaps, it’s done. Avoid over-dehydrating, as this can result in tough jerky.
Storing the Jerky:
Once the jerky is done, let it cool completely . Store it in an airtight container at room temperature for up to 2 weeks.
Tips for Perfect Beef Jerky:
- Use high-quality beef for the best flavor and texture.
- Marinate the beef for at least 4 hours, but overnight for optimal results.
- Slice the beef thinly against the grain to ensure even dehydration.
- Don’t overcrowd the dehydrator rack to allow for proper air circulation.
- Check the jerky frequently to prevent over-dehydrating.
- Experiment with different marinade ingredients to create unique flavor combinations.
Variations on Beef Jerky:
- Spicy Beef Jerky: Add an extra kick to your jerky with additional red pepper flakes or cayenne pepper.
- Teriyaki Beef Jerky: Replace the soy sauce with teriyaki sauce for a sweet and savory twist.
- Herb-Infused Beef Jerky: Enhance the flavor with dried herbs such as rosemary, thyme, or oregano.
The Joy of Homemade Beef Jerky:
Homemade beef jerky is not only a delicious snack but also a satisfying culinary endeavor . With the Ninja Foodi , you have the power to create your own unique jerky recipes and enjoy the fruits of your labor.
Questions You May Have
Q: Can I use other cuts of beef for making jerky? A: Yes, you can use other lean cuts of beef such as brisket, chuck roast , or sirloin.
Q: How can I make my jerky more tender? A: Use a meat mallet to tenderize the beef before slicing it.
Q: Can I store beef jerky in the refrigerator? A: Yes, you can store beef jerky in the refrigerator for up to 3 months.
Q: What are some healthy dipping sauces for beef jerky? A: Honey mustard , hummus, or guacamole make excellent dipping sauces for beef jerky.
Q: How do I rehydrate beef jerky? A: You can rehydrate beef jerky by soaking it in water or broth for a few minutes.
Hannah Grace
Leave a reply / feedback cancel reply.
Your email address will not be published. Required fields are marked *
Save my name, email, and website in this browser for the next time I comment.
Related Articles
The secret ingredient in beef jerky: does it need curing salt, the truth about expiration dates: does beef jerky really expire, can you bring beef jerky into canada the answer might surprise you, the best way to cut beef jerky: do you cut with the grain or against it, the surprising truth: does beef jerky lose nutrients here’s the answer, are you eating gluten in your beef jerky find out now.

- Bourbon Pepper
- Finest Steakhouse
- Santa Maria Style
- Carne Asada
- Irish Brand Beef Round
- Cooked Corned Beef
- View All Products
- Main Dishes
- Soups & Stews
- Tri-Tip Roasts
- Asada Style Meats
- Corned Beef
- View All Recipes
- Cooked Corned Beef with Juices
- Bill Bailey’s Video Channel
- Tips & Tricks

- Find Bill Bailey’s
- Foodservice
Tri-Tip Beef Jerky
- Prep Time: 4 hrs
- Cook Time: 2 hrs
- 30 strips

Ingredients
- 1 Bill Bailey's Santa Maria Style Tri-Tip Roast , sliced thinly into strips
- 4 Tbs soy sauce
- 4 Tbs ketchup
- 1/4 C dark brown sugar, packed
- 1/2 tsp freshly ground black pepper
- 1 tsp sriracha
Preparation Instructions
- Wash hands with soap and water.
- Combine the soy sauce, ketchup, brown sugar, pepper and sriracha in a large resealable bag. Seal the bag and shake to blend. Add the thinly sliced Tri-Tip and marinate at least 4 hours and up to overnight.
- Remove the Tri-Tip strips from the marinade and place on paper towels. Pat the Tri-Tip dry. Line 2 large rimmed baking sheets with foil and place baking racks on the pans. Lay the strips of Tri-Tip in a single layer across the baking racks. Wash hands with soap and water after handling uncooked Tri-Tip.
- Preheat oven to 200°F. Dry the Tri-Tip strips in the oven for 2 to 3 hours or until dry, but still pliable.
- Store in an airtight container in a cool, dry location. Consume within 2 weeks or freeze.
Featured Product:

Other products that work with recipe:
- Bourbon Pepper Tri-Tip Beef Sirloin Roast
- Finest Steakhouse Tri-Tip Beef Sirloin Roast
Reviews Cancel reply
Your email address will not be published. Required fields are marked *
Save my name, email, and website in this browser for the next time I comment.
29 Beef Jerky Recipes That Will Blow Your Taste Buds Away!

Do you love the savory, chewy goodness of beef jerky? Well, get ready to take your jerky game to a whole new level! In this blog post, we'll explore the best beef jerky recipes that will have your taste buds dancing with delight.
Whether you prefer a classic smoky flavor or crave a bold and spicy kick, we've got you covered. So, grab your apron and let's dive into the world of mouthwatering beef jerky recipes that will leave you begging for more!
1. Beef Jerky

This easy homemade beef jerky recipe is a convenient and healthy snack option. Made with grass-fed beef and a flavorful marinade, it offers a cheaper and MSG-free alternative to store-bought jerky.
Simply marinate the beef in a mixture of apple cider vinegar, molasses, Worcestershire sauce, and tamari, then dehydrate until it reaches the desired texture. Perfect for camping, traveling, or on-the-go snacking.
2. Jerkyholic's Original Ground Beef Jerky

Jerkyholic's Original Ground Beef Jerky is a rich and flavorful recipe that requires no marinating. It is quick and easy to make, perfect for a protein-packed snack. The recipe uses common pantry ingredients and recommends using curing salt for food safety.
The ground beef mixture is either loaded into a jerky gun or spread on a baking sheet and then dried using a dehydrator or oven. The resulting ground jerky has a different texture compared to whole muscle jerky, being more brittle. Overall, this recipe offers a convenient and tasty option for beef jerky lovers.
3. Mexican Heat Beef Jerky

Mexican Heat Beef Jerky is a spicy and flavorful recipe made with Serrano peppers and red pepper flakes. It delivers a fiery kick that will satisfy any spice lover's cravings.
The marinade infuses the beef strips with intense flavor, resulting in a delicious jerky. It is recommended to marinate the beef for 6-24 hours for maximum taste. Overall, this recipe is perfect for those who enjoy a spicy twist to their beef jerky.
4. Dr. Pepper Beef Jerky

Dr. Pepper Beef Jerky is a unique and flavorful recipe that combines the sweetness of Dr. Pepper with the savory taste of beef. The marinade consists of curing salt, sea salt, pepper, and Dr. Pepper, resulting in a delicious jerky with a hint of the soda's flavor.
While the Dr. Pepper taste may not be as prominent as expected, the jerky is still enjoyable and worth making. It can be customized by using any cola of choice. Overall, Dr. Pepper Beef Jerky offers a tasty twist on traditional beef jerky recipes.
5. Homemade Beef Jerky

Homemade Beef Jerky is a simple and delicious recipe that requires minimal effort. The marinade, consisting of Worcestershire sauce, soy sauce, paprika, honey, and spices, adds a flavorful punch to the thinly sliced beef.
The jerky is then cooked low and slow in the oven until it becomes dry and leathery. The result is tender and flavorful beef jerky that is perfect for snacking or on-the-go.
6. Peppered Beef Jerky

The Peppered Beef Jerky recipe is a must-try for first-time beef jerky makers. Packed with classic jerky flavor and a black pepper kick, it offers a mouthful of flavor with every bite. The marinade combines elements of salt, sweet, acidity, and bold seasonings to enhance the taste and tenderness of the jerky.
Optional ingredients like brown sugar and beer add balance and depth to the marinade. The recipe also provides adaptations for dehydrating the jerky in an oven or classic dehydrator. Overall, this Peppered Beef Jerky recipe is a winner for those looking to make delicious homemade jerky.
7. Ground Beef Jerky

Ground Beef Jerky is a delicious and easy-to-make recipe that offers a classic beef jerky flavor with a soft texture. It combines the perfect blend of sweet, savory, and spicy flavors, making it a great option for BBQ lovers on the go. This recipe can be made with lean ground beef or other lean ground meats like venison, elk, pork, or turkey.
The jerky is cooked in a smoker at 160-170 degrees F for 2.5-3 hours until it reaches 165 degrees F and bends without breaking. Once cooled, it can be stored in the refrigerator for up to 2 weeks. Overall, Ground Beef Jerky is a must-try for jerky enthusiasts looking for a tasty and tender alternative to traditional whole muscle jerky.
8. Herbed Beef Jerky

The Herbed Beef Jerky recipe is a delicious and flavorful option for homemade beef jerky. The marinade, made with ingredients like onion, horseradish, herbs, lemon juice, soy sauce, and hot sauce, creates a thick and savory sauce that coats the beef strips.
The jerky is not overly salty and has a nice balance of flavors. The recipe allows for customization in terms of the thickness and width of the jerky strips, as well as the desired level of dehydration. Overall, this herbed beef jerky is a tasty and satisfying snack option.
9. Air Fryer Beef Jerky

Air Fryer Beef Jerky is a simple and delicious recipe for making homemade beef jerky. The marinade combines Worcestershire sauce, honey, soy sauce, and onion powder for a flavorful punch. The recipe suggests using lean and flavorful cuts of beef like top round or bottom round steaks.
The jerky is air fried at a low temperature for a long time to achieve the desired texture. It is a great snack option that is low carb and portable. Overall, Air Fryer Beef Jerky is a tasty and healthy alternative to store-bought jerky.
10. Beef Jerky Marinade

The Beef Jerky Marinade recipe is a simple and easy-to-follow recipe that requires basic ingredients such as Worcestershire sauce, soy sauce, brown sugar, sea salt, black peppercorns, garlic powder, and onion powder. The marinade is prepared by heating the ingredients in a saucepan until well combined and then allowing it to cool before adding it to the meat.
The recipe provides various cooking methods for the marinated beef jerky, including smoking, dehydrating, air frying, and baking. The tips included in the recipe emphasize the use of lean beef, thin slicing, even layering, and low cooking temperature for tender jerky. Overall, the Beef Jerky Marinade recipe is a great addition to any beef jerky enthusiast's collection.
11. "Real Healthy" Beef Jerky

"Real Healthy" Beef Jerky is a standout recipe for those seeking a truly healthy and delicious snack. Unlike many store-bought options, this recipe uses real ingredients and is cooked with a dehydrator, ensuring a nutritious result.
The choice of beef, such as top round or sirloin tip, helps minimize fat content. With a flavorful marinade and the convenience of homemade preparation, this beef jerky is a great choice for a quick and satisfying on-the-go snack.
12. Sweet Java Beef Jerky

Sweet Java Beef Jerky is a delightful homemade jerky recipe that combines sweet, savory, and slightly spicy flavors. Made with cuts of beef like London Broil or eye of round roast, this jerky is thinly sliced for the perfect chew.
The marinade, with its unique blend of sweet, savory, and heat, adds a burst of flavor to every bite. Whether made in a smoker, dehydrator, or oven, this jerky is a must-try for jerky enthusiasts.
13. Lemon Peppered Jerky

Lemon Peppered Jerky is a flavorful and easy-to-make beef jerky recipe. The combination of lemon pepper, garlic, and soy sauce creates a delicious and slightly spicy jerky with a nice kick. The addition of water helps balance the flavors and prevent the jerky from being overly salty.
This recipe recommends marinating the meat for 6-24 hours for the most intense flavor. Overall, Lemon Peppered Jerky is a tasty option for jerky lovers looking for a unique and zesty twist.
14. Spicy Beef Jerky

PepperGeek's Spicy Beef Jerky is a mouthwatering treat that combines Asian flavors to create a unique and delicious snack. The marinade, featuring gochujang paste and brown sugar, adds a perfect balance of sweetness and spice.
The beef slices are tender and flavorful, making this homemade jerky far superior to store-bought options. Whether enjoyed fresh or stored for later, this recipe is a must-try for beef jerky enthusiasts.
15. Keto Beef Jerky

Keto Beef Jerky is a delicious and easy-to-make recipe that is perfect for those following a ketogenic lifestyle. It is sugar-free, low carb, and packed with flavor.
Made with beef, diet Dr Pepper, lemon juice, brown sugar Swerve, and a blend of spices, this homemade beef jerky is a healthier alternative to store-bought options. Whether you're on a road trip or enjoying outdoor activities, this keto-friendly snack is a must-try.
16. Dr. Pepper Jalapeno Beef Jerky

Dr. Pepper Jalapeno Beef Jerky is a delicious combination of sweet and spicy flavors. The heat level can be adjusted to suit individual preferences. It is a popular choice among friends and family, often enjoyed as a treat or given as a gift.
This jerky is made from select cuts of beef, sliced thinly for even drying. It can be dehydrated or smoked for that perfect texture. Overall, Dr. Pepper Jalapeno Beef Jerky is a must-try recipe for beef jerky enthusiasts.
17. Homemade Jerky

Homemade Jerky is a protein-packed snack that is sure to satisfy your cravings. Whether you use ground meat or muscle meat, beef or venison, this recipe delivers a flavorful and tender jerky.
Simply marinade the meat with spices, dehydrate it, and enjoy the delicious results. With its natural flavors and high protein content, this homemade jerky is a must-try for jerky lovers.
18. Coconut Ground Beef Jerky

Coconut Ground Beef Jerky is a unique and flavorful twist on traditional beef jerky. The combination of lean ground beef, coconut flavoring, and a variety of spices creates a delicious and tropical snack.
The addition of curing salt ensures food safety, while corn syrup solids help to bind the jerky together and prevent it from drying out too much. Whether made in a dehydrator, smoker, or oven, this coconut-infused jerky is a must-try for those looking for a taste of the tropics in their beef jerky.
19. Garlic Black Pepper Beef Jerky

The Garlic Black Pepper Beef Jerky recipe is a winner. The combination of soy sauce, black pepper, and brown sugar creates a perfect balance of flavors.
The jerky has a subtle taste at first, but then delivers a nice kick of spice from the black pepper. The garlic flavor is not overpowering, allowing the other ingredients to shine. It's a must-try for beef jerky enthusiasts.
20. Thai Beef Jerky

Thai Beef Jerky is a flavorful and protein-packed snack that is perfect for road trips or parties. This recipe uses minimal ingredients, with the spicy dipping sauce adding a burst of flavor.
The beef jerky is made in the oven and can be served immediately or stored in the refrigerator for up to 5 days. Overall, Thai Beef Jerky is a delicious and versatile dish that pairs well with sticky rice and papaya salad.
21. Homemade Smoked Beef Jerky

Homemade Smoked Beef Jerky is a flavorful and protein-packed snack that is easy to make at home. This recipe uses flank steak, marinated in a mixture of coconut aminos, hoisin sauce, garlic, ginger, onion, chili powder, and black pepper.
The meat is then smoked for 4 hours, resulting in a firm yet pliable texture. It can be enjoyed as a snack on its own or crumbled into other dishes. Overall, this homemade beef jerky is a delicious alternative to store-bought options.
22. Midwest Ground Beef Jerky

Midwest Ground Beef Jerky is a flavorful and easier-to-chew alternative to traditional tough jerky. Made with lean ground beef and a combination of familiar ingredients like liquid smoke, sugar, black pepper, and salt, this recipe delivers a satisfying salty snack.
The jerky is rolled flat and dried in the oven for about 4 hours, resulting in a soft and pliable texture. While whole muscle jerky may be preferred by some, this ground beef jerky is a great option for those craving a savory treat.
23. Spicy Sweet Beef Jerky

Spicy Sweet Beef Jerky is a crowd-pleasing recipe that combines a delightful sweet flavor with a spicy kick. The brown sugar and honey create a pleasant sweetness, while the red pepper flakes and black pepper add a satisfying heat.
This jerky received rave reviews from both home and work, proving its popularity. If you're looking for a flavorful and addictive beef jerky recipe, Spicy Sweet Beef Jerky should be at the top of your list.
24. Corned Beef Jerky

Corned Beef Jerky is a simple and delicious recipe that requires minimal ingredients and preparation. The combination of smoke and corned beef creates a flavorful and tender jerky.
It is easy to make and does not require any marinades or seasonings. The jerky is cooked for 2-3 hours until it is firm and slightly pliable. Overall, Corned Beef Jerky is a great option for homemade jerky lovers looking for a tasty and hassle-free recipe.
25. Sugar-Free Keto Beef Jerky

The Sugar-Free Keto Beef Jerky recipe is a simple and delicious option for those following a keto diet. Made with thinly sliced flank steak and a flavorful spice mix, this homemade jerky is chewy, flavorful, and satisfying.
Unlike many commercial brands, this recipe contains no sugar, making it a healthier alternative. With just a few basic ingredients and an oven, you can easily make this tasty snack at home. It's a great option for those looking for a sugar-free and keto-friendly beef jerky recipe.
26. Teriyaki Beef Jerky

Teriyaki Beef Jerky is a delicious and flavorful snack that is perfect for on-the-go or as a tasty treat at home. The tender beef strips are marinated in a sweet and tangy homemade teriyaki sauce, giving them a delightful Asian-inspired flair.
Whether you prefer to smoke it, use your oven, or a dehydrator, this recipe offers versatile options for drying the jerky. With its balance of sweet, savory, and spicy flavors, Teriyaki Beef Jerky is a must-try for any jerky lover.
27. Hot & Spicy Beef Jerky

Hot & Spicy Beef Jerky is a flavorful and satisfying homemade snack. Unlike store-bought options loaded with chemicals and additives, this recipe offers a natural and delicious alternative. The process requires time and effort, but the end result is worth it. The jerky can be sliced with or against the grain, depending on preference, with the former being easier to chew and the latter providing a more chewy texture.
The addition of hot and spicy flavors adds an extra kick to the jerky, making it a perfect choice for those who enjoy a bit of heat in their snacks. Overall, making your own Hot & Spicy Beef Jerky allows you to enjoy a high-quality, all-natural treat that will impress your friends and leave you feeling satisfied.
28. Beef Sticks / Ground Beef Jerky

Beef Sticks / Ground Beef Jerky is a flavorful and easy-to-make recipe that is perfect for jerky lovers. The recipe uses a combination of ground beef and ground pork, along with a variety of spices, to create a delicious and smoky flavor.
The jerky can be cooked in a smoker, oven, or dehydrator, making it versatile for different cooking methods. Overall, Beef Sticks / Ground Beef Jerky is a great option for those looking to make their own homemade jerky.
29. Kentucky Bourbon Beef Jerky

Kentucky Bourbon Beef Jerky is a bold and flavorful beef snack that is perfect for jerky enthusiasts. The addition of bourbon gives it a nice kick and adds an amazing flavor. This recipe uses lean beef top round or venison, marinated in a mixture of bourbon, liquid smoke, molasses, brown sugar, black pepper, soy sauce, and Worcestershire sauce.
The jerky is then dried in a dehydrator, oven, or smoker until it is bendable and crackly. Overall, this beef jerky recipe is a must-try for those who enjoy a strong and tasty jerky.
Related Posts

32 Vegan Cookie Recipes That Will Have You Drooling

26 Sandwich Bread Recipes Straight from the Oven

36 Japanese Recipes: Unleash Your Inner Sushi Samurai!
About the author.

Dana Frank is a bon vivant, lover of all things gastronomical. She has authored books and written numerous articles on the subject of food and drinks. Dana's passion for cuisine is rivaled only by her love of wine - she enjoys discussing both endlessly.

21 Fall Appetizer Recipes That Will Have You Falling for Flavor

21 Lamb Shank Recipes to Shank Your Taste Buds!

13 Butter Recipes That Will Make Your Taste Buds Melt!

27 Healthy Vegetable Recipes that are Simply Veg-Tastic!

34 Ham Recipes: From Classic to Creative, Ham in Every Bite!

14 Texas Dessert Recipes That'll Sweeten Your Day!

Jalapeno Beef Jerky: The Ultimate Camping And Hiking Snack
Having the right snacks is crucial for outdoor activities like hiking.
While there are countless options to choose from, one snack that stands out as a favorite among outdoor enthusiasts is jalapeno beef jerky.
This spicy and savory treat satisfies your taste buds and provides the energy and sustenance needed for strenuous activities.
This article tells you why you should kickstart your taste buds with Jalapeno beef jerky and why it is the ultimate choice for camping and hiking trips.
The Perfect Balance of Flavor and Spice
One of the primary reasons why jalapeno beef jerky is the go-to snack for outdoor enthusiasts is its perfect balance of flavor and spice.
The combination of savory beef and the fiery kick of jalapeno peppers creates a taste sensation that's hard to beat.
The natural spiciness of jalapenos adds a zing to the jerky without overwhelming your palate, making it an ideal choice for those who enjoy a little heat in their snacks.
Long Shelf Life for Extended Adventures
Camping and hiking often involve extended periods away from civilization, where access to fresh food may be limited. Jalapeno beef jerky comes to the rescue with its impressive shelf life.
This dried and cured meat can last for months without refrigeration, making it an excellent choice for long trips.
You can pack it in your backpack and forget about it until you're ready to refuel, knowing it will still taste fresh and delicious.
Compact and Lightweight
When you're on the trail, every ounce in your backpack matters. Jalapeno beef jerky is a lightweight snack that won't weigh you down.
Its small and portable design makes it a breeze to stow away and transport, guaranteeing you always have a handy and energizing treat at the ready for whenever hunger hits.
This convenience factor is especially crucial for an energy boost without the hassle of preparing a meal.
High Protein Content for Sustained Energy
Hiking and camping demand a lot of physical effort, and your body requires a steady energy supply to keep going.
Jalapeno beef jerky is an excellent source of high-quality protein, making it an ideal snack for maintaining energy levels. Protein helps repair and build muscle tissue , keeping you strong and ready to tackle challenging terrains.
With jalapeno beef jerky, you can keep your energy up without the sugar crashes associated with many other snacks.
Low Fat and Low Carb Option
Maintaining a balanced diet while on outdoor adventures is essential for your overall well-being. Jalapeno beef jerky fits into this equation perfectly.
It's low in fat and carbs, making it a healthier alternative to many other portable snacks loaded with sugar and unhealthy fats.
This snack can help you stay on track with your dietary goals while enjoying the great outdoors.
No Cooking Required
One of the hassles of camping and hiking is preparing meals in the wild. Jalapeno beef jerky eliminates the need for cooking entirely.
It's a ready-to-eat snack that requires no preparation, stove, or utensils. Simply tear open the package and enjoy.
This simplicity is a game-changer when you're tired after a long day of hiking and just want a quick and satisfying snack.
Versatility in Meal Planning
Although jalapeno beef jerky is a delicious standalone snack, it is also a flexible ingredient that elevates your campfire cuisine.
You can chop it up and add it to soups, stews, or scrambled eggs for an extra burst of flavor and protein.
Its spicy kick can elevate the taste of your campfire cooking, turning an essential meal into a gourmet experience.
There are so many reasons to kickstart your taste buds with Jalapeno beef jerky , besides the fact that it is the ultimate snack for outdoor activities like camping and hiking.
Its compelling blend of flavor and spice, long shelf life, compactness, and high protein content make it the perfect fuel for outdoor adventures.
Whether hiking through rugged terrain or sitting by the campfire, this savory treat will energize and satisfy you.
The post Jalapeno Beef Jerky: The Ultimate Camping And Hiking Snack appeared first on Kellys Thoughts On Things .

All products and listings featured on Condé Nast Traveler are independently selected by our editors. If you purchase something through our links, we may earn an affiliate commission.
The Best Airport Snacks From Hudson News, According to Our Editors
By CNT Editors
This article is part of our airport food survival guide , which includes tips and tricks—even a hot take or two—that challenge the notion that airport meals are always dull, overpriced, and tasteless.
Facing an obnoxious airport delay ? No time to down a power bar from your pantry before hitting the airport at the crack of dawn? Too hangry to decide where to sit and eat near your terminal? No matter the situation, preflight grab-and-go Hudson News is the old reliable. With over 1,000 stores across 37 states in the US , the stalwart stocks everything from the random to the reliable. As professional travelers (with, I’ll say, great taste), we’ve rounded up our favorite snacks from Hudson News that are variously convenient, delicious, and—most often—a combination of the two.
Pad out the protein

In case you haven't heard, we're in a beef jerky renaissance—the road trip snack is back baby! Long journeys require large doses of salty snacks (I tell myself it forces me to drink more water, which is good?), and while I used to be all salt and vinegar chips, I'm now prone to the pricey, grass-fed jerkies that line the walls at Hudson News. They're all targeted toward a very keto/paleo/etc audience, which is not me, but hey, they're the closest thing to a burger that you can keep in your bag, and if the in-flight meal doesn't hit (it rarely does), you know you can fill up on little smoky beef bits. I wash it all down with a gigantic cold seltzer (if they have glass bottles that is) otherwise I dutifully fill my reusable water bottle at the fountain. —Megan Spurrell, senior editor

On my latest trip, I happily discovered The Perfect Bar at the Hudson News in the Raleigh Durham International Airport. It’s a protein bar, but get this—it’s refrigerated. That’s because there are no chemicals or artificial preservatives, which means a shorter shelf life, but if you check out the ingredients list it’s all whole foods like nut butter, coconut, and honey. It’s the best tasting protein bar I’ve ever had, and with 20-plus superfoods and up to 17 grams of protein in one bar, it’ll keep you full for at least a few hours. I found out afterward that the founders based the recipe off a road trip snack their dad would make for the family after finding a deficit of healthy travel bites, so it’s no wonder that it’s so traveler-friendly. — Hannah Towey, Associate Editor

I hate eating on airplanes, but the only thing that’s worse is being trapped when the blood sugar starts to tank. For this reason, I buy a good amount of jerky at the airport—keeps it simple, packs that quick and easy protein punch that will actually make you full. Megan puts it well above so I won’t belabor the point. But I will add that, because so much of air travel for me is done in a fugue, a mint or peanut butter chocolate whey protein bar can pass pretty easily for candy when you’re out of it enough. The CLIF options are my favorite, but can be quite dry, so I like to hold each bite in my mouth with a sip of water for a few seconds to let it soften. I’m realizing as I write this that it sounds pretty sad. — Charlie Hobbs, associate editor

I may like to put my taste buds to the test during road trips , but when I'm at the airport, I'm as boring as it gets. I try to pack my own snacks, like trail mix or apple slices—if I'm not rushing out to hail a cab at the last minute—but my most consistent Hudson News purchase is *drum roll* a small cup of yogurt. Because I'm most often browsing as the sun rises, I'm usually on the hunt for breakfast items that don't come from a fast-food chain. There may not always be fresh produce or a protein snack pack available, especially at smaller airports, but I know I can always find a cold cup of Chobani to give me at least the illusion that I've had a nutritious and filling breakfast before I inhale the minuscule bag of snack mix in flight anyway. — Taylor Eisenhauer, editorial operations manager
Artificial reality

I’m a sucker for any crispy and salty (and usually alarmingly bright in hue) snack— Doritos , Cheetos , BBQ corn nuts , those weird fake cheddar and peanut butter crackers that you ordinarily only find in vending machines. I see them and I want them, but I’ve learned my lesson: I will eat the entire 8-serving bag or package on the flight and arrive at my destination queasy, dehydrated, and with a stubborn orange residue under my fingernails that is impossible to scrub away in the airplane bathroom . Lately, my go-to has been a regular ( not king-sized) bag of peanut M&Ms . They are satisfying (the nut factor–good fats–even makes me feel a little virtuous) while still feeling like a treat, even if I pound the whole bag, I don’t land feeling ill, and, as everyone knows, they melt in your mouth and not in your hands. — Rebecca Misner, Senior Features Editor

Peanut M&Ms on every flight! It might sound basic but it is the perfect sugar lift, right when you need it most. And it has actual substance to quench the appetite without ruining your first meal upon arrival. Pro-tip, get the ones in a resealable bag. The only downside comes when the pilot announces a nut allergy onboard , which has happened to me once or twice. —Eugene Shevertalov, Associate Entertainment Editor
Pass the salt

When I hit up Hudson News, I do it right: salty, sweet, and semi -substantial. Clif Bar’s White Chocolate Macadamia nut bar is a regular companion. No other flavor or brand does the trick. Buttery, filling, and not too sweet, it is most delicious on morning flights. For later or longer flights, I snag Sabra’s hummus and pretzel cups. As a lover of the salty, it's a compromise on other options I would otherwise impulsively buy—namely, a large bag of Kettle’s delicious and crunchy and messy and loud-to-chew Jalapeño chips. —Jessica Chapel, editorial assistant

I love primarily salty snacks for travel, and ones that lean a bit on the healthier side (if only to make me feel better about the bag of Salt and Vinegar Lays we will also no doubt crush). Lately, SunChips of the French Onion variety have caught my eye at the Hudson Newses of the world and are really doing it for me—they’re so zingy and minimally messy compared to some other flavored chips with too much of that flavor dust happening (plus, on the healthy side, they’re whole grain). But sometimes I like to go back to basics and stick to the potato variety: If I’m in Greece , there’s always a bag of oregano flavored potato chips in my beach bag. I've also been known to throw Twizzlers or any generic peach ring gummies into a haul, because if you have your salty you’re inevitably going to want your sweet, too. — Shannon McMahon, destinations editor

I do my best to bring snacks from home for long flights, but occasionally, the rush-to-the-airport chaos gets the best of me and I wind up at Hudson News looking for something to bring on board. After perusing the magazine rack, I’ll usually grab one of those mini packaged charcuterie spreads that resemble a grown-up Lunchable, or if I’m lucky (I’ve only seen them in some airports), a pack of Oh Snap!’s Hottie Bites pickle packs . It sounds like a weird plane snack, but they’re spicy, crunchy, and fresh. If I’m in the mood for something sweet, it’s always a pack of some worm or bear from Trolli. —Madison Flager, senior commerce editor
Eating as entertainment

I have to preface this by saying, I don’t usually find myself racing over to Hudson News for snacks. I’m typically there to buy a mag for my plane ride or a bottled beverage because I’ve managed to forget to bring my refillable bottle. But once I'm there, it’s hard to ignore the tiny bags of snacks that offer the most luxurious of benefits on a long plane ride—something to pass time with. So it’s less about sustenance and more about breaking the monotony of, say, a 21-hour flight to India . Once I’ve convinced myself of this, I typically lean on a hummus and pretzel cup (or two), sometimes a bag of dried fruit (mango is my favorite—they don’t always have this), and then, invariably, a Kind bar that I find uneaten weeks after in my handbag. —Arati Menon, Global Digital Director

Agent Cooper once said: every day, once a day, give yourself a present. On travel days, waiting to board is an excuse for me to gorge on what I usually try to roll past in the grocery snack aisle: salty, umami pleasure bombs like Combos or cheese puffs make me instantly more patient about any sitting around I have to do. I also grab Welch's fruit snacks for nostalgia if the strawberry ones are in stock. Snapple iced tea is an imperative antidote to all this delicious sodium. — Alex Sanidad, research director

Flying with a one-year-old means snacks, snacks, snacks—it’s the best form of entertainment! Considering my son only has four teeth right now, my go to Hudson News snack is that bright yellow tub of Cheerios . Each cheerio in that yellow container is one second of a great activity to combat the impatience of a 12 month old. For myself however, I keep it simple with a Kind bar (I try to steer clear of the chocolate ones so I don’t end up with a melted mess half way through my flight.) The salty-sweet aspect of the maple-glazed pecan and sea salt flavor is perfect when you only have one snack because I always need a bit of salty and a bit of sweet to complete a snack. —Andrea Edelman Kay, Digital Photo Editor
The Latest Stories from Condé Nast Traveler
Want to be the first to know? Sign up to our newsletters for travel inspiration and tips
The 42 Best Things to Do in New York City
The Air France La Première First Class is About To Get Even More Luxurious
Why You Should Ditch the Short-Haul Flight for an Overnight Train
These Are the Foods to Avoid on a Flight
By signing up you agree to our User Agreement (including the class action waiver and arbitration provisions ), our Privacy Policy & Cookie Statement and to receive marketing and account-related emails from Traveller. You can unsubscribe at any time. This site is protected by reCAPTCHA and the Google Privacy Policy and Terms of Service apply.
- Amazon Newsletter
- About Amazon
- Accessibility
- Sustainability
- Press Center
- Investor Relations
- Amazon Devices
- Amazon Science
- Sell on Amazon
- Sell apps on Amazon
- Supply to Amazon
- Protect & Build Your Brand
- Become an Affiliate
- Become a Delivery Driver
- Start a Package Delivery Business
- Advertise Your Products
- Self-Publish with Us
- Become an Amazon Hub Partner
- › See More Ways to Make Money
- Amazon Visa
- Amazon Store Card
- Amazon Secured Card
- Amazon Business Card
- Shop with Points
- Credit Card Marketplace
- Reload Your Balance
- Amazon Currency Converter
- Your Account
- Your Orders
- Shipping Rates & Policies
- Amazon Prime
- Returns & Replacements
- Manage Your Content and Devices
- Recalls and Product Safety Alerts
- Conditions of Use
- Privacy Notice
- Consumer Health Data Privacy Disclosure
- Your Ads Privacy Choices
Getting lost on Black Balsam on Blue Ridge Parkway, 'best view ever, plenty of photo ops'

On Good Friday, my friend Justin Rollins texted me around 7:55 a.m.: “I’m ready to rock.”
After a stop to get more water, we headed from Spartanburg to the Blue Ridge Parkway to hike 13 miles up Black Balsam on a beautiful, clear morning.
Sunshine, clear skies, cooler temperatures, and distant mountains. Hip-hop and pop music played through the new sound system in my 2004 Jeep Rubicon as it climbed steeply up the mountain.
Justin had suggested hiking the 13-mile trail to see the view from Black Balsam in the Pisgah National Forest, which he has hiked several times. “It will take us all day,” he messaged. "It’s off the Blue Ridge Parkway. You can do it. There is a lot of elevation, but you will be good. It’s a giant loop, and the payoff is incredible. Mile 12, the best view ever. Plenty of photo ops.”
Take a hike: The easy to challenging trails to check out in the Carolinas this summer
Hiking 101
I’ve hiked local trails like Cottonwood, River Birch, and the Mary Black Rail Trail in Spartanburg. I’ve also hiked nearby trails on Crowders Mountain, Table Rock, and Caesar’s Head. Nothing prepared me for what lay ahead on Black Balsam.
Justin suggested some good waterproof trail shoes and a backpack.
I purchased a salmon-colored Osprey backpack at The Local Hiker in Spartanburg and ordered some waterproof Oboz trail shoes, which didn’t arrive in time. I filled my backpack with a water bottle, bug spray, sunscreen, extra socks, lip balm, travel-size Lysol, and wipes.
When we arrived and parked on the Blue Ridge Parkway, it was a cold 54 degrees and the wind made it feel even colder.
We decided to take a first photo by the Jeep; we would take another at the top of the summit.
Unfortunately, that final photo would never happen.
Beware of bears
I wore a long-sleeved shirt, long pants, a jacket, my Old Bay Seasonings cap, thick socks, and New Balance sneakers.
Justin wore hiking pants, his colorful $30 FILA trail shoes, thick hiking socks, a couple of long-sleeved shirts, a hooded jacket, and a cap. He had a couple of pairs of sunglasses.
Justin’s backpack was loaded with trail mix, beef jerky, chocolate-covered pretzels, water bottles, and a small Fireball cinnamon whiskey bottle. We would take three swigs from that Fireball bottle along the trail. The first one went down hard, the second was easier, and the third went down like water at the end of our trek.
Justin also carried bear repellent spray and a knife, just in case we encountered trouble along the way.
Several signs along the trail warn hikers about bears.
“If you encounter a bear, make yourself big and be as loud as possible. If attacked, fight back with anything you have.”
Justin had the knife. I had my salmon-colored backpack.
The first leg
We started our hike, and Justin told me to let him know if I wanted to stop and take photos or to rest. We had all day to make the 13-mile hike.
At one point, I looked around, and the sights were beautiful: deep blue skies and tall trees reaching to the heavens. It was calm and peaceful. Even the photographs taken with my new iPhone camera wouldn’t do it justice.
At one point, I could hear the wind climbing up the mountain. Maybe it was my imagination, or Mother Nature also had to hike to reach the top of Black Balsam.
The first few miles
For the most part, we were out there alone. So, if we heard a sound or a voice, our Spidey senses would be activated.
One of the first hikers we met along the way was a female hiker and her dog. She sensed she had passed by a bear, but her dog, unafraid of bears, didn’t make a sound.
We gathered that it might be that time of year when bears were coming out of hibernation. We were now on high bear alert.
We thought we might see the female hiker and her dog again, but we never did.
Trails come and go
Justin gave me a lot of hiking advice along the way. First, he would tell me how to position my feet when climbing the mountain. He said to dig my feet into the ground or on the side of the mountain or trek sideways down a slippery path. He also talked me through how to fall if I slipped to lessen the impact on my body. Fall backward on your butt and not forward on your hands. There were many of those near-falls but, thankfully, no accidents.
On a hike, you quickly learn that leaves can be deceiving. They are slippery, and your foot can fall straight through. Mud is also tricky. Your foot can sink deep into the mud and get stuck momentarily.
We both had many near-misses along the way — an unsteady rock or a root jutting out along the pathway could cause a near-trip, but we would keep our bearings and not fall.
The trail would often disappear, and we (Justin, for the most part) would have to figure out how to get back on track.
One of my first challenges was when the trail disappeared out of nowhere. I was stuck on the side of the mountain. To get back on the trail, we would have to shimmy across the side of the mountain.
So here I am, hugging, clinging to the side of this mountain. If I made one false move, I would slide down. I jammed my New Balance shoe into the wet, muddy side of the mountain to give me a foothold and held onto anything I could.
Justin said if I did go down, there would be a tree that would stop my fall. I didn’t want to take that chance, so I held on. I grabbed onto any stable tree branches I could find and guided my way across in almost a vertical bear crawl, and we found our path again.
In an ironic twist, my phone rang out on the side of Black Balsam, in the middle of nowhere, miles from civilization. It was The Local Hiker calling about the hiking shoes I ordered. I sure could have used those on Black Balsam.
Three streams to cross
We noticed the water was higher than expected when we reached our first stream.
This rapidly flowing waterfall fed the stream we were about to cross. Justin quickly assessed the stream and decided how best to cross it.
At one point, Justin was lifting heavy rocks and tossing them into the creek bed to determine its depth.
On his previous hikes to Black Balsam, Justin said the water levels were much lower.
He plunged into the freezing, rapidly rushing water. I wanted to see every step he took so I could put my feet down in the same spots. From the surface, the depth of the creek could be deceiving.
So, I mustered all my courage, put one foot into this ice-cold rushing water, and then my other foot, following Justin’s lead. It was cold, and the water was pushing at my legs. It was slippery, and keeping my balance was hard, so I crouched briefly. I was holding onto slippery rocks and trying to stay steady. One false move, one slip, and you could fall and hit your head on a rock or worse.
Justin reached out to help, but I didn’t want to pull him in if I slipped. So, I hugged onto the rocks, keeping my feet steady. I then lunged for the rock bed and was safe on dry ground.
We got baptized in ice-cold water three times that Good Friday.
Once, we were soaked from our knees down during a creek crossing. This time, Justin had to pull me onto the rock during the deepest part of the crossing, and I gladly accepted his help.
Justin removed his shoes and socks in this stream and waded into the ice-cold water. He even jumped over a large puddle onto a rock at another creek bed. I just stepped into the puddle to get to the other side.
After a quick photo, we were back on our way to the summit.
The hard part
After a quick stop for beef jerky, trail mix, and water for lunch, we rested in the beauty of the tall trees and the endless skies. Our picnic table and benches would be moss-covered boulders or fallen tree trunks along the way.
At this point, I still had a lot of energy, and my legs felt good.
By mid-afternoon, we were hiking upward and downward and discussing where to eat for dinner. Justin said we should get a big order of chicken wings and a large pizza at Side Street Pizza in Tryon, N.C. One-half pepperoni and one-half Deluxe.
I was getting so thirsty. My lips were chapped and puckered. I might have even been dehydrated.
On top of the world
The last part of the trek up Black Balsam is fuzzy at times. All I remember is that it was a steady climb upward. I could only imagine that we would be touching the sky when we got to the top — if we ever got to the top. That’s why I dubbed it the “Stairway to Heaven.” I will be meeting Jesus on Good Friday.
This part of the trail was called Greasy. Justin and I often joked along this path to keep our mood upbeat.
The more we climbed, the more we started calling Greasy — Greazy. We rhymed every other word we could think of to describe Greasy — freezy, breezy, and sneezy for the runny nose and snot bubbles that were forming at the end of my nose.
“Is that all you got, Greasy?” I taunted.
But Greasy kept coming back with more and more steps upward – steep, difficult, winding, punishing, twisting, never-ending, jagged steps.
That light backpack on my back kept getting heavier as the day wore on.
Black Balsam can be deceiving
To get to the top, I decided to look at the steps ahead of me and not think of that tall mountainside we had to climb.
Justin would yell back at me, “Don’t look up!” He didn’t want me to see the steep mountain we still had to climb. Too late. I had already looked up to a mountainside that reached to the heavens.
I started moving slower.
Once, Justin looked back, and I was hugging a tree. He asked if I was OK, so I said, “I need to hug this tree.”
In a way, the tree gave me a chance to catch my breath and steady myself. On the hike up that mountain, I hugged many trees.
Once, we came upon a tall, thick tree trunk that had fallen along the path. We had to climb over it. I lay on that trunk like it was one of those mattresses they advertise on TV. It felt so good to rest for a minute, but we had to keep moving. The sun was going down.
Once again, trails would disappear from us along the hike, and Justin would try to find our way back using his AllTrails app.
We needed that app to get off this trail, reach the summit, see the spectacular view, and then head back to where I parked the Jeep.
That’s when Justin’s phone battery died. We would have to rely on Justin to get us out of here using his senses and memories of past trail hikes up Black Balsam. We guessed we had 3 more miles to go. Instead, we would have to hike an additional 6 miles that day.
We decided to take our final photo now.
We also took our final swig of whiskey to mark the occasion. I also drank the last of the water from Justin’s second water bottle he had packed.
That’s when I realized my phone was dead, too.
Two dead phones. We had no way of reaching the outside world.
There would be no photo at the top of the summit either.
End to Greasy, Hello to Art Loeb
We exited onto this massive clearing when we finally reached the top of this Greasy trail.
“Is this heaven?” I was thinking but remembered seeing this clearing on the Black Balsam website.
In the distance, we could see a tent in the middle of this field and hear some voices.
Finally, humans, after all these many miles and countless hours.
Justin went over, told them where we were headed, and asked for directions to the parking lot. Were we headed in the right direction to get to the summit?
The male hiker gave us directions to the Art Loeb trail, which we thought would be the best way to reach the summit and see that spectacular view.
We found the sign for Art Loeb.
That Art Loeb trail was another steep trail with these jagged, uncomfortable, unforgiving rocks that you had to step on to climb up the other side of the mountain. I called these punishing rocks “Jagged Little Pills.”
Keeping up our dark sense of humor, I told Justin, “I would like to have a word with Mr. Art Loeb.”
According to the Hike WNC website, the 30.1-mile Art Loeb Trail is one of the state's longer and more challenging trails. Loeb was an activist who “deeply loved these mountains.”
One hiker about a quarter up the steep Art Loeb trail advised us to return and take another much easier trail to the parking lot. He said our current path had many more chances to get lost.
Sundown was coming in about an hour. Would we make it in time?
Once we reached the beginning of the Art Loeb trail, Justin hesitated and wondered if we should try to make it to the summit. Ultimately, we took the hiker’s advice and followed the trail to the parking lot.
We met up with another hiker from North Carolina, and his AllTrails App was working. He said we were headed in the right direction and that he would walk with us.
This was no easy path, either. It was nonstop, with jagged rocks and puddles punishing the feet. It added a couple more miles to our day, and we guessed we hiked 16 miles that day.
Justin looked back at me and said, “You completed a half-marathon.”
My iPhone Health summary, before it died, recorded that we had walked 34,234 steps that day and that was before those extra 3 miles we hiked.
Although the trip was challenging, I’m glad we did it.
If Justin was tired or frustrated, he didn’t show it. The next day, I asked him about that, and he said, “Nah, LOL. I knew we would be OK.”
And one day, we’ll be back to see that spectacular view from the top of the summit.
Hiking safety tips
- Don't hike alone. You are safest with a group.
- Leave your hiking plans with someone at home and check in frequently. Establish a time you will check in upon completion of your trip, as well as a procedure to follow if you fail to check in.
- Be wary of strangers. Be friendly, but cautious. Don't tell strangers about your plans. Avoid people who act suspiciously, seem hostile, or are intoxicated.
- Bring a map and compass and know how to use them.
- Carry a cell phone.
- Bring extra food and water.
- Bring extra layers of synthetic clothing. Avoid cotton, which doesn’t dry quickly and can lead to hypothermia when it’s wet.
How to stay safe outdoors in WNC:: Have fun, but don't be stupid
Jose Franco is a Content Coach for the Greenville News. He can be reached at [email protected]
IMAGES
VIDEO
COMMENTS
Place a wire rack over each pan. Preheat the oven to 175°F and set two oven racks in the centermost positions. Arrange the marinated meat on the wire racks in a single layer. Bake, rotating the pans from front to back and top to bottom midway through, until the meat is dried out, 3 to 4 hours.
Place the beef strips in a zip-top bag. Mix remaining ingredients and pour over beef. Cover & marinate for 12-36 hours. Shake the bag a few times as it's marinating to make sure the beef is evenly coated. Spread the meat in a single layer, shaking off any excess marinade, on the dehydrator trays.
Instructions. In a large bowl or ziplock bag, stir together soy sauce, worcestershire sauce, honey, garlic powder, onion powder, chili flakes, liquid smoke, black pepper, and cayenne pepper. Place sliced beef into the bowl and make sure all of the pieces are covered in the marinade. Cover or seal tightly.
Place in a bowl or ziplock bag. Remove the meat from the freezer and slice ¼" strips against the grain for an easy chew. Cut with the grain for a more chewy jerky. Add sliced beef to the mixture in the ziplock bag or bowl and marinate for 8-24 hours in the refrigerator.
Directions. Gather all ingredients. Prepare the marinade: Combine soy sauce, Worcestershire sauce, liquid smoke, brown sugar, salt, pepper, meat tenderizer, garlic powder, onion powder, and paprika in a glass bowl. Place beef strips in a 9x13-inch glass baking dish. Pour marinade over top; toss until evenly coated.
You don't want to cover the slots where heat circulates. Balance the toothpicks on the rack, so the meat is hanging down like a bunch of wild-looking streamers, and bake at 175°F. After 30 minutes, remove the foil-lined tray; juice will have accumulated on that, and you don't want its moisture to steam the meat.
Directions. Whisk together Worcestershire sauce, soy sauce, smoked paprika, honey, black pepper, red pepper flakes, garlic powder, and onion powder in a large bowl. Add beef; mix until completely coated with marinade. Cover the bowl with plastic wrap and marinate in the refrigerator, 3 hours to overnight. Dotdash Meredith Food Studios.
Trim all visible fat from the beef, wrap in plastic wrap, and place in the freezer for an hour or two to partially freeze. While the meat is in the freezer, combine the soy sauce, water, brown sugar, ground black pepper, sea salt, garlic powder, & onion powder in a bowl or ziplock bag and mix well. Remove the meat from the freezer and slice ¼ ...
While the meat is in the freezer, combine the pickling salt, curing salt, coriander, onion powder, garlic powder, liquid smoke, black pepper, sugar, and cold water in a medium size bowl or ziplock bag. Mix well. Remove the meat from the freezer and slice ¼" strips with the grain. Or skip the freezing phase and use a jerky slicer for evenly ...
Preheat your smoker, oven (with the door cracked), or dehydrator to 170 degrees F. Place the jerky strips on the grill grates, jerky rack, or cooling rack and season the top of the jerky with additional pepper (this is optional if you want extra pepper flavor). Make the beef jerky. Smoke/cook/dehydrate the jerky for 2-3 hours.
Searching for the Best Beef Jerky. Everyone has a road trip snack—you know, the one item you always grab at the gas station on your way out of town. Polling Taste of Home staffers, Combos, Swedish Fish and beef jerky are popular favorites. But there's a reason beef jerky tops many snack lists: It's chewy, salty and packed with protein to keep you fueled up as you drive cross-country.
Step 2: In a medium-sized bowl whisk, coconut aminos, liquid smoke, Worcestershire sauce, and spices. Step 3: In a ziplock bag, combine sliced beef and marinade. Mix very well and refrigerate for at least 6 hours or better yet, overnight. Step 4: Place wire cooling rack over a parchment-lined baking tray.
Place the beef slices one by one into the marinade, ensuring the slices are completely covered with the marinade. Cover with a plastic wrap and let marinate in the fridge overnight, or at least 6 hours. The next day, take the marinated beef slices from the fridge. Preheat the oven to 140 °F (60 °C).
Prepare your marinade by mixing all ingredients except for beef in a bowl. Stir until completely mixed. In a storage bag, add your sliced beef and marinade mixture, ensuring all beef is submerged in the mixture. Remove as much air as possible from the bag, then seal and refrigerate for 12-24 hours.
Place the strips of meat along with all of the remaining ingredients into a large, 1-gallon plastic zip-top bag and move around to evenly distribute all of the ingredients. Place the bag into the ...
Remove meat and place on dehydrator trays. Group similar sized pieces of meat together. This way, when the smaller pieces are ready before the bigger pieces you will remove that tray and let the rest cook for longer. Plug in the machine. Set the knob on "jerky," the highest setting. Dehydrate for 2 ½ - 3 hours.
Instructions. In a bowl whisk together the soy sauce, Worcestershire sauce, liquid smoke, onion powder, garlic powder, 2 teaspoons of salt and 1 teaspoon of black pepper until combined. Transfer in a jar and refrigerate until ready to use. This marinade as listed will marinate 2 pounds of meat. Print Recipe.
10. Trader Joe's Natural Original Beef Jerky. This may come as a shock to the masses, but not everything Trader Joe's makes is a homerun. And while I wouldn't mind picking this up as a last ...
Assemble the Ninja Foodi Dehydrator Rack and spread the marinated beef slices evenly over the rack. Close the lid and set the dehydrator to 165°F (74°C). Dehydrate for 4-6 hours, or until the jerky is dry and leathery.
Wash hands with soap and water. Combine the soy sauce, ketchup, brown sugar, pepper and sriracha in a large resealable bag. Seal the bag and shake to blend. Add the thinly sliced Tri-Tip and marinate at least 4 hours and up to overnight. Remove the Tri-Tip strips from the marinade and place on paper towels. Pat the Tri-Tip dry.
Instructions. Trim all visible fat from the beef and place in freezer for an hour or two to partially freeze. While the meat is in the freezer, combine ¼ cup of dry rub in a shallow bowl. Remove the meat from the freezer and slice ¼" strips against the grain for an easy chew or with the grain for more of a chew.
This recipe can be made with lean ground beef or other lean ground meats like venison, elk, pork, or turkey. The jerky is cooked in a smoker at 160-170 degrees F for 2.5-3 hours until it reaches 165 degrees F and bends without breaking. Once cooled, it can be stored in the refrigerator for up to 2 weeks.
Jalapeno beef jerky comes to the rescue with its impressive shelf life. This dried and cured meat can last for months without refrigeration, making it an excellent choice for long trips.
In case you haven't heard, we're in a beef jerky renaissance—the road trip snack is back baby! Long journeys require large doses of salty snacks (I tell myself it forces me to drink more water ...
The BEST Beef Jerky Recipes that are easy to make and taste great! 100+ Spicy, Sweet, Tangy, & Salty Beef Jerky recipes to choose from! ... The Prague Powder #1 is made for quick use (ex. Jerky) and Prague Powder #2 is for meat that require longer air drying time (ex. Pepperoni). The #1 does NOT need time in to work, that is why it is included ...
Celebrate National Jerky Day: Camping Essentials. Amazon Music Stream millions of songs: Amazon Ads Reach customers wherever they
After a quick photo, we were back on our way to the summit. The hard part. After a quick stop for beef jerky, trail mix, and water for lunch, we rested in the beauty of the tall trees and the endless skies. Our picnic table and benches would be moss-covered boulders or fallen tree trunks along the way.